

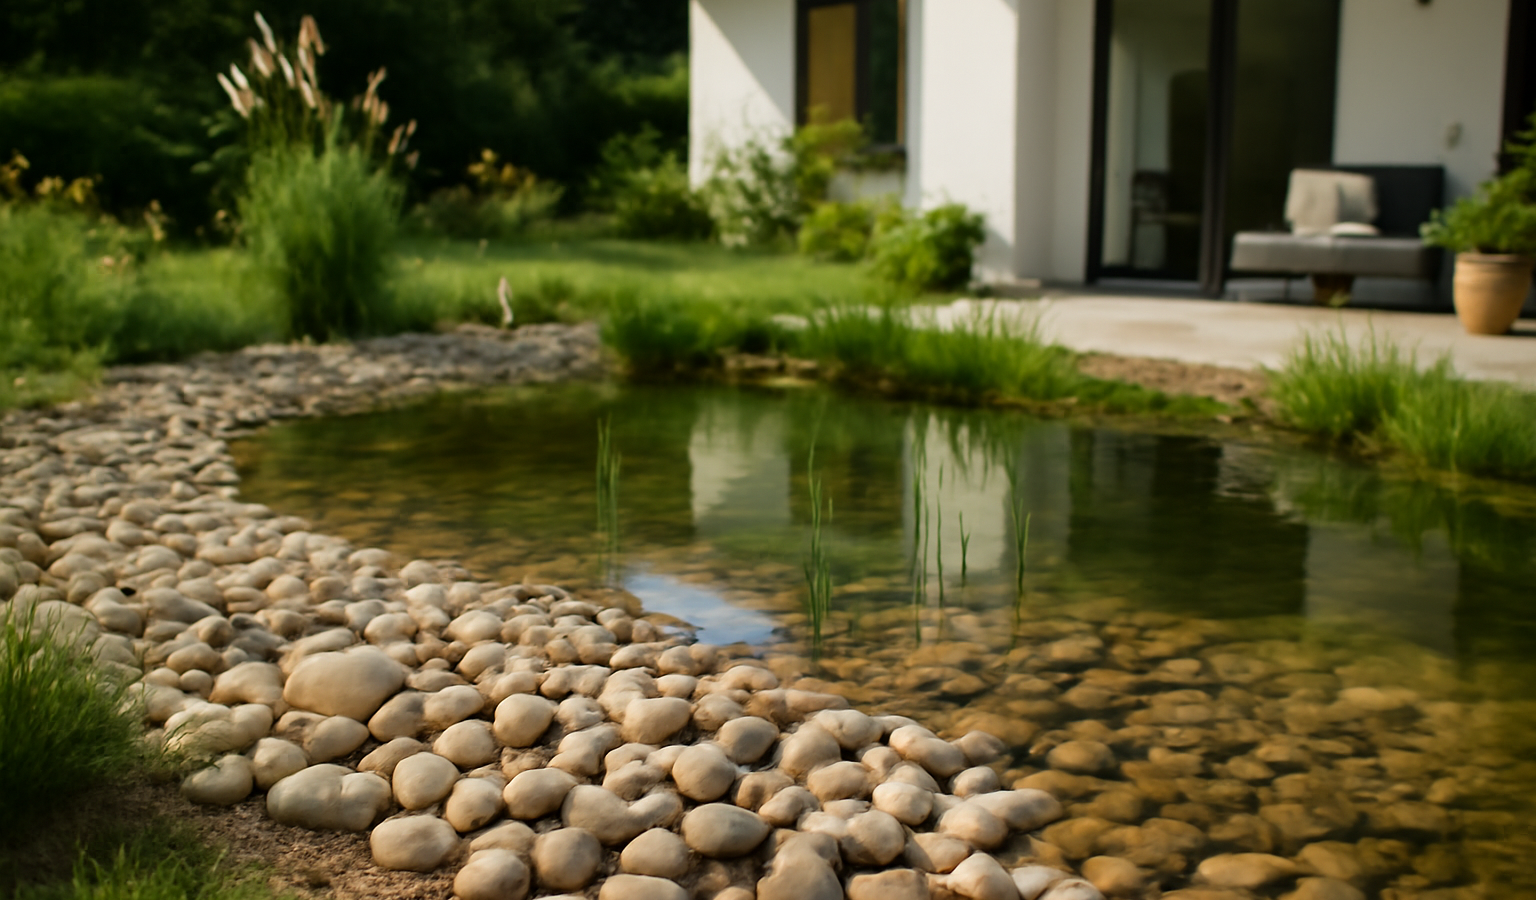
A pebble beach is the single most important feature you can add to a wildlife pond. It is a gently sloping shore of washed cobbles and gravel that runs from the dry land down into the water, and it does the one thing a steep liner edge cannot: it lets animals get in and out safely. Frogs and newts can walk down to breed, hedgehogs that fall in can scramble out instead of drowning, and birds and bees have a shallow, non-slip place to drink and bathe. It also hides the ugly liner edge, holds the liner down, and creates a sun-warmed shallow that aquatic insects and tadpoles love. This guide walks through the slope you need, the right stone to use, how to protect the liner, and the exact build steps — whether you are making a new pond or retrofitting a beach into one you already have.
Key Takeaways
- The slope is everything. Aim for a gradient no steeper than 1:3 (one vertical to three horizontal) — gentler, around 1:5, is better for wildlife.
- Use washed, rounded stone — a mix of cobbles (2–4 in) and pea gravel (10–20 mm). Never sharp crushed stone, which can puncture the liner and cut animals’ feet.
- Protect the liner with a layer of underlay or spare liner under the beach; cobbles sitting directly on the main liner will eventually wear or pierce it.
- The beach must span the waterline. Run it from above the water down to 6–12 inches deep so there’s always a shallow access point even as the level rises and falls.
- Wash the stone before and after laying to avoid clouding the water and to remove dust that fuels algae.
- Plant the top edge with low marginals to blur the transition and give cover to animals using the beach.
Why a Pebble Beach Matters for Wildlife
Most ponds, especially preformed and steep-sided liner ponds, are death traps for small animals. A creature that falls or wanders in finds a vertical or slippery edge it cannot climb, swims in circles until exhausted, and drowns. Hedgehogs, which are surprisingly good swimmers but useless climbers, are common casualties. A gently shelving beach removes that risk entirely by giving every visitor a walkable ramp.
The benefits go beyond rescue. A shallow, sun-warmed margin is the most biologically productive part of any pond. Amphibians spawn there because the warm shallows speed up tadpole and newt development. Dragonfly and damselfly larvae hunt among the stones, then climb the cobbles to emerge as adults. Birds use the wet gravel to drink and bathe without getting in over their heads, and bees and wasps land on damp pebbles to collect water. The interlocking stones also create thousands of cool, damp crevices where insects, snails, and froglets shelter from heat and predators.
Aesthetically, the beach solves the perennial liner problem too. A bare liner lip looks artificial no matter how you fold it. A pebble beach buries that edge under a natural-looking shore, and combined with a planted margin it makes the pond read as if it belongs in the landscape. If you want to extend that planting, our guide on growing marginal pond plants covers the shallow-water species that finish the top of the beach beautifully.
Getting the Slope Right
The gradient is the part people get wrong, and it is the part that decides whether the beach works. If the slope is too steep, the cobbles slide down into the deep water over time and the shore becomes useless to wildlife; animals still can’t get a grip.
Aim for a slope no steeper than 1:3 — that is, for every 1 inch (or foot) of vertical drop, the beach extends 3 units horizontally. Better still for wildlife is a gentler 1:5 grade, which gives a long, shallow shore that hedgehogs and fledgling birds can use confidently. In practice, a beach that drops from the surface to 8 inches deep at a 1:4 slope needs to be about 32 inches (roughly 2.5–3 feet) long from top to bottom. That sounds like a lot of pond real estate, and it is — which is why you design at least one beach into the largest, sunniest, most accessible edge rather than trying to ring the whole pond.
The beach must cross the waterline, not just sit at it. Build it so it starts on dry ground above the normal water level and continues down to 6–12 inches below it. Pond levels rise and fall by several inches between rain and summer evaporation, so a beach that only touches the current waterline can end up either fully submerged or stranded high and dry. Spanning that range guarantees there is always a usable shallow.
Choosing the Right Stone
Material choice matters for both wildlife safety and liner protection. The rule is simple: rounded and washed, never sharp.
- Cobbles, 2–4 inches: rounded river or beach cobbles form the visible surface and the larger structure of the beach. Their size stops them washing away and creates the crevices wildlife shelters in.
- Pea gravel, 10–20 mm: washed, rounded pea gravel fills the gaps between cobbles, creates the shallow walkable apron at the waterline, and gives small creatures and birds secure footing.
- A graded mix: the most natural-looking beaches use a blend — larger cobbles toward the top and deeper edges, finer gravel in the middle and along the waterline where birds bathe.
Avoid sharp crushed stone, hardcore, and limestone chippings. Crushed angular stone can cut the soft feet of amphibians and abrade or puncture the liner from above. Limestone (and other calcareous stone) gradually dissolves and raises the water’s pH and hardness, which can stress fish and skew the pond chemistry — for a wildlife pond, choose inert stone such as granite, flint, slate cobbles, or natural river rock. Always rinse the stone with a hose before laying it; quarried and bagged gravel is coated in fine dust that will cloud your water for weeks and feed an algae bloom if it goes in dirty.
Protecting the Liner
The weight of a stone beach is considerable, and cobbles laid directly onto a flexible liner will, over years of being trodden on and shifting, eventually thin or pierce it. Protect the liner before any stone goes down.
Lay a layer of geotextile pond underlay (the same protective fleece you put beneath the main liner) over the top of the liner across the entire beach area. If you don’t have underlay, an offcut of spare liner, old carpet, or even thick cardboard works as a sacrificial cushion, though purpose-made underlay lasts longest. For extra security on a long or heavily used beach, some builders sandwich the cobbles: liner, underlay, a layer of stone, a second sheet of underlay, then the top dressing of cobbles — the upper fleece stops the stones grinding against each other and the liner.
To stop the cobbles slumping down the slope into the deep water, install a discreet retaining edge at the bottom of the beach. A line of larger anchor cobbles, a low ridge built into the pond profile when you dig, or a buried row of bricks behind the liner all work to hold the toe of the beach in place. On steeper sections you can bed the lower cobbles into a thin layer of soft sand over the underlay to lock them together.
Build Steps
1. Shape the slope
On a new pond, excavate one edge as a long, gentle ramp at 1:3 to 1:5 before fitting the liner. On an existing pond, you may need to import soil or build up the pond floor with sandbags or stone to create the shallow gradient, since most existing edges are far too steep. Compact and smooth the soil, removing any sharp roots or stones that could press into the liner.
2. Fit underlay and liner
Lay protective underlay over the shaped slope, then the pond liner on top, smoothing out big creases and leaving generous overlap at the top edge so the liner runs well above the waterline. On an existing pond, the liner is already in place — clean it and check for grit before the next step.
3. Add the upper protective layer
Lay a second layer of geotextile underlay over the liner across the whole beach footprint. This is the layer that takes the abrasion from the stone, and it is the single most-skipped step that later leads to leaks.
4. Set the retaining toe
Place a row of larger anchor cobbles or a buried brick ridge at the lowest point of the beach to hold everything back from sliding into deep water. Build from the bottom up so each course of stone rests against the one below.
5. Lay the cobbles and gravel
Working up the slope, place the larger washed cobbles first, nestling them so they interlock, then fill the gaps with pea gravel. Keep the surface uneven and natural — varying stone sizes and the odd larger boulder look far better than a uniform carpet. Make the apron right at the waterline mostly fine gravel, as that is where birds and insects do most of their drinking and bathing.
6. Fill, rinse, and settle
Fill the pond slowly and watch how the waterline sits on the beach — adjust stones so the slope continues smoothly under the surface. Hose the laid stone gently to wash off remaining dust; if the water clouds, a partial refresh and a few days settling will clear it. Trim the excess liner and underlay at the top, leaving enough to tuck under soil or turf so no liner shows.
7. Plant and finish the top edge
Tuck low marginal plants and damp-loving groundcover along the top of the beach to disguise the liner edge and give cover to animals approaching the water. This soft fringe is what makes the beach disappear into the garden and gives nervous wildlife the confidence to come down and drink. For ideas on companion planting around the whole pond, browse the Water Gardens & Ponds hub.
Common Mistakes to Avoid
- Too steep. A 1:1 or 1:2 slope looks fine when you build it but the cobbles slide and wildlife still can’t climb out. Go gentler than you think you need.
- Skipping the upper underlay. Stone laid straight on the liner causes slow leaks that are almost impossible to find later.
- Sharp or limestone gravel. Cuts feet, pierces liner, or raises pH. Use rounded, inert, washed stone only.
- Not spanning the waterline. A beach that ends at the current water level is useless once the level changes. Run it well above and below.
- Laying dirty stone. Unwashed gravel clouds the pond and fuels algae for weeks.
Frequently Asked Questions
How gentle should the slope of a pebble beach be?
No steeper than 1:3 (one vertical to three horizontal), and ideally around 1:5 for the best wildlife access. A gentle gradient stops cobbles sliding into deep water and gives hedgehogs, frogs, and birds a surface they can actually climb. Build it to span from above the waterline down to 6–12 inches deep.
What kind of stone should I use for a pond beach?
Use washed, rounded stone — a mix of 2–4 inch cobbles and 10–20 mm pea gravel. Avoid sharp crushed stone (it punctures the liner and cuts animals’ feet) and limestone (it dissolves and raises the water’s pH). Granite, flint, slate, and river rock are all safe, inert choices.
Do I need to protect the liner under the pebbles?
Yes. Lay a layer of geotextile underlay (or spare liner) over the top of the main liner before adding any stone. Cobbles sitting directly on the liner will eventually abrade or pierce it, causing slow leaks that are very hard to locate later.
Can I add a pebble beach to an existing pond?
Yes, though it’s harder than building one into a new pond. You’ll usually need to build up the pond floor along one edge with soil, sandbags, or stone to create a gentle slope, then add upper underlay and lay the cobbles. Choose the largest, most accessible edge and keep the gradient shallow.
Why is my pond cloudy after building a pebble beach?
Almost always unwashed stone. Quarried and bagged gravel is coated in fine dust that clouds the water and feeds algae. Always rinse stone with a hose before and after laying. If it’s already cloudy, a partial water change and a few days of settling will usually clear it.
A pebble beach turns a sterile water feature into a working wildlife pond. Keep the slope gentle, use rounded washed stone, protect the liner with underlay, span the waterline, and finish the top with low marginal plants. Built that way, the beach will draw in frogs, birds, and beneficial insects within a season — and quietly save the life of every hedgehog that wanders too close to the water’s edge.