

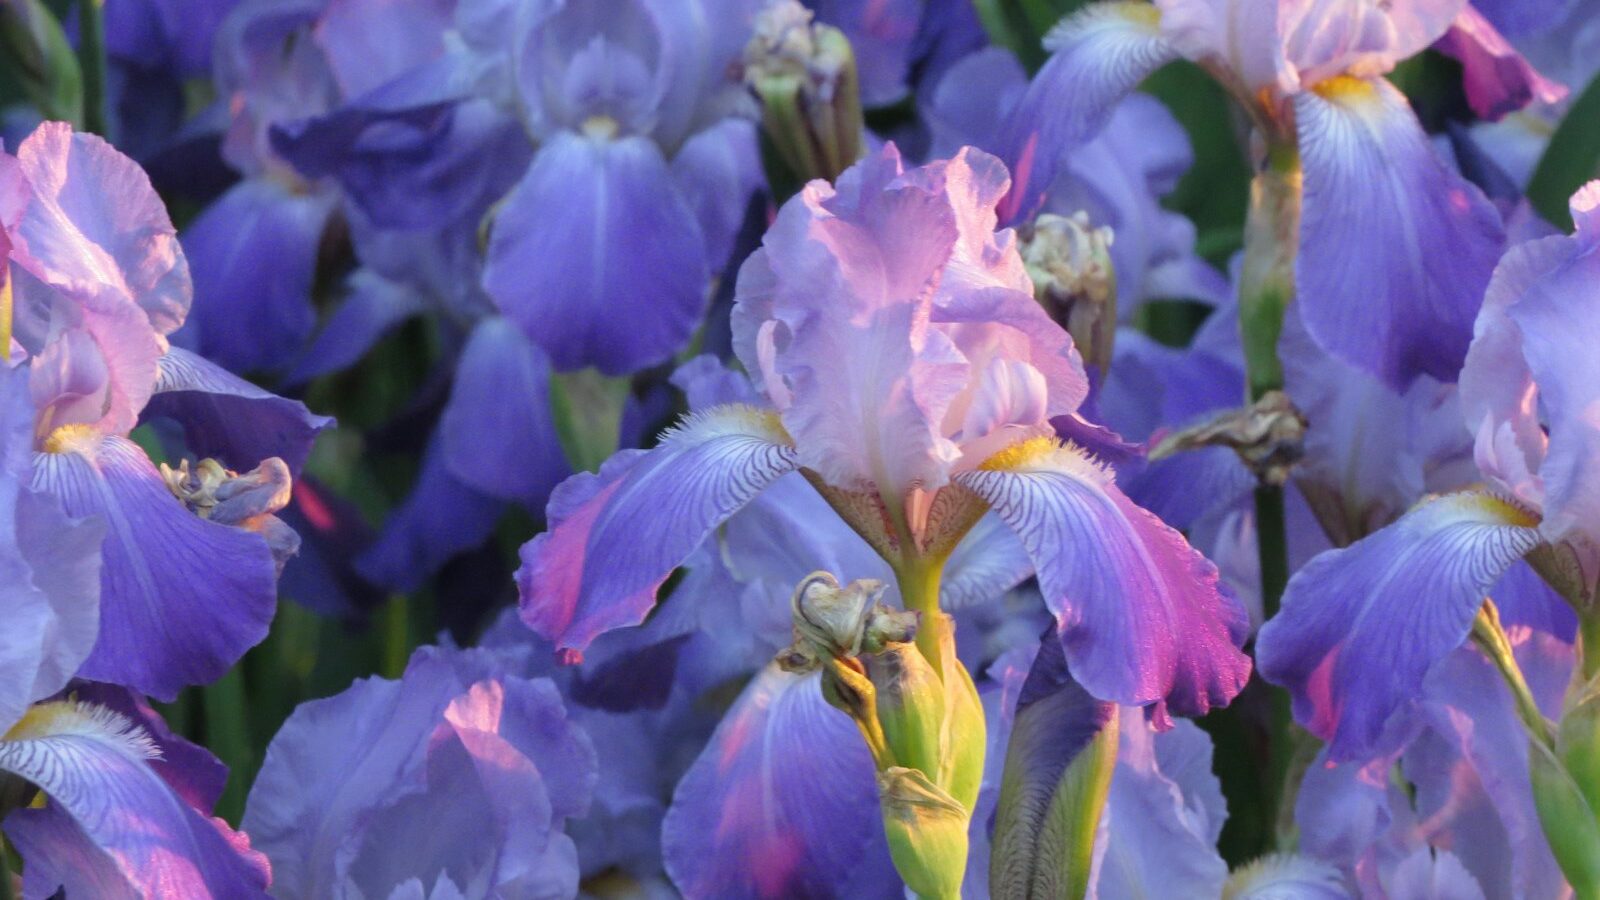
Japanese iris (Iris ensata) produces the largest, flattest, most painterly flowers of any iris you can grow at home—blooms up to 8 inches across that float over upright, sword-shaped foliage in late June and early July. The trade-off for that drama is one firm rule: these plants are moisture lovers that demand acidic, humus-rich soil and never want to dry out during the growing season. Get the water and pH right and Japanese iris is otherwise a tough, long-lived perennial that returns bigger every year. This guide covers hardiness zones, siting, soil prep, planting depth, watering, feeding, dividing, and the pest and overwintering details that decide whether you get a few flowers or a full June show.
Key Takeaways
- Hardy in USDA zones 4–9; needs a cold winter to bloom well, so it struggles in the Deep South without chilling.
- Full sun to light afternoon shade—at least 6 hours of direct sun for strong bloom.
- Acidic, rich, constantly moist soil (pH 5.5–6.5). Never let it dry out from spring through bloom; lime in the soil will slowly kill it.
- Plant rhizomes 2 inches deep, 18–24 inches apart, in spring or early fall.
- Blooms late June to mid-July, after bearded and Siberian iris finish.
- Divide every 3–4 years in late summer to keep clumps vigorous and free-flowering.
- Foliage is mildly toxic if eaten; the sap can irritate skin—wear gloves when dividing.
Where Japanese Iris Grows Best
Japanese iris is reliably hardy in USDA zones 4 through 9. It actually needs a genuine winter chill to set flower buds, so gardeners in zones 9 and warmer often see lush foliage but disappointing bloom. In the coldest zones (3–4) a 3–4 inch winter mulch protects the shallow rhizomes from frost heaving. The plant tolerates a wider range of summer heat than most irises as long as its roots stay wet—the limiting factor in the South is winter warmth, not summer heat.
Mature plants reach 2 to 4 feet tall with flower stalks that often top the foliage by several inches. Clumps spread slowly outward, eventually forming stands 18 to 24 inches wide. They are not aggressive spreaders the way some pond marginals are, so you can place them in a border without worrying about a takeover.
Sun and siting
Give Japanese iris full sun—at least six hours of direct light—for the most flowers and the sturdiest stems. In zones 7–9, a bit of afternoon shade keeps the blooms from scorching and extends how long each flower lasts in the heat. The classic placement is the edge of a pond, stream, or rain garden, where the soil stays naturally wet. But you do not need water features: a low spot in the border, a poorly draining clay pocket, or any bed you can keep irrigated will work. If you grow it in a regular bed, plan to water heavily and mulch deeply.
Soil: The Make-or-Break Factor
If there is one thing to get right, it is the soil. Japanese iris wants soil that is consistently moist, deeply enriched with organic matter, and distinctly acidic—target a pH of 5.5 to 6.5. This is the opposite of what bearded iris wants, and it is why the two are not interchangeable in care. The single most common reason a healthy-looking plant slowly declines is alkaline soil or, worse, lime leaching from nearby concrete, mortar, or hardscaping. Never plant Japanese iris at the base of a new block wall or fresh concrete pond edge.
Before planting, work 3 to 4 inches of compost, well-rotted manure, or peat moss into the top foot of soil. The organic matter does double duty: it holds moisture and gently acidifies. If a soil test shows your pH above 7, amend with elemental sulfur or use an acidifying fertilizer formulated for azaleas and rhododendrons over the first season. Skip bone meal and any product containing lime. Our broader guide on choosing soil amendments for moisture and drainage is useful if you are building a custom bed mix.
How and When to Plant
Plant Japanese iris in spring after the soil warms, or in early fall (late August through September) so roots establish before winter. Fall planting in zones 4–6 should finish at least six weeks before the first hard freeze. You will usually buy plants as bare rhizomes with attached fans of foliage or as established potted divisions.
- Soak bare rhizomes in water for an hour or two before planting so they rehydrate.
- Dig a generous hole and set the rhizome so its crown sits about 2 inches below the soil surface—deeper than bearded iris, which is planted at the surface.
- Spread the roots downward and outward, then backfill and firm gently.
- Space plants 18 to 24 inches apart. Closer spacing crowds the clumps faster and reduces airflow.
- Water in thoroughly and keep the soil saturated for the first few weeks while roots establish.
For pond-edge planting, you can submerge the crown in up to a few inches of water during the growing season, but most gardeners pull plants back to merely saturated soil in winter, since standing water over a frozen crown can cause rot.
Watering and Feeding
Water
Water is non-negotiable from the time growth resumes in spring through the end of bloom. The soil should never dry out in that window—aim to keep it as moist as a wrung-out sponge or wetter. In a garden bed, that often means 1 to 2 inches of water per week from rain or irrigation, more in heat. Drip irrigation or a soaker hose on a timer is the easiest way to keep up. After bloom, you can ease back slightly, but Japanese iris never wants to go bone dry. Brown, crispy leaf tips by midsummer are almost always a drought signal.
Fertilizer
These are hungry plants. Feed in early spring as new growth emerges and again just as flower buds form, using an acid-forming, balanced fertilizer—a formula sold for azaleas, camellias, or rhododendrons is ideal because it supports the low pH the plant needs. A topdressing of compost each spring also helps. Avoid high-phosphorus “bloom booster” products with lime fillers, and never use bone meal. If you are weighing feeding strategies in general, our comparison of organic vs synthetic fertilizer walks through the trade-offs for perennials like this.
Bloom Time and Deadheading
Japanese iris blooms late—generally late June into mid-July, a few weeks after bearded and Siberian iris have finished. That late timing is a feature: it extends the iris season in the garden. Each flower lasts only two to three days, but a healthy clump throws multiple buds per stem, so the show runs two to three weeks. Flowers come in white, blue, purple, lavender, and red-violet, often with contrasting veining and yellow signal patches, and named cultivars range from single three-fall forms to ruffled doubles.
Deadhead spent blooms to keep the planting tidy and to stop the plant from spending energy on seed. Snap or cut the faded flower off below the swelling seed pod, but leave the green stalk and foliage intact—the leaves feed next year’s rhizome all summer. Cut the foliage back to a few inches only after it yellows in fall.
Dividing Japanese Iris
Clumps lose vigor and bloom when the center gets crowded, typically after three to four years. You will notice fewer flowers and a hollow, dead center surrounded by a ring of foliage—your cue to divide. The best time is late summer (August into early September), right after bloom, so divisions root before winter; early spring is the backup window in cold zones.
- Lift the entire clump with a garden fork, keeping as many roots as possible.
- Wash off soil so you can see the rhizomes, then cut the clump into sections, each with two to three healthy fans and a chunk of root.
- Trim the foliage back to about 6 inches so the divisions lose less water while they re-root.
- Discard the woody, flowerless center.
- Replant immediately at the same 2-inch depth, water heavily, and keep the soil saturated until growth resumes.
Wear gloves: iris sap can irritate skin, and the plant is mildly toxic if any part is eaten, so keep divisions and trimmings away from pets and children.
Pests, Disease, and Troubleshooting
Japanese iris is relatively trouble-free compared with bearded types, which suffer from iris borer. Still, watch for a few issues:
- Iris borer: Larvae tunnel into rhizomes and can introduce soft rot. Remove and destroy old foliage in fall to eliminate overwintering eggs—this is the single best preventive step.
- Leaf spot: Brown to gray spots on foliage in humid weather. Improve airflow with proper spacing, water at the base rather than overhead, and remove infected leaves.
- Yellowing, crispy tips: Almost always under-watering or alkaline soil. Check moisture first, then pH.
- No blooms: Too much shade, soil too dry during bud set, an overcrowded clump that needs dividing, or—in warm zones—not enough winter chill.
- Rotting crowns: Standing water over a frozen rhizome in winter. Move plants to saturated-but-not-submerged soil before freeze-up.
Overwintering
Japanese iris is a hardy perennial that needs no lifting in zones 4–9. After the foliage yellows in late fall, cut it down to 2 to 3 inches and remove the debris to deny borers a winter home. In zones 3–4, apply a 3 to 4 inch mulch of straw or shredded leaves after the ground freezes to prevent the shallow rhizomes from heaving out of the soil during freeze-thaw cycles. Pull mulch back in early spring as growth resumes. For pond-grown plants, lower the water level or move containers so the crown is moist but not under standing water through the freeze.
Frequently Asked Questions
Can Japanese iris grow in standing water?
Yes, during the growing season it tolerates a few inches of water over the crown, which is why it is a favorite for pond and stream edges. But it does not want to sit in standing water over a frozen winter—that invites crown rot. Lower the water or move container plants to merely saturated soil before freeze-up.
Why won’t my Japanese iris bloom?
The usual culprits are too much shade (aim for six-plus hours of sun), soil that dried out while buds were forming, or an overcrowded clump that hasn’t been divided in four or more years. In zones 9 and warmer, too little winter chill can also prevent flowering.
How is Japanese iris different from Siberian and bearded iris?
Japanese iris has the largest, flattest flowers and demands constantly moist, acidic soil with later (late-June) bloom. Siberian iris is more drought-tolerant and blooms earlier. Bearded iris wants well-drained, neutral-to-alkaline soil with rhizomes at the surface—nearly the opposite culture of Japanese iris.
Is Japanese iris toxic?
Yes, mildly. The rhizomes and foliage contain compounds that cause stomach upset if eaten, and the sap can irritate skin. Wear gloves when dividing and keep trimmings away from pets and children, though it is far less dangerous than a plant like monkshood.
How often should I divide Japanese iris?
Every three to four years, or whenever the clump develops a dead center and bloom drops off. Divide in late summer right after flowering so divisions root before winter, replanting each section at a 2-inch depth in rich, acidic, well-watered soil.
Japanese iris rewards one specific kind of attention: keep it wet, keep it acidic, and keep it fed. Do that and you will get the most spectacular flowers in the iris world every summer, on a plant that lives for decades. For more moisture-loving perennials, browse the Plants & Flowers hub.