

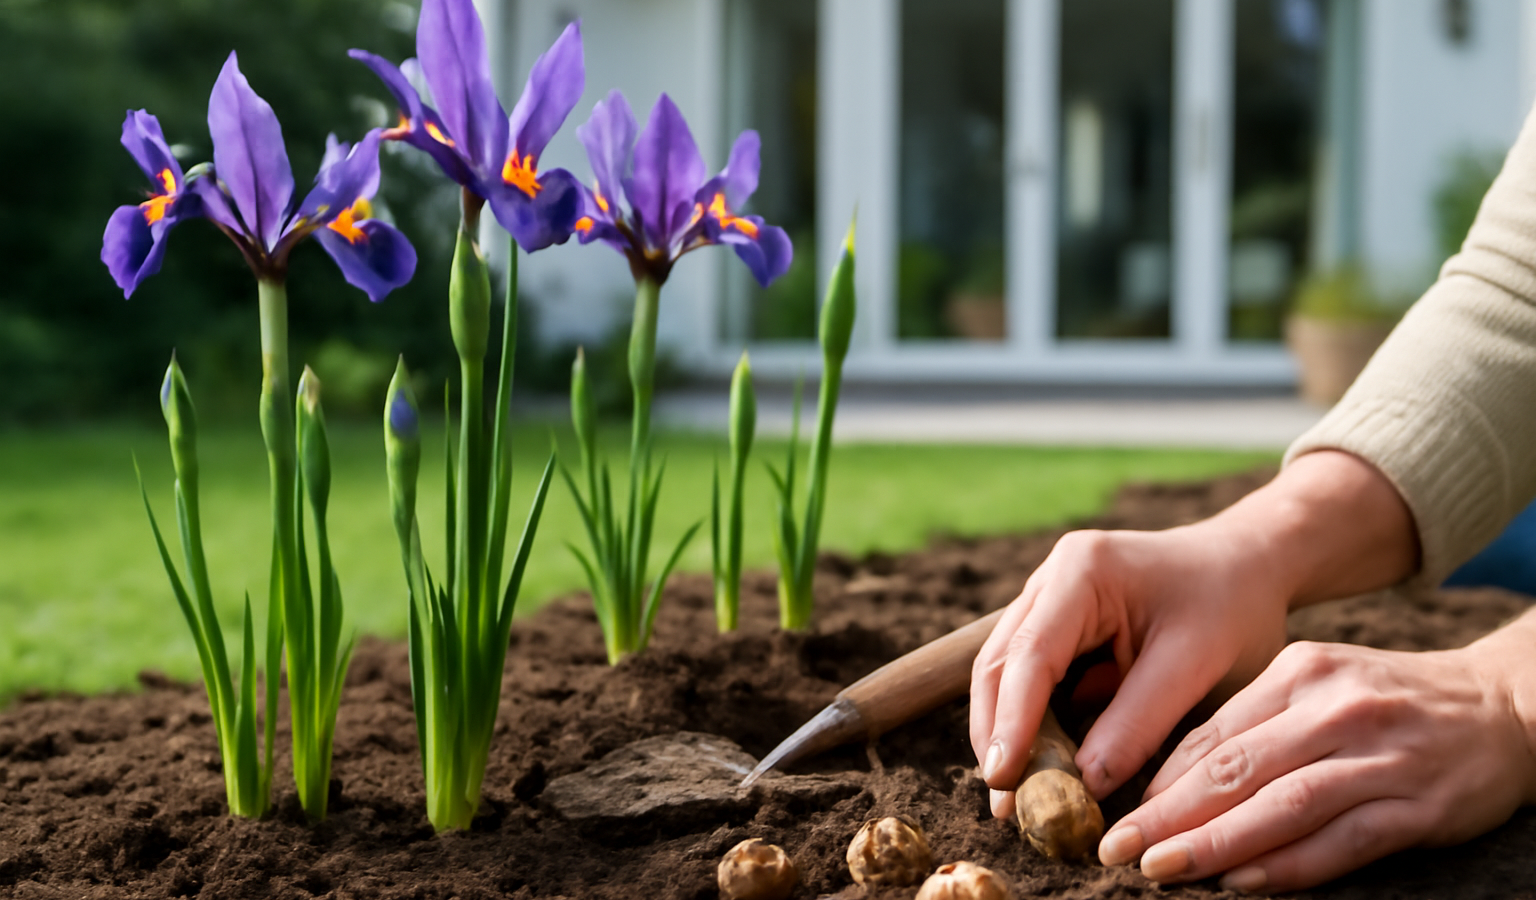
Plant Dutch iris (Iris x hollandica) as a true bulb in fall, September through November, setting each bulb 4 to 5 inches deep and 3 to 4 inches apart with the pointed end facing up. Give them full sun and sharply drained soil, and you’ll get 18- to 24-inch stems topped with sleek, orchid-like flowers in blue, purple, yellow, white, or bronze the following late spring, usually May into June. This is the part that trips people up: Dutch iris is a bulb, not a rhizome. If you’ve grown bearded iris, forget almost everything you know about planting those fat horizontal roots at the soil surface. Dutch iris go down deep, like a tulip or daffodil, and they want the same kind of treatment. Get the depth, drainage, and timing right and they’re nearly foolproof; get the drainage wrong and they rot in the ground before they ever bloom.
Key Takeaways
- Dutch iris grows from a true bulb (not a rhizome) — plant it deep like a tulip, pointed end up, 4 to 5 inches down.
- Plant in fall (September to November) in zones 5 to 9; space bulbs 3 to 4 inches apart in full sun and fast-draining soil.
- Blooms arrive late spring, roughly May to June, on 18- to 24-inch stems — an excellent and long-lasting cut flower.
- Drainage is everything: bulbs rot in soggy summer soil, so plant on the dry side and let them bake during dormancy.
- Let foliage die back naturally after bloom to recharge the bulb; in zones 3 to 4, treat as annuals or lift and store.
What Dutch Iris Actually Is (and Why It’s Not a Bearded Iris)
Dutch iris is a hybrid group, Iris x hollandica, bred from Spanish and North African iris species in the early 1900s by Dutch growers — hence the name. The critical thing to understand is the underground structure. Bearded iris and Siberian iris grow from rhizomes, thick horizontal stems that sit at or just below the soil surface and spread sideways year after year. Dutch iris grows from a true bulb: a compact, teardrop-shaped storage organ with a papery skin, a pointed growing tip on top, and a flat basal plate where roots emerge on the bottom. It looks and behaves much more like a small daffodil or a fat crocus than like the bearded iris in your neighbor’s border.
That distinction drives every planting decision. Rhizomes go shallow and want their tops exposed to bake in the sun. Bulbs go deep and want full coverage. If you plant a Dutch iris bulb on the surface the way you’d plant a bearded iris rhizome, it will dry out, fail to anchor, and likely die. So treat Dutch iris as a fall-planted bulb in the same mental category as tulips, daffodils, alliums, and crocus — not as a perennial iris you divide and replant. The foliage is also different: instead of the broad, flat, sword-shaped leaves of bearded iris, Dutch iris sends up narrow, grassy, almost reed-like leaves that channel upward and stay slim all season.
Hardiness Zones and Climate
Dutch iris is reliably hardy in USDA zones 5 through 9, though some sources draw the cold line a bit tighter at zone 6. In that 5-to-9 band, you can plant the bulbs in fall and leave them in the ground to come back. They genuinely thrive in Mediterranean-type climates with wet winters and dry summers — think of the California coast or the Pacific Northwest’s drier pockets — because that pattern matches their native rhythm: grow and bloom in cool, moist conditions, then go fully dormant and dry during summer heat.
In colder regions, zones 3 and 4, the ground freezes too hard and too deep for the bulbs to survive a winter outdoors. You have two options there. Plant them in early spring and treat them as one-season annuals, accepting that you’ll buy fresh bulbs next year. Or lift the bulbs after the foliage dies back, cure and store them dry over winter, and replant in spring. At the warm end, zones 9 and into 10, the problem flips: winters may not get cold enough to trigger the chilling the bulbs need to flower, so you’ll want to pre-chill them before planting. More on that below.
When to Plant: Fall Timing and Pre-Chilling in Warm Zones
In most of the country, plant Dutch iris bulbs in fall, anywhere from September through November, depending on your zone. The target is to get them in the ground roughly four to six weeks before the soil freezes hard, so the bulbs have time to push out roots before winter. In zone 5, that often means September or early October. In zones 7 and 8, you have until November and sometimes later. A good rule of thumb: plant Dutch iris around the same time you plant tulips and daffodils. If your local garden center is selling spring-flowering bulbs, it’s time.
Pre-chilling in zones 8 to 10
Dutch iris bulbs need a stretch of cold to set flower buds properly. In zones 5 through 7, winter does this for free. In warm-winter areas — the lower South, Gulf Coast, low-desert Southwest, much of coastal California — winters may stay too mild, and ungchilled bulbs come up blind, producing leaves but no flowers. The fix is to pre-chill the bulbs in the refrigerator for 10 to 14 weeks before planting. Put them in a paper or mesh bag in the crisper, and keep them well away from ripening fruit: apples and other fruit give off ethylene gas, which can kill the developing flower inside the bulb. After chilling, plant in late fall or early winter for spring bloom.
Where to Plant: Sun and Sharp Drainage
Two site requirements matter most: full sun and well-drained soil. Give Dutch iris at least six hours of direct sun a day, and more is better. In too much shade they get floppy, lean toward the light, and bloom sparsely or not at all. The flowers also open and hold their color best in good light.
Drainage is the make-or-break factor, and it deserves more attention than gardeners usually give it. Dutch iris bulbs rot in soil that stays wet, especially during their summer dormancy when they want to be dry and warm. If your soil is heavy clay or sits in a low spot that puddles after rain, the bulbs will likely turn to mush within a season or two. Look for a raised bed, a slope, a spot at the top of a gentle grade, or a sandy loam that drains fast. If you only have clay, amend the planting area generously with coarse sand and compost, or build a raised bed, or plant in containers where you control the mix. A spot that bakes dry in summer — the kind of place where many plants struggle — is often perfect for Dutch iris. They want soil with a near-neutral pH, around 6.0 to 7.0, but they’re not fussy about fertility as long as the water moves through.
How to Plant the Bulbs: Depth, Spacing, and Orientation
Plant each bulb 4 to 5 inches deep, measuring from the top of the bulb to the soil surface, and space them 3 to 4 inches apart. Set the bulb with the pointed end up and the flat, rooty basal plate down. The point is the growing tip where the shoot emerges; get it upside down and the shoot has to waste energy curving around, which weakens the plant. If you genuinely can’t tell which end is which on a particular bulb, plant it on its side — the shoot will find its way up and the roots will find their way down.
Because they’re slim and the stems are tall and narrow, Dutch iris look best planted in tight clusters or drifts rather than spaced out in a thin line. Plant in groups of at least 10 to 15 bulbs per cluster, dropping them 3 inches apart within the group, so the bloom reads as a satisfying mass of color rather than a few lonely spikes. Dig out the whole planting area to depth rather than poking individual holes — it’s faster and gives you a consistent depth across the patch. After setting the bulbs, backfill, firm the soil gently, and water once thoroughly to settle the soil and trigger rooting. Then leave them alone for the winter.
Dutch iris layer beautifully with other fall-planted bulbs. Because they bloom late spring, after most tulips and daffodils have finished, you can interplant them with those earlier bulbs in the same bed for a relay of color. For more on combining bulbs and perennials in a single planting, see our guide to growing peonies, which bloom in the same late-spring window and pair handsomely with Dutch iris in a cutting bed.
Watering and Feeding
The watering schedule for Dutch iris is unusual and worth memorizing because it runs opposite to most garden plants. They want moisture during active growth — from when shoots emerge in late winter or early spring through bloom — and then they want to dry out completely once the foliage starts to yellow and the bulb goes dormant in summer. During the growing season, give them about an inch of water a week if rain doesn’t provide it. Once flowering ends and the leaves brown, cut off supplemental water entirely. Summer irrigation on dormant bulbs is the single most common way to kill them, because wet, warm soil rots the bulb. This is also why Dutch iris can be tricky to fit into a bed that gets regular summer watering for other plants.
Feeding is light. At planting time, you can work a little bulb fertilizer or bone meal into the soil below the bulbs. In spring, as the shoots emerge, a single application of a balanced, low-nitrogen bulb food supports flowering and helps the bulb recharge. Skip high-nitrogen lawn-type fertilizers; they push soft leafy growth at the expense of flowers and can make the bulbs more rot-prone. For naturalized plantings in lean, well-drained soil, you can often skip feeding altogether and the bulbs will do fine.
After Bloom Care: Let the Foliage Die Back
This is the rule that determines whether your Dutch iris come back next year: do not cut the foliage after the flowers fade. Once a bloom is spent, you can snap off the flower stalk to keep things tidy and prevent the plant from wasting energy on seed. But leave every leaf in place. Those grassy green leaves are running photosynthesis to refill the bulb with the energy it needs to flower again next spring. Cut them early and you starve the bulb. Let the foliage yellow, brown, and wither completely on its own, then remove it once it pulls away easily.
The narrow, grassy foliage of Dutch iris is actually easier to live with during this die-back period than the bulky leaves of tulips or daffodils — it’s thin and unobtrusive, and you can plant low perennials or summer annuals nearby to screen it. Resist the urge to braid, knot, or tie the leaves; it looks neat but folds the leaf surface away from the sun and reduces the energy the bulb stores. Just let nature take its course, and keep the soil dry while the foliage does its work and the bulb settles into dormancy.
Will They Come Back? Perennializing, Lifting, and Storing
Honest answer: sometimes, and it depends heavily on your conditions. Dutch iris has a reputation for being short-lived and not reliably perennializing, especially in climates with wet summers. In a spot with the perfect combination — full sun, sharp drainage, and dry summer dormancy — an established planting can come back and even slowly multiply for years. In heavier soils or anywhere the bulbs sit damp through summer, you may get one or two good seasons and then a steady decline as the bulbs rot or simply exhaust themselves. Many gardeners in less-than-ideal climates treat Dutch iris as a semi-disposable bulb, replanting a fresh batch every couple of years to keep the display strong. There’s nothing wrong with that approach; the bulbs are inexpensive and the bloom is worth it.
If you want to maximize their return, two strategies help. First, choose the driest, best-draining spot you have and never irrigate them in summer. Second, in cold zones 3 to 4 or anywhere they don’t overwinter, lift the bulbs after the foliage has fully died back. Dig carefully, brush off the soil, discard any soft or moldy bulbs, and cure the healthy ones in a single layer in a dry, airy, shaded place for a week or two. Then store them in mesh bags or open trays with sawdust or peat in a cool, dry, dark spot — ideally around 60 to 65 degrees Fahrenheit — until fall or spring replanting. Good air circulation during storage prevents the fungal rots that kill stored bulbs. For another bulb-like perennial that rewards careful siting, our notes on growing gentian cover similar lessons about drainage and patience.
Dutch Iris as a Cut Flower
Dutch iris earns its keep in the vase. The straight, 18- to 24-inch stems and elegant, orchid-like flowers in clean blues, purples, yellows, whites, and bronzes make it a florist staple, and it’s just as good cut from your own garden. For the longest vase life, cut the stems in the morning when the bud is showing color but not yet fully open — what florists call the “pencil” or “cracking color” stage. The flower will continue to open indoors and you’ll get several days of display. Cut at a slant with a clean blade, strip any leaves that would sit below the waterline, and place the stems in cool water right away.
Each stem typically produces one main flower and sometimes a secondary bud lower down, so plant generously if you want enough to cut without stripping the garden display. Because they bloom in that late-spring gap after the early bulbs and before the big summer perennials, Dutch iris fills a useful slot in a cutting garden’s calendar. They combine well in arrangements with late tulips, peonies, alliums, and the first roses.
Pests and Problems
The good news: Dutch iris is relatively trouble-free, with far fewer pest headaches than bearded iris. The single biggest threat isn’t an insect at all — it’s bulb rot from wet soil. Soft, mushy bulbs that fail to sprout or collapse mid-season are almost always a drainage problem, not a disease you can spray away. The cure is preventive: plant in fast-draining soil and keep them dry in summer. Discard any soft bulbs at planting and never plant a bulb that’s already gone squishy.
Iris borer, the caterpillar that famously tunnels through bearded iris rhizomes, is much less of a concern with Dutch iris because the bulb structure and growth habit are different, though it’s not impossible — keep the area free of old plant debris where the moth lays eggs. Slugs and snails will occasionally chew on the tender new foliage and flowers in damp spring weather; hand-pick them at night or use an iron-phosphate bait if they’re persistent. On the rodent front, squirrels and chipmunks find Dutch iris far less appealing than tulips, so you’re less likely to dig up an empty bed in spring — one more reason to interplant them with tulips, where they can act as a modest deterrent. If you garden where animal pressure is heavy, you may also like our guide to growing cleome, another low-maintenance bloomer, or browse the full Plants & Flowers hub for more pest-resistant options.
Frequently Asked Questions
Do Dutch iris come back every year?
They can, but they’re not as reliably perennial as daffodils. In full sun with sharp drainage and dry summers, an established planting may return and multiply for years. In wet or heavy soil, the bulbs often decline after one or two seasons, so many gardeners replant a fresh batch periodically.
When and how deep do I plant Dutch iris bulbs?
Plant in fall, September through November, about the same time as tulips and daffodils. Set each bulb 4 to 5 inches deep and 3 to 4 inches apart, with the pointed end up and the flat base down, in full sun and well-drained soil.
Is Dutch iris a bulb or a rhizome?
Dutch iris (Iris x hollandica) grows from a true bulb, not a rhizome. That’s the key difference from bearded iris, which spreads by surface rhizomes. Plant Dutch iris deep like a tulip rather than shallow like a bearded iris.
Can I grow Dutch iris in warm-winter climates?
Yes, but in zones 8 to 10 the winters may be too mild to trigger flowering. Pre-chill the bulbs in the refrigerator for 10 to 14 weeks before planting, keeping them away from ripening fruit, then plant in late fall for spring bloom.
Why didn’t my Dutch iris bloom?
The usual culprits are too little sun (they need six-plus hours), insufficient winter chilling in warm zones, cutting the foliage too early last year so the bulb couldn’t recharge, or bulb rot from soggy soil. Check those four factors against your conditions.