

The single most important rule of bird’s nest fern care is this: never pour water into the central rosette. Everything else about Asplenium nidus is forgiving, but water sitting in that cup at the heart of the plant will rot the crown and there is no coming back from it. Get that one habit right, give the fern medium indirect light and steady humidity, and you have one of the easiest, most architectural houseplants you can grow. This is a slow, undemanding epiphyte that asks for consistency rather than fuss. Below is exactly how to keep those glossy, ripple-edged fronds unfurling year after year, plus how to read the warning signs when something drifts out of balance.
Key Takeaways
- Water the soil around the edge of the rosette, never into the central cup, which rots the crown.
- Give medium to bright indirect light; direct sun scorches the fronds, and brighter light makes them crinklier.
- Aim for high humidity, ideally 60 to 70 percent or more, using a bathroom spot, humidifier, or pebble tray.
- Keep the soil evenly moist but never soggy; let the top inch dry slightly between waterings.
- Hold temperatures between 65 and 80 degrees Fahrenheit and protect the plant from cold drafts; it is frost-tender.
- Bird’s nest ferns are non-toxic to cats and dogs, making them a safe choice for pet households.
Meet the Bird’s Nest Fern
The bird’s nest fern is an epiphytic fern, which means in the wild it grows perched on the branches and trunks of trees rather than rooted in soil. It anchors itself in bark crevices and collects falling leaves and debris in its central funnel, which slowly decomposes into a pocket of nutrients. That growth habit explains almost everything about how it behaves as a houseplant. It is used to bright, filtered light under a forest canopy, constant warmth, and high humidity, and its roots are accustomed to air and quick drainage rather than dense, waterlogged ground.
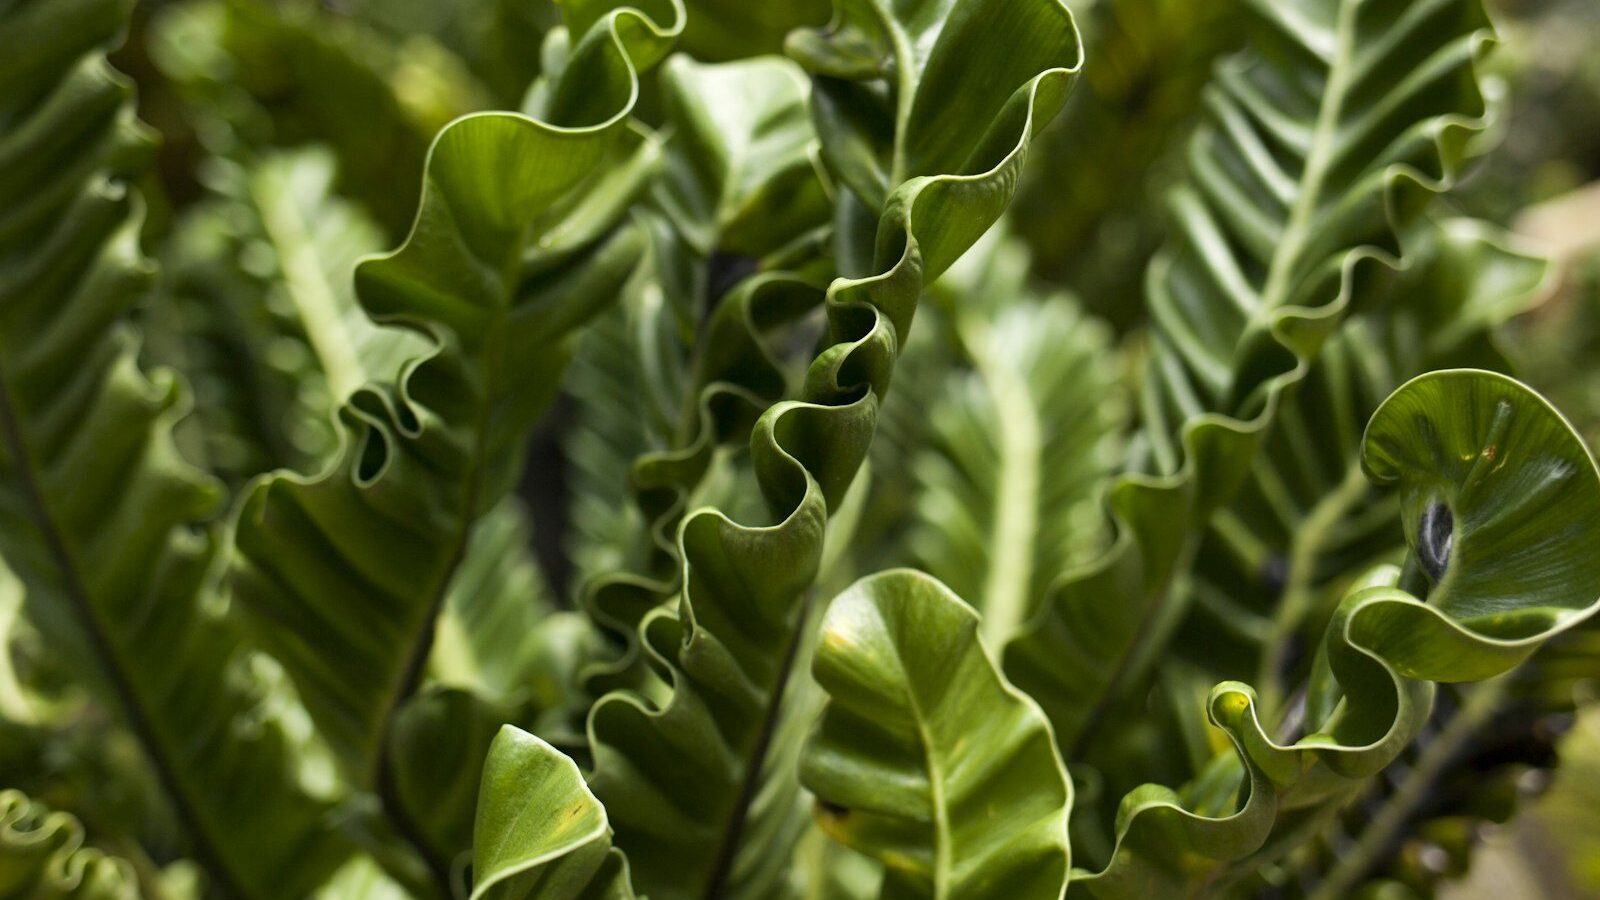
Visually, the plant forms a rosette of broad, strap-shaped fronds in a fresh apple-green color, often with a wavy or rippled edge and a dark central rib running down each leaf. New fronds emerge from the center, tightly coiled like little fiddleheads, and unfurl upward and outward from a spongy crown. That crown, the dense central point where all the fronds originate, is the heart of the plant, and protecting it is the core skill of bird’s nest fern care. Unlike many ferns with finely divided, lacy foliage, this species reads as bold and tropical, which makes it a striking specimen on a shelf or in a grouping. If you enjoy ferns and want to expand the collection, the same humidity-loving approach applies to a staghorn fern and the more delicate maidenhair fern.
The Golden Rule: Never Water the Center
It is worth dwelling on this because it is the mistake that kills more bird’s nest ferns than anything else. The central rosette looks like a natural basin, almost like it is designed to be filled, and the instinct to pour water straight into that cup is strong. Resist it completely. In the wild, the open canopy and constant air movement let that funnel drain and dry, and the collected debris is mostly dry leaf matter. In your living room, water sitting in the crown has nowhere to go. It stays trapped against the tender growing point, and within a week or two you get crown rot: the center turns brown, mushy, and foul, and the whole plant collapses from the middle out.
Always direct your watering to the soil around the outer edge of the rosette. Tip the watering can spout low and pour at the rim of the pot, working your way around so the whole root zone gets moisture while the crown stays dry. If you mist for humidity, aim the spray at the foliage and the air, not down into the cup. And if water does splash into the center, blot it out with a paper towel or tip the pot to drain it. Treat the crown as a no-go zone and you have eliminated the most common cause of failure.
Light Requirements
Bird’s nest ferns want medium to bright indirect light, and they are notably tolerant of lower light when they have to be. An east-facing window with gentle morning sun is close to ideal. A north window works well too. A bright spot a few feet back from a south or west window, out of the direct beam, suits them nicely. What they cannot take is direct sun. Harsh, unfiltered rays will scorch the fronds, leaving pale, bleached patches and crispy brown burns that do not heal, so keep the plant out of any window where sunlight lands directly on the leaves for more than a brief moment.
Light also shapes the look of the foliage. In brighter indirect light, fronds tend to grow more compact, more upright, and noticeably crinklier along the edges, giving that characteristic wavy texture. In lower light, the same plant will produce flatter, smoother, more spread-out fronds as it reaches for what light it can find. Neither is unhealthy, but if you love the rippled effect, lean toward the brighter end of the indirect range. If your plant is in a dim corner and looks thin or floppy, move it gradually toward more light rather than all at once, since a sudden jump can shock the fronds.
Humidity: The Make-or-Break Factor
If light is the easy part, humidity is where most homes fall short. Bird’s nest ferns are rainforest plants and they genuinely want high humidity, ideally 60 to 70 percent or more. Average household air, especially in winter when heating runs, often sits down around 30 to 40 percent, and that dryness shows up first as brown, crispy frond edges. You do not necessarily need a greenhouse, but you do need to make a deliberate effort to raise the moisture in the air around the plant.
- A bright bathroom is one of the best homes for a bird’s nest fern, since showers keep humidity naturally high.
- A small room humidifier running near the plant is the most reliable solution and the easiest to control.
- A pebble tray, a shallow dish of water filled with stones that hold the pot above the waterline, raises local humidity as the water evaporates.
- Grouping the fern with other plants creates a shared pocket of more humid air.
Misting helps a little but its effect is brief, and frequent misting can encourage fungal spots if the air does not move. A humidifier or pebble tray gives steadier results. The clearest sign your humidity is too low is a creeping brown margin on otherwise healthy green fronds, so let that symptom guide how hard you need to work on the air.
Watering
Keep the soil evenly moist but never soggy. That is the balance to aim for: the root zone should feel like a wrung-out sponge, damp throughout, but never sitting in standing water. Check the top inch of soil with your finger, and when it has begun to dry slightly, water again, always pouring around the outer edge of the rosette and never into the center. In practice that often means watering roughly once a week, but let the soil be your guide rather than the calendar, since the right frequency depends on your light, pot size, and humidity.
Use room-temperature water. Cold water straight from the tap can shock the roots and stress the plant, sometimes showing up as yellowing fronds. Let the water drain freely from the bottom of the pot and never leave the plant standing in a full saucer, because waterlogged roots quickly suffocate and rot. Bird’s nest ferns dislike drying out completely just as much as they dislike sogginess; a fern that is left bone dry will wilt and brown at the edges, so consistency is the goal. If your tap water is heavily treated or hard, the plant will be happier with filtered or rainwater, but plain room-temperature tap water is fine for most homes.
Soil and Potting
Because this is an epiphyte, its roots want air as much as moisture. Choose a loose, rich, well-draining mix, ideally peat-based and lightened with materials that keep it open. A standard peat-based houseplant potting mix amended with perlite, orchid bark, or coarse material works well, giving the roots something to grip while letting excess water flow straight through. Dense, heavy soil that stays wet is the enemy here, since it holds water against the roots and invites rot.
Always use a pot with a drainage hole. Bird’s nest ferns actually prefer to be a little snug in their container, so resist the urge to overpot. Moving a plant into a pot that is much too large surrounds the roots with a big volume of soil that stays wet long after the roots have taken up what they need, which again sets up rot. When you do pot up, go just one size larger. A snug fern in fast-draining soil is a happy fern.
Temperature
Keep your bird’s nest fern in the comfortable range of about 65 to 80 degrees Fahrenheit, which happens to overlap nicely with normal household temperatures. This plant is frost-tender and has no tolerance for cold. Temperatures below the mid-fifties stress it, and a real chill will damage or kill it outright. Keep it well away from cold drafts, drafty winter windows, exterior doors that open to freezing air, and the blast of air conditioning vents. Sudden swings in temperature are as harmful as sustained cold, so a stable, warm, draft-free spot is exactly what it wants. If you summer the plant outdoors, bring it back inside well before nights start turning cold in autumn.
Feeding
Bird’s nest ferns are light feeders and sensitive to fertilizer salts, so the watchword is restraint. During the active growing season of spring and summer, feed with a balanced liquid fertilizer diluted to half strength every two to four weeks. Dilute well, because too strong a dose builds up salts in the soil and burns the roots and frond tips. Apply the fertilizer to the soil, watering it in around the edges, and never pour it onto the fronds or into the central cup, where it can scorch the tender leaves and the crown.
Stop feeding in fall and winter, when growth naturally slows and the plant is not using the nutrients. Overfeeding does far more harm than underfeeding with this species. If you see crispy, browned frond tips and you know your humidity and watering are on track, a salt buildup from too much fertilizer is a likely culprit; flush the soil thoroughly with plain water and ease off the feeding.
Repotting
Plan to repot roughly every two to three years, or when you can see roots filling the pot and circling the surface. Spring is the best time, as the plant is entering active growth and recovers fastest. The key thing to understand is that the crown is brittle and easily damaged, so handle it with care. Support the base gently, avoid crushing or snapping the central growing point, and try not to bury the crown when you reseat the plant; it should sit at the same depth it grew before, with the base of the rosette right at the soil surface.
Move up just one pot size into fresh, loose, well-draining mix, water it in around the edges, and keep it in slightly higher humidity for a week or two while it settles. Because these ferns like being snug and dislike disturbance, do not repot more often than necessary. If the plant is healthy and the pot is not yet crowded, leave it be.
Common Problems and How to Fix Them
Most issues with bird’s nest ferns trace back to humidity, watering, or light. Learning to read the fronds lets you correct course before any real damage is done.
Brown, Crispy Edges
Browning along the margins of the fronds is the classic symptom of low humidity and dry air. Raise the humidity with a humidifier, pebble tray, or a move to a steamier room, and check that you are not letting the soil dry out completely. A buildup of fertilizer salts can also crisp the tips, so flush the soil if you suspect overfeeding.
Yellowing Fronds
Yellowing usually points to overwatering, too much light, or watering with cold water. Check that the soil is not staying soggy and that the pot drains freely. Move the plant out of any direct sun or overly bright spot, and switch to room-temperature water if you have been using cold tap water.
Rotting Crown
A brown, soft, mushy center is crown rot, and it comes from water sitting in the central rosette. This is the most serious problem and is hard to reverse once it sets in. The cure is prevention: never water into the center, blot out any water that lands there, and keep the crown dry. If rot has started, remove affected mush, improve airflow, and hope the plant pushes new growth, but recovery is uncertain.
Pale, Washed-Out Fronds
When the green drains out of the fronds and they look bleached or faded, the plant is getting too much light. Direct or excessively bright exposure washes out the color and can scorch the leaves. Move it to a spot with gentler, filtered light and the new growth should come in a richer green.
Pests
Watch for scale, which shows up as small brown bumps on the fronds and ribs, and mealybugs, which look like white cottony spots in the crevices. Both can be wiped off and treated with insecticidal soap or a cotton swab dipped in diluted rubbing alcohol, though be gentle and avoid the crown. Fungus gnats, small flies hovering around the soil, signal that the mix is staying too wet; let the surface dry more between waterings to break their cycle.
Propagation: Set Realistic Expectations
Here is the honest truth: bird’s nest ferns are tricky to propagate at home, and it is best to go in with low expectations. Unlike many houseplants, they do not grow from cuttings and they cannot be divided, because each plant grows from a single central crown rather than producing offsets or multiple growing points. There is no clump to split. Instead, like all ferns, they reproduce by spores, the tiny dust-like structures that form in brown lines on the undersides of mature fronds.
Growing from spores is a slow, finicky process that requires sterile conditions, consistent warmth, and high humidity over many months, and it is genuinely difficult outside specialized setups. For most home growers, the practical answer is to enjoy and maintain the plant you have rather than trying to multiply it. If you want more bird’s nest ferns, buying young plants is far more reliable than attempting spore propagation. For more on growing ferns and other foliage plants, browse our wider plants and flowers guides.
Is the Bird’s Nest Fern Safe for Pets?
Good news for pet households: the bird’s nest fern is non-toxic to both cats and dogs. You can keep it in a home with curious animals without worrying about poisoning if a frond gets nibbled. That said, no plant is meant to be eaten in quantity, and a pet that chews on foliage may still get an upset stomach, so it is sensible to place the plant somewhere out of easy reach. But as far as toxicity goes, this is one of the safer ferns you can choose for a household with cats or dogs.
Frequently Asked Questions
Why are the edges of my bird’s nest fern turning brown and crispy?
Brown, crispy edges are almost always a sign of low humidity and dry air. Bird’s nest ferns want 60 to 70 percent humidity or more, and typical indoor air, especially in winter, is far drier. Add a humidifier or pebble tray, move the plant to a more humid room such as a bright bathroom, and make sure the soil is not drying out completely between waterings. A fertilizer salt buildup can also crisp the tips, so flush the soil if you have been feeding heavily.
Can I water into the center of the rosette?
No, never water into the central cup. It looks like a natural basin, but water trapped there has nowhere to drain and will rot the crown, which is fatal. Always pour water onto the soil around the outer edge of the rosette, and blot out any water that accidentally splashes into the center. Keeping the crown dry is the single most important habit in bird’s nest fern care.
How much light does a bird’s nest fern need?
It prefers medium to bright indirect light and tolerates lower light well, but it cannot handle direct sun, which scorches the fronds. An east or north window, or a bright spot set back from a brighter window, is ideal. In brighter indirect light the fronds grow crinklier and more compact, while in lower light they spread flatter and smoother.
How often should I water my bird’s nest fern?
Keep the soil evenly moist but never soggy, watering when the top inch has begun to dry slightly. In practice this is often around once a week, but let the soil guide you rather than a strict schedule, since light, pot size, and humidity all affect how fast it dries. Use room-temperature water and always water the soil around the edges, never the center.
Is the bird’s nest fern toxic to cats and dogs?
No, it is non-toxic to both cats and dogs, which makes it a safe choice for pet households. While it is not poisonous, it is still wise to keep it out of reach, since any plant nibbled in quantity can cause mild stomach upset in pets.
Bird’s nest ferns reward consistency over fuss. Keep the crown dry, give them filtered light and steady humidity, water the soil around the edges with room-temperature water, and protect them from cold, and they will reward you with a slow, steady flush of glossy green fronds for years. Once the watering habit becomes second nature, this is one of the most forgiving and dramatic ferns you can grow indoors.