

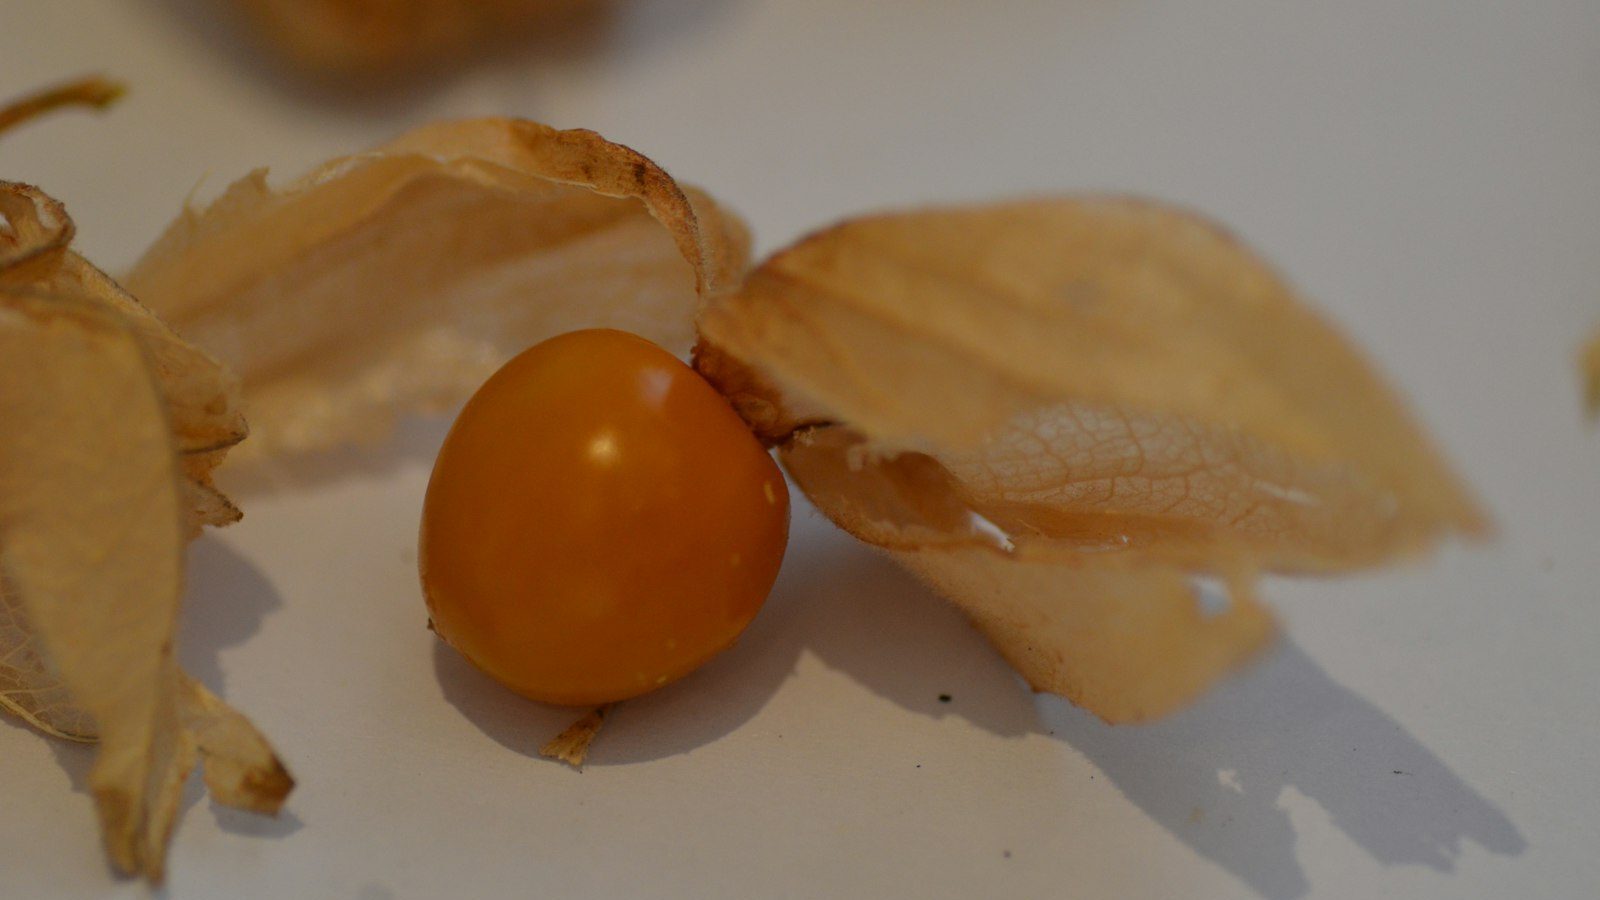
Ground cherries (Physalis pruinosa) are one of the garden’s best-kept secrets: small, golden, husk-wrapped fruits that taste like a cross between a tomato, a pineapple, and a hint of vanilla. Sometimes called husk cherries, cape gooseberries, or strawberry tomatoes, they’re close cousins of the tomatillo and grow much the same way. The plants are sprawling, productive, and remarkably easy once established, dropping ripe fruit onto the ground inside its papery lantern — which is exactly how you know it’s ready. If you can grow a tomato, you can grow ground cherries. This guide covers starting seeds indoors, when and where to transplant, spacing, days to maturity, care, and the uniquely simple harvest that gives this fruit its name.
Key Takeaways
- Start seeds indoors 6–8 weeks before your last frost; they germinate slowly and need warmth like tomatoes.
- Transplant out only after all frost danger has passed and soil has warmed — ground cherries are frost-tender.
- Space plants 2–3 feet apart in rows 3 feet apart; the low, sprawling plants need room to spread.
- Days to maturity run about 65–75 days from transplant (roughly 90–100 from seed) to first ripe fruit.
- Give full sun, moderate, even watering, and lean to moderate soil — too much nitrogen means leaves, not fruit.
- Harvest by collecting the husked fruit that drops to the ground when ripe; the papery husk turns tan and the berry inside turns golden.
Starting Seeds Indoors
Ground cherries have a fairly long season and slow-germinating seeds, so in most climates you’ll want to start them indoors 6 to 8 weeks before your last expected spring frost — the same timing you’d use for tomatoes and peppers. Sow seeds about a quarter-inch deep in moist seed-starting mix and keep them warm; germination is best at 70–80°F and can take one to three weeks, so be patient and don’t give up on a tray that looks slow. A heat mat noticeably speeds and evens out sprouting.
Once seedlings emerge, give them bright light — a sunny south window or, better, a grow light a few inches above the plants — to prevent the leggy, stretched growth that weak light causes. Pot up into larger containers if the seedlings outgrow their cells before transplanting weather arrives. About a week before moving them outdoors, harden the plants off by setting them outside in a sheltered, partly shaded spot for gradually longer periods so they acclimate to sun, wind, and cooler nights. Skipping this step leads to transplant shock and sunscald.
When and Where to Transplant
Ground cherries are frost-tender, so wait to transplant until all danger of frost has passed and the soil has warmed, typically a week or two after your last frost date when nighttime temperatures stay reliably above 50°F. Cold soil and late frosts will stall or kill young plants.
Choose a spot in full sun — at least six to eight hours daily — with well-drained soil. Ground cherries are not heavy feeders and actually fruit best in lean to moderately fertile soil; overly rich, high-nitrogen ground produces a jungle of foliage and few fruits, the classic mistake with this crop. A neutral pH around 6.0–6.8 suits them well. Because the plants sprawl low and wide and drop their fruit to the ground, plant them where you can easily collect the harvest and where the soil surface stays reasonably clean — a bed edged with straw mulch, or even rows you can rake, makes gathering far easier. Some gardeners grow ground cherries in large containers or even let them tumble over a raised-bed edge, which keeps the dropped fruit off bare soil.
Spacing and Planting
Give these plants room — they look small at transplanting but grow into sprawling mounds two to three feet across. Space plants 2 to 3 feet apart, in rows about 3 feet apart. Crowded plants compete for light and air and become harder to harvest under. When transplanting, set the seedlings slightly deeper than they grew in their pots, like tomatoes; the buried stem will sprout extra roots and anchor the plant. Water in well after planting.
The plants are low and bushy and usually self-supporting, but in rich soil or windy sites a low tomato cage or short stakes can keep the sprawling stems contained and the fruit cleaner. A layer of straw mulch beneath the plants is genuinely worth the effort: it conserves moisture, suppresses weeds, and — most importantly — gives the dropped fruit a clean, dry surface to land on rather than bare, muddy soil.
Days to Maturity and Care
From transplant, ground cherries take roughly 65 to 75 days to begin ripening fruit — about 90 to 100 days from seed. Once they start, they produce heavily and keep going right up until frost, so a single planting can yield for months in a long season. The plants flower with small, bell-shaped yellow blooms, each of which forms a papery husk that swells around the developing berry.
Water moderately and evenly — about an inch a week — keeping the soil consistently moist but never soggy. Erratic watering can cause flower drop and inconsistent fruit, while overwatering invites rot. Once the plants are established and fruiting, they’re fairly drought-tolerant. Resist the urge to fertilize heavily; if growth is weak in poor soil, a single light feeding of a balanced or low-nitrogen fertilizer at planting is plenty. Too much nitrogen is the number-one reason gardeners get lush plants and disappointing yields. Ground cherries are generally pest- and disease-resistant, though they can attract the same flea beetles, cutworms, and occasional three-lined potato beetles that bother their nightshade relatives; row covers on young plants and good garden hygiene keep problems minor. For more on growing nightshade-family crops, our guide to growing an orange tree shares some of the same warm-climate fruiting principles, and you’ll find more food crops in our Plants & Flowers section.
Common Problems
All Leaves, No Fruit
The most common complaint with ground cherries is vigorous foliage but few flowers or fruit, almost always caused by overly rich soil or too much nitrogen fertilizer. Grow them lean, ease off feeding, and be patient — they often start slow and then produce abundantly in late summer.
Flea Beetles and Pests
Tiny flea beetles can pepper the leaves with shot-hole damage, especially on young plants. Mature plants usually outgrow it, but floating row covers protect seedlings during the vulnerable stage. Slugs may go after fallen fruit, which is another reason to harvest promptly and keep the ground clean.
Volunteers
Ground cherries self-seed readily from dropped, missed fruit, so expect volunteer seedlings the following spring. This is usually a bonus, but pull unwanted ones to keep them from spreading where you don’t want them.
How to Harvest Ground Cherries
Here’s the magic that gives ground cherries their name: you harvest them off the ground. Rather than picking fruit from the plant, you wait for the ripe fruit to fall, then gather it from beneath the plants. When a ground cherry is fully ripe, the husk dries to a thin, papery tan or straw color and the berry inside turns from green to a rich golden-yellow, and the whole fruit, still wrapped in its husk, drops to the ground on its own.
Check beneath the plants every few days during the harvest season and simply collect the dropped husks — this is why a clean mulch layer underneath matters so much. Don’t pick fruit that’s still firmly attached and green; it isn’t sweet yet. If you must harvest before a frost, you can pick fruit whose husks have just begun to dry, and it will often finish ripening indoors. A light frost can damage the plants, so gather everything ripe before the first hard freeze.
Left inside their intact, papery husks, ground cherries store remarkably well — several weeks in a cool, dry spot, sometimes months. Peel back the husk before eating; the golden berry inside is sweet-tart and delicious raw by the handful, in salads and salsas, simmered into jam, or baked into pies and tarts. Their natural pectin and unique flavor make them a standout preserve. A single productive patch can keep you in fruit from midsummer until frost, so it’s worth growing more than you think you’ll need.
Frequently Asked Questions
How long do ground cherries take to grow?
They take about 65 to 75 days from transplant to first ripe fruit, or roughly 90 to 100 days from seed. Because of that long season, most gardeners start seeds indoors 6 to 8 weeks before the last frost.
How do you know when ground cherries are ripe?
Ripe ground cherries fall to the ground on their own. The papery husk dries to a tan, straw color and the berry inside turns golden-yellow. Simply gather the dropped, husked fruit from beneath the plants every few days — fruit still firmly attached and green isn’t sweet yet.
How far apart should I plant ground cherries?
Space plants 2 to 3 feet apart in rows about 3 feet apart. The plants look small at transplanting but grow into sprawling mounds two to three feet wide, so they need the room and good airflow.
Why do my ground cherry plants have no fruit?
The usual cause is soil that’s too rich or too much nitrogen fertilizer, which drives leafy growth instead of flowers and fruit. Grow them in lean to moderate soil, stop feeding, and give them time — they often fruit heavily in late summer after a slow start.
Can you eat ground cherries raw?
Yes — once fully ripe (golden inside a dry, papery husk), they’re delicious eaten raw by the handful, with a sweet-tart, tropical flavor. Peel off the husk first. Note that unripe, green ground cherries and the husks themselves should not be eaten, as the unripe fruit of this nightshade can cause stomach upset.
Ground cherries are an easy, prolific, and genuinely fun crop that delivers a flavor you simply can’t buy in most stores. Start them early indoors, grow them lean and sunny with room to sprawl, mulch underneath for a clean landing pad, and let the ripe fruit drop into your hands. You’ll be hooked after the first sweet, golden handful.