

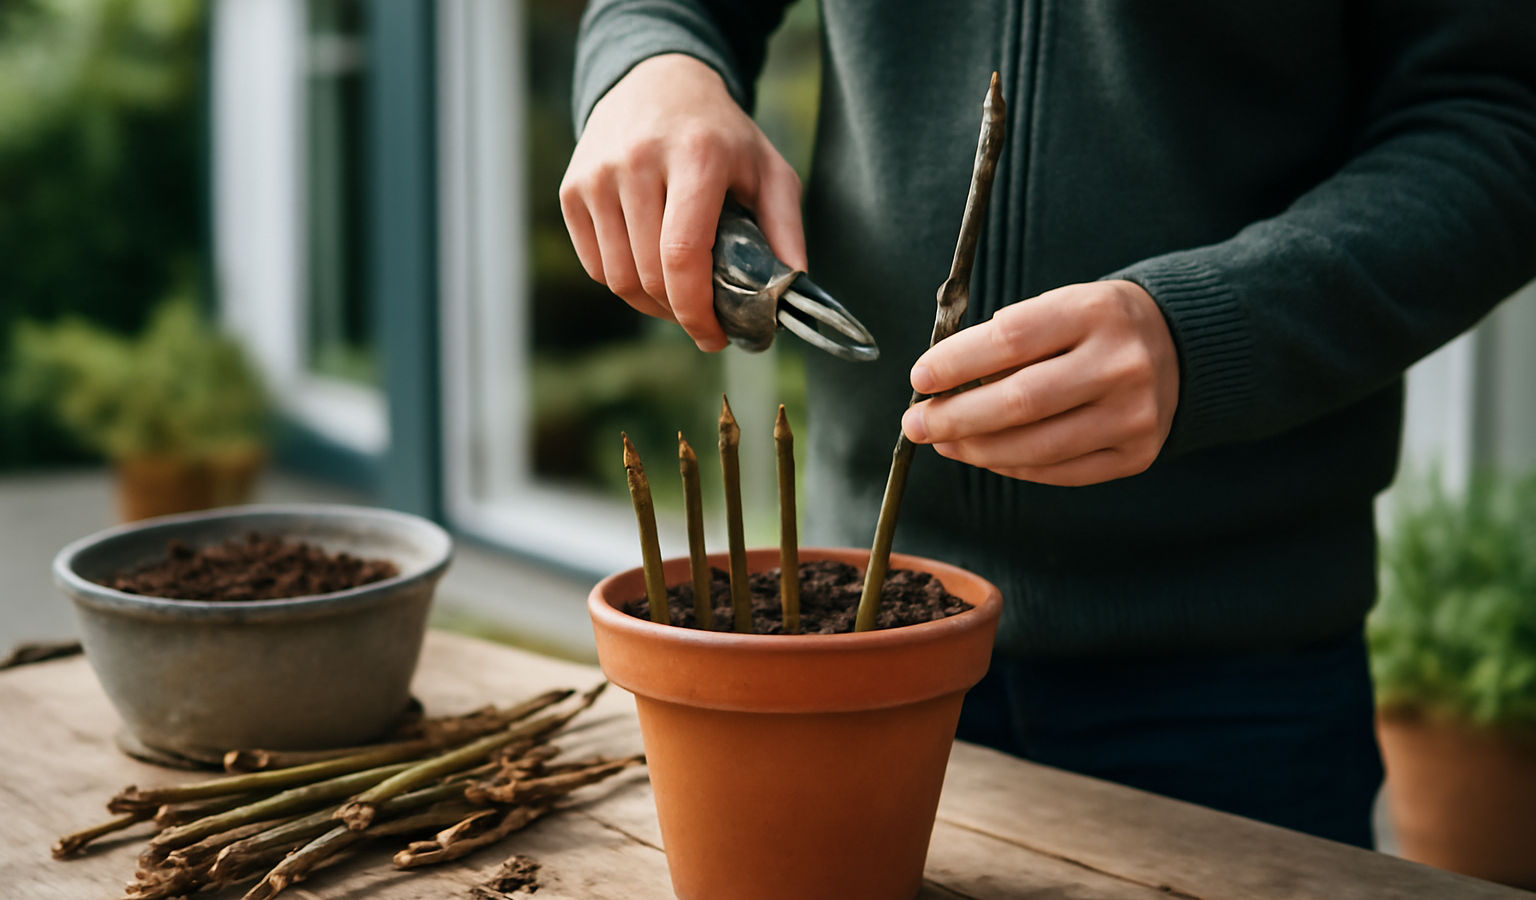
If you want free shrubs and fruit bushes with almost no equipment and barely any attention, hardwood cuttings are the method to learn. You take a length of dormant stem in the dead of winter, push it into the ground, and walk away. Months later, sometime the following spring or autumn, you come back to rooted plants. There is no propagator, no misting, no daily babysitting. It is genuinely the cheapest, most hands-off form of propagation there is, and for plants like willow, dogwood, and currants it works so reliably it feels like cheating. The trade-off is patience: hardwood cuttings are slow. You are working on the plant’s timetable, not yours. But if you start a row in November, you will likely have a row of young plants to line out by the following autumn, all for the cost of a few minutes with a pair of secateurs. This guide covers exactly what counts as hardwood, when to take cuttings, which plants respond, and the precise technique that gets you the best strike rate.
Key Takeaways
- Take hardwood cuttings during dormancy, roughly November to February, after leaf fall and before bud break in spring.
- Use fully ripened, pencil-thick stems from the current year’s growth; cut them into 6 to 10 inch sections.
- Make a flat cut just below a bud at the base and a sloping cut just above a bud at the top so you never plant them upside down.
- Insert two-thirds of each cutting into a trench with sharp sand at the base, space them 4 to 6 inches apart, and leave them outdoors all winter.
- Rooting is slow; willow, dogwood, and currants are nearly foolproof, while figs, grapes, and roses are a little more variable.
What Counts as a Hardwood Cutting
The word “hardwood” describes the maturity of the stem, not the kind of plant. A hardwood cutting is a length of fully ripened, woody stem taken from growth the plant made during the current year. By the time you take it, that growth has stopped, hardened off, and turned woody all the way along. The leaves have dropped, the plant is dormant, and the stem snaps or cuts cleanly rather than bending like a green shoot. This is the opposite end of the spectrum from softwood cuttings, which are soft, sappy spring shoots that wilt in minutes and need warmth and humidity to survive. Hardwood is tough, self-reliant, and able to sit outdoors through frost without protection.
The benchmark thickness is pencil-thick: somewhere around a quarter to three-eighths of an inch in diameter. Thinner whippy stems carry too little stored energy and tend to dry out before they root; much thicker stems are slower and less reliable. You want the firm, even, well-ripened wood from the middle of a strong shoot, not the thin soft tip and not the old gnarled wood at the very base. A good test is to bend a section gently. Soft, still-flexible wood is not ready. Wood that is firm and resists bending, with a clearly formed bud at each node, is exactly what you are after.
Because the stem is dormant and leafless, it loses very little water. That is the whole reason the method is so undemanding. A leafy summer cutting is in a race against dehydration and has to be coddled. A bare winter stem just sits there, slowly building roots from its stored carbohydrate, while the cold keeps the top from breaking into growth too early. You are essentially banking a stem in the soil and letting it root on its own clock.
When to Take Hardwood Cuttings
Timing is the single most important thing to get right, and it is simple: take hardwood cuttings during the dormant season, after the leaves have fallen and before the buds break in spring. In most temperate climates that means roughly late autumn to late winter, broadly November through February. The ideal moment for many gardeners is shortly after leaf fall, often in November or early December, when the wood is freshly ripened and the plant has just shut down for winter. Cuttings taken at this point have the longest possible window to form a callus and begin rooting before they need to support new top growth.
You can keep taking cuttings right through midwinter and into late winter, as long as the buds have not yet started to swell and open. Once a plant breaks dormancy and pushes new leaves, a hardwood cutting is at a disadvantage: it will try to support foliage before it has any roots to feed it, and many cuttings exhaust themselves and die at that stage. So the practical rule is to get them in the ground while the plant is firmly asleep. If you are slightly late and buds are just beginning to swell, take the cuttings anyway and get them planted immediately, but expect a slightly lower success rate.
Avoid taking and planting cuttings into ground that is frozen solid or waterlogged. If a hard freeze is forecast, you can take the cuttings, bundle them, label them, and heel them into a pot of damp sand or a sheltered spot until conditions improve. Mild, workable winter days are perfect for this job. There is no rush within the season itself, only the boundary at each end: wait for leaf drop, beat bud break.
Which Plants Root From Hardwood Cuttings
Hardwood cuttings work best on deciduous shrubs and many woody fruits, the kinds of plants that naturally drop their leaves and go fully dormant. The classic candidates fall into a few groups, and once you know the list you will start seeing free plants everywhere in winter gardens.
Ornamental shrubs
Willow and dogwood are the headline acts. Both root so readily that you barely have to try; a willow stem pushed into damp ground will often root just from the moisture in the soil. Forsythia, privet, poplar, elderberry, and many hydrangeas also take well from hardwood. These are the plants you want for hedging, screening, and quick structure, and propagating them this way can produce dozens of plants from a single afternoon of pruning. Roses can be grown from hardwood cuttings too, including ramblers, climbers, and many shrub roses, though strike rates vary by variety and are generally lower than for willow or dogwood.
Soft fruit and woody fruit
This is where hardwood cuttings really earn their keep for a productive garden. Currants, blackcurrants, redcurrants, white currants, and gooseberries are all propagated commercially from hardwood cuttings, and they are easy enough for any home gardener to get right. Grapes (grapevines), figs, and mulberry also root from dormant wood, giving you free fruiting plants that would cost a lot to buy. With currants and gooseberries you can put up a whole new fruit cage from your own prunings in a single season.
If a plant does not respond well to this method, it usually has a different propagation route. Many broadleaf evergreens prefer semi-ripe cuttings taken in late summer instead, and some trees and shrubs that resist stem cuttings altogether root much better from root cuttings or from layering. Match the method to the plant and your success rate climbs sharply.
How to Take Hardwood Cuttings: Step by Step
Here is the core technique. Work with clean, sharp secateurs, because crushed or torn cuts root poorly and invite rot. Take your material from a healthy parent plant on a mild day.
1. Select the right stems
Choose straight, vigorous stems of this year’s growth that are roughly pencil-thick along most of their length. Straight stems are easier to handle and plant. Cut whole shoots from the plant first, then process them on a bench or board where you can see what you are doing. Discard anything that is thin and whippy, damaged, diseased, or oddly soft.
2. Cut into sections
Cut each stem into sections 6 to 10 inches long. Each section should have several buds, with at least a couple near the top to produce shoots and one or more near the base where roots will form. The bottom of a long shoot may yield two or three cuttings from one stem, so a single pruned branch can give you several plants.
3. Make the two distinctive cuts
At the base of each cutting, make a flat, straight cut just below a bud or node. The area around a node has the most active cells and roots form there most readily, and a flat base maximizes contact with the rooting medium. At the top, make a sloping, angled cut just above a bud. The slope sheds water so the top does not sit wet and rot, and, just as usefully, the two different cuts tell you instantly which end is which. A hardwood cutting planted upside down will not grow, so this small habit saves you from a season-wasting mistake. Always plant the flat base down and the sloping top up.
4. Remove the soft tip
Trim off and discard the thin, soft, unripened tip of each shoot. This tip is not fully woody, will not root reliably, and is the most likely part to die back over winter. You only want firm, ripened wood in the ground.
5. Optional wounding and rooting hormone
For plants that are slower to root, such as some fruit and certain ornamentals, you can give the cutting a nudge. Wounding means slicing a thin sliver of bark, about an inch long, off one side of the base to expose more of the cambium layer just under the bark, where roots emerge. Dipping the base in a powdered or gel rooting hormone can also improve and speed up rooting. For the near-foolproof plants like willow, dogwood, and currants, neither step is necessary; they root happily without help. Use these aids on the trickier subjects where every percentage point counts.
6. Plant two-thirds deep
The classic method is a slit trench in a spare corner of well-drained ground. Push a spade in vertically and rock it back and forth to open a narrow V-shaped trench, then trickle an inch or two of sharp sand or grit into the bottom. Sharp sand at the base keeps the cut from sitting in stagnant wet and rotting, and gives young roots an easy medium to grow into. Stand the cuttings against one wall of the trench, flat base down, so that about two-thirds of each cutting is below ground and only the top two or three buds show above the surface. Space them 4 to 6 inches apart. Firm the soil back against them so they are held tightly, then water in. Alternatively, you can line cuttings around the edge of deep pots of gritty, free-draining compost, which is handy if your ground is heavy or you only have a few cuttings; deep pots give the roots room to develop.
Once they are in, label the row clearly and leave the cuttings outdoors. They do not want heat or shelter. The winter cold is part of the process, keeping the buds dormant while the buried portion slowly forms callus and then roots.
Rooting and Aftercare
Patience is everything now. Hardwood cuttings root slowly over the winter and into spring, and some, especially the fruit and the trickier ornamentals, will not be fully rooted until the following autumn, nearly a year after you took them. The single most important thing is not to disturb them. Resist the urge to pull a cutting up to “check,” because doing so tears the fragile new roots and sets the plant back or kills it.
Keep the soil moist but never waterlogged. In a normal winter, rainfall does this for you; in a dry spell, give the row a soak. The most common winter problem is frost heave, where repeated freezing and thawing lifts the cuttings and loosens them in the ground, breaking contact between the base and the soil. After a hard frost, walk the row and gently firm any cuttings that have been pushed up, pressing the soil back around them with your heel or fingers. Through spring you will see the top buds break and leaf out. This is encouraging but not proof of rooting yet; a cutting can leaf out on stored energy before roots have formed. Real success shows in steady growth that continues through the season, fed by a working root system.
By the following autumn, or for the easiest plants by the autumn after planting, the cuttings should be well rooted and ready to lift. Ease them out carefully with a fork, keeping as much root as possible, and line them out in their final positions or in a nursery bed with more generous spacing to grow on for another season before their permanent home. Water them in well after transplanting. If you enjoy this kind of slow, low-input increase, it pairs naturally with other quiet methods like propagating plants by layering, where you root a stem while it is still attached to the parent.
Success Rates and the Foolproof Plants
Not all hardwood cuttings are equal. A handful of plants root so readily that beginners get near-total success on their first attempt. Willow tops the list; it produces its own rooting compounds and will strike from almost any dormant stem in damp ground. Dogwood is nearly as reliable, and currants and gooseberries are dependable enough that you can expect the great majority of a row to take. These are the plants to start with if you have never done this before, because early success is the best teacher.
The more variable subjects, where strike rates can range from modest to good depending on the season and the variety, include figs, grapes, mulberry, and roses. With these, the optional wounding and rooting hormone earn their place, and it is worth taking more cuttings than you need so that even a partial strike leaves you with plenty of plants. Because the whole method costs almost nothing, taking extras is the smart insurance: plant twice as many as you want and thin to the best.
Compared with every other propagation technique, hardwood cuttings ask the least of you. There is no equipment to buy, no daily watering, no propagator to heat, and no greenhouse space tied up through the growing season. You take the cuttings in winter when there is little else to do in the garden, push them into a spare bit of ground, and let nature do the rest. For filling a hedge, expanding a fruit patch, or sharing plants with neighbors, it is hard to beat for value. Once you have a reliable row going, you can fold it into a wider plan of low-cost propagation alongside techniques like other outdoor growing projects and build a whole garden from cuttings.
Frequently Asked Questions
When is the best time to take hardwood cuttings?
During the dormant season, after leaf fall and before bud break in spring, which is broadly November to February in temperate climates. Many gardeners favor the period shortly after leaf drop in late autumn, as that gives the cutting the longest window to root before it has to support new growth.
How long does a hardwood cutting take to root?
Slowly. Roots form over winter and into spring, and the easiest plants like willow may be rootable by late spring or summer. Fruit and trickier ornamentals often are not fully rooted until the following autumn, close to a year after taking. The key is not to disturb them while they work.
How thick and long should hardwood cuttings be?
Aim for pencil-thick stems, roughly a quarter to three-eighths of an inch in diameter, cut into sections 6 to 10 inches long. Use firm, fully ripened wood from the current year’s growth and discard the thin, soft tip, which will not root reliably.
Do I need rooting hormone for hardwood cuttings?
Not for the easy plants. Willow, dogwood, currants, and gooseberries root happily without it. For slower subjects like figs, grapes, and roses, dipping the base in rooting hormone and wounding the stem can improve and speed up rooting, so it is worth using on those.
Which plants are easiest to grow from hardwood cuttings?
Willow is the easiest and almost never fails. Dogwood, currants, and gooseberries are also close to foolproof. Forsythia, privet, poplar, and elderberry take well too. Start with these for guaranteed early success before trying the more variable figs, grapes, mulberry, and roses.