

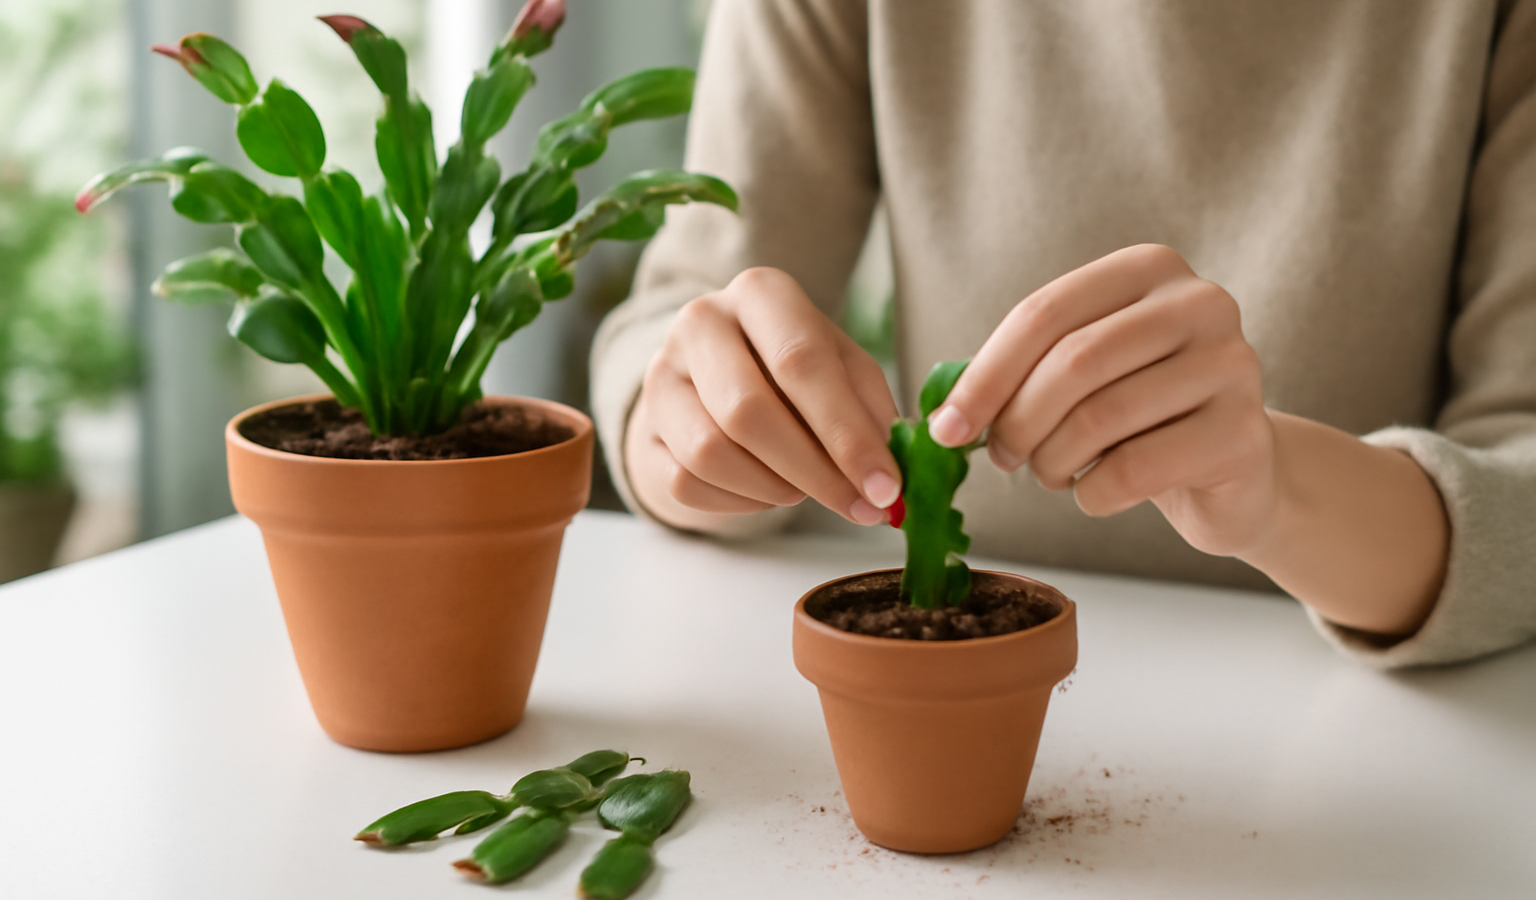
The Christmas cactus is one of the most generous houseplants you can own: snap off a few segments, let them sit for a day, push them into soil, and within weeks you have brand-new plants — exact clones of the parent, right down to its bloom color. It’s how grandmothers passed these plants down for generations, and it’s so reliable that a single mature plant can give you a dozen gifts in an afternoon. Unlike many cuttings, Christmas cactus segments root almost without trying, provided you avoid the one classic mistake: rushing them into wet soil before the cut end has healed, which causes rot. This guide covers the best time to propagate, exactly how to take and prepare segment cuttings, both soil and water methods, and how to grow your cuttings into full, blooming plants. (The same technique works for the closely related Thanksgiving and Easter cacti.)
Key Takeaways
- Propagate in late spring through summer, after blooming and during active growth, for the fastest rooting — never while the plant is setting buds.
- Take cuttings of 2–4 connected segments, twisting or snapping them off cleanly at a joint.
- Let the cuttings callus for 1–3 days before planting — this is the step most people skip, and skipping it causes rot.
- Root in a gritty, free-draining cactus mix (best) or in water; most root in 3–6 weeks.
- Water sparingly until rooted — overwatering is the number-one killer of Christmas cactus cuttings.
Best Time to Propagate
The ideal window is late spring through summer, after the plant has finished flowering and is in active growth. During this period segments root quickly and the parent recovers fast from being trimmed. Avoid propagating in fall and early winter when the plant is forming buds or in full bloom — taking cuttings then stresses the plant and the segments root sluggishly because the plant’s energy is committed to flowering. A bonus: light pruning to take cuttings actually encourages the parent to branch and bush out, so propagation and tidying go hand in hand. As always, work from a healthy, pest-free plant for the strongest cuttings.
Understanding the Segments
A Christmas cactus stem is made of flat, leaf-like segments (technically called cladodes or phylloclades) joined end to end at distinct joints. Those joints are where you take and root cuttings. Each cutting should be a short chain of two to four connected segments — a single segment can root but grows slowly, while a chain of three or four establishes into a fuller plant faster. The bottom joint of the chain is where roots will emerge, so that’s the end that goes into the medium.
What You’ll Need
- A healthy parent Christmas cactus
- Clean hands or sterilized scissors/pruners (twisting by hand usually works best)
- A gritty, free-draining medium: a cactus/succulent mix, or potting mix cut 50/50 with perlite or coarse sand — or a glass of water for the water method
- Small pots or a shallow tray
- Rooting hormone (optional; Christmas cactus rarely needs it)
- A warm spot with bright, indirect light
Step-by-Step: Soil Method (recommended)
Step 1: Take the cuttings
Choose a healthy stem and remove a chain of two to four segments. The cleanest way is to gently twist the stem at a joint until the segments separate, or snip cleanly through a joint with sterilized scissors. Twisting at the natural joint gives the best result and leaves a tidy break that heals well. Take several cuttings — they’re free and not all may take, though most will.
Step 2: Let them callus
This is the step most people skip, and it’s the difference between rooting and rotting. Set the cuttings aside in a dry, shaded spot for one to three days so the cut end dries and forms a callus — a slightly dry, sealed surface. Planting a fresh, wet-ended segment straight into damp soil invites rot before roots can form. A short callusing period lets the wound close so the cutting roots cleanly. The cuttings will look fine sitting out for a few days; don’t worry about them.
Step 3: Plant the cuttings
Fill a small pot with lightly moistened, free-draining cactus mix. Insert the callused end of each cutting about an inch deep — deep enough that the first joint is buried and the cutting stands up on its own. You can plant several cuttings around the edge of one pot for a fuller result later. Firm the mix gently around each. If you like, dip the end in rooting hormone first, though Christmas cactus rarely needs it. Don’t water heavily — the mix should be barely damp.
Step 4: Care while rooting
Set the pot in bright, indirect light and warmth (around 65–75°F), out of harsh direct sun that would scorch the segments. Keep the soil barely moist — mist or water lightly only when the surface is dry. Overwatering at this stage is the single most common killer, causing the buried ends to turn mushy and black. Unlike many cuttings, Christmas cactus doesn’t need a humidity cover and often rots if kept too humid, so leave it uncovered. In three to six weeks, roots form; you’ll see new growth at the tips and feel resistance to a gentle tug. A wrinkled, slightly limp cutting just needs a little patience and a touch more (not less careful) water.
Water Method
You can also root Christmas cactus in water, which lets you watch roots develop. Callus the cuttings for a day or two as above, then suspend each so just the bottom joint touches the water — resting the cutting across the rim of a narrow glass or jar works well, keeping most of the segment above the surface. Set it in bright, indirect light and refresh the water every few days. Once roots are an inch or two long, pot the cutting into gritty cactus mix and keep it lightly watered for a couple of weeks while it adjusts. As with other plants, water-grown roots are more delicate than soil roots, so don’t leave cuttings in water too long after rooting.
Growing On Into a Blooming Plant
Once rooted, grow your young plant in bright, indirect light and water only when the top inch of mix dries — Christmas cactus is a tropical epiphyte, not a desert cactus, but it still rots if kept soggy. Feed monthly with a dilute balanced or houseplant fertilizer during spring and summer growth. Pinch or twist off a segment or two from each stem tip in spring to encourage branching, which builds a full, cascading plant over a couple of seasons. To trigger blooms around the holidays, give the plant cool nights and 12–14 hours of uninterrupted darkness for about six weeks in fall, then return it to normal light when buds appear. A rooted cutting may bloom in its first or second year. Christmas cactus is a perfect low-light houseplant for an apartment or small-space indoor garden, and the segment method here is as easy as the leaf and stem methods in our other propagation guides — see propagating lavender from cuttings for a woody-herb comparison, and browse more in our outdoor living guides.
Common Mistakes to Avoid
The two big errors are skipping the callusing step and overwatering — both lead to rotted cuttings. Always let the cut ends dry for a day or three before planting, and keep the medium barely damp, never soggy, while roots form. Other pitfalls: propagating during bud-set or bloom (cuttings root poorly then), covering the pot with a humidity dome (Christmas cactus prefers it uncovered), and using a heavy, water-retentive potting soil instead of a gritty cactus mix. Callus, plant in fast-draining mix, water sparingly, and your cuttings will root with almost no effort.
Frequently Asked Questions
When is the best time to propagate a Christmas cactus?
Late spring through summer, after the plant has finished blooming and is in active growth — segments root fastest then and the parent recovers quickly. Avoid propagating in fall or winter while the plant is forming buds or flowering, since cuttings root sluggishly during bloom.
Do I really need to let the cuttings dry before planting?
Yes — this callusing step is the one most people skip and the main cause of rot. Let the cut ends dry in a shaded spot for one to three days so the wound seals over. Planting a fresh, wet-ended segment straight into damp soil invites rot before roots can form.
How long does a Christmas cactus take to root?
Usually three to six weeks. You’ll know it’s rooted when you see fresh new growth at the segment tips and feel gentle resistance when you give a cutting a light tug. A slightly wrinkled cutting just needs a little patience.
Can I root a Christmas cactus in water?
Yes. Callus the cuttings first, then suspend each so only the bottom joint touches the water, keeping most of the segment above the surface, and refresh the water every few days. Once roots are an inch or two long, pot them into gritty cactus mix promptly, since water roots adapt poorly if left too long.
Why are my Christmas cactus cuttings rotting?
Almost always from overwatering or skipping the callusing step. Let the cut ends dry for a few days before planting, use a gritty, fast-draining cactus mix, keep it barely damp rather than wet, and leave the pot uncovered — Christmas cactus rots if kept too humid.