

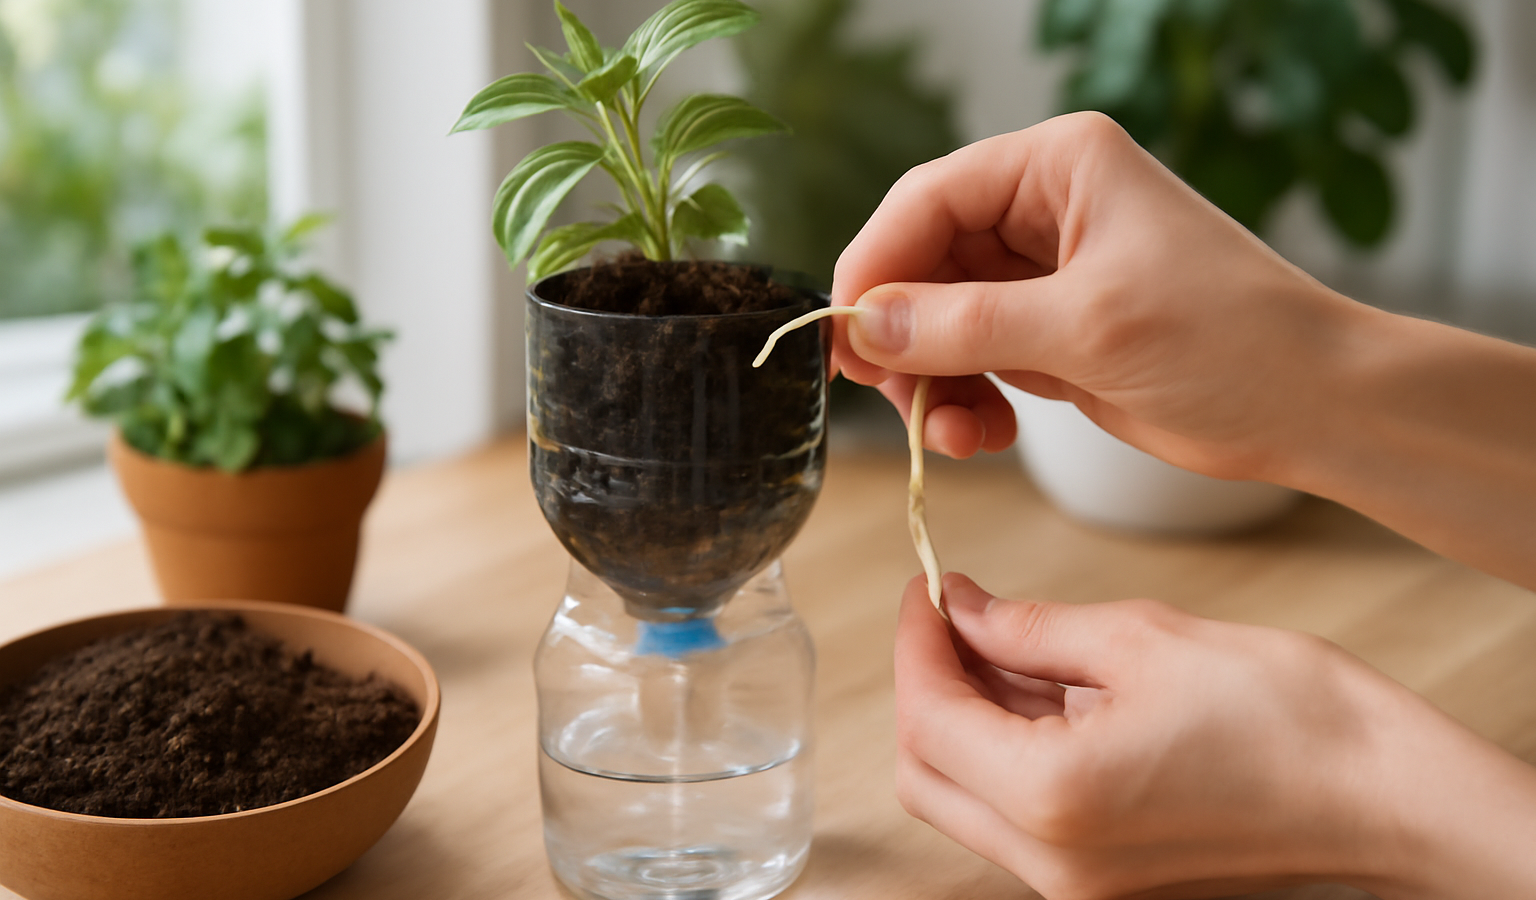
A self-watering container does not actually water itself, but it comes close. It is a sub-irrigated planter — a SIP — with a sealed water reservoir built into the bottom. Instead of pouring water onto the soil surface and watching most of it run out the drainage holes, you fill a reservoir underneath the soil, and the plant draws moisture upward through a wick exactly as fast as it needs it. The result is a container that you might top up every three or four days instead of twice a day, that almost never droops in a heat wave, and that grows noticeably larger, more even plants than a conventional pot. Best of all, you can build a good one in under an hour from a storage tote, a couple of buckets, or a recycled food-grade barrel. This guide explains how the system works and walks you through two reliable builds.
Part of our Houseplants & Container Gardening guide →
In this guide
Key Takeaways
- A self-watering container is a sub-irrigated planter with a sealed water reservoir below the soil that feeds moisture upward on demand.
- Four parts make it work: a reservoir, a wicking system that pulls water into the soil, an overflow hole that caps the water level, and a fill tube to refill from the top.
- You can build one from a plastic storage tote, a pair of 5-gallon buckets, or a food-grade barrel — all cheap, recyclable materials.
- The overflow hole is the most important detail: it stops the reservoir from drowning the roots and tells you when it is full.
- SIPs excel with thirsty, fast-growing crops — tomatoes, peppers, cucumbers, basil, and leafy greens — but are a poor fit for cacti, succulents, and herbs that demand dry feet.
How a Self-Watering Container Works
Every sub-irrigated planter is built from the same four functional parts, no matter what container you start with.
The reservoir is a sealed pocket of water in the bottom of the container, separated from the soil above by a platform or false floor. Depending on the size of the container, it holds anywhere from one to several gallons — enough to carry the plant for several days between fills.
The wicking system is the bridge between the water and the soil. It is simply soil — or a cup, basket, or column packed with soil — that dips down through the platform into the reservoir. Capillary action pulls water up out of the reservoir into that wicking soil, and from there it spreads through the whole root zone. The plant takes up exactly as much as it transpires, so the soil stays evenly moist, never waterlogged and never bone dry.
The overflow hole is drilled through the side of the container at the exact height of the platform — the top of the reservoir. It does two jobs. It sets a hard ceiling on the water level so the soil above the platform always has air and never drowns, and it gives you a visible signal: when water trickles out of the overflow as you fill, the reservoir is full and you stop.
The fill tube is a length of pipe running from the top of the container down into the reservoir, so you can refill the water from above without wetting the soil surface. Pour into the tube, watch for the overflow to weep, and you are done. Keeping the surface dry also discourages fungus gnats and surface weeds. Because the soil surface stays dry while the root zone stays moist, a SIP delivers far steadier moisture than hand-watering — one reason gardeners weighing fabric versus plastic grow bags and other container options often land on a sub-irrigated build for thirsty summer crops.
Materials and Tools
Containers (pick one)
- An opaque plastic storage tote, roughly 18–27 gallons, with a lid. The classic, highest-yield DIY SIP — big enough for two tomatoes or a row of greens.
- Two food-grade 5-gallon buckets that nest inside each other, for a compact single-plant build.
- A food-grade plastic barrel or half-barrel for a large, long-lived planter.
Reservoir and wicking parts
- A platform to hold the soil up off the reservoir floor: a perforated plastic tray, an upturned colander or two, a length of corrugated drain pipe, or — in the bucket build — a second bucket with its bottom drilled out.
- One or two small plastic cups, net pots, or perforated containers to act as wicking chambers, packed with soil to dip into the reservoir.
- A 24- to 30-inch length of 1- to 1.5-inch PVC or other rigid pipe for the fill tube; cut one end at an angle so it cannot seal against the reservoir floor.
- Potting mix — a peat- or coir-based mix that wicks well; avoid heavy garden soil, which compacts and wicks poorly.
Tools
- Drill with a spade or hole-saw bit sized to your fill tube, plus a small bit for the overflow and aeration holes.
- Utility knife or jigsaw to cut openings in the platform.
- Tape measure and marker; gloves.
Build 1: The Storage-Tote SIP (Step-by-Step)
This is the workhorse build and the one most worth your time. The finished planter has a wide footprint, a generous reservoir, and room for two large plants.
Step 1 — Build the platform
Decide on a reservoir depth — 3 to 4 inches is ideal. Find or cut a rigid platform that will sit at that height across the bottom of the tote, supported by something sturdy underneath (lengths of perforated corrugated pipe laid in the bottom work well, or upturned pots, or a milk crate cut to height). The platform separates the water below from the soil above, so it needs to bear the weight of saturated potting mix without sagging into the reservoir.
Step 2 — Cut the wicking holes
Cut one or two holes in the platform and seat your wicking cups or net pots in them so they hang down into the reservoir space. Drill the cups full of small holes. When you fill the planter, these cups pack with soil and become the columns that wick water up out of the reservoir. Also drill a grid of small aeration holes across the rest of the platform so air can reach the underside of the soil — roots need oxygen as much as water.
Step 3 — Drill the overflow hole
This is the make-or-break step. Drill a 1/2-inch overflow hole through the side wall of the tote, positioned just below the top of the platform. That sets the maximum water level a hair under the soil floor, guaranteeing the soil never sits in standing water. Get this hole right and the system regulates itself; place it too high and you will rot your roots.
Step 4 — Install the fill tube
Cut a hole near one corner of the platform for the fill tube and stand the pipe in it so the angled bottom end rests in the reservoir and the top sticks up above the eventual soil line. Anchor it so it stays vertical while you add soil. This is how you will refill the reservoir from the top.
Step 5 — Fill with potting mix
Pack the wicking cups firmly with damp potting mix first — firm contact is what makes them wick reliably. Then fill the whole container with potting mix, mounding it slightly. Pre-moisten the mix as you go; dry peat or coir can be stubborn to wet and slow to start wicking. Leave the top of the fill tube proud of the soil so you can find it.
Step 6 — Mulch the surface (optional but smart)
Many tote SIP builders cap the soil with a plastic sheet or the tote’s own lid, cut with planting holes, to cut evaporation from the surface to near zero — that is what turns a SIP into a nearly closed-loop watering system. If you skip the cover, a layer of straw or wood-chip mulch achieves much of the same effect.
Step 7 — Fill, plant, and prime
Pour water into the fill tube until it runs out of the overflow hole, then stop. Plant your transplants into the mix. For the first week or two, water the surface by hand as well, because young roots have not yet reached down into the wicking zone. Once the plants establish and their roots find the moisture column, the reservoir takes over and you simply top up the fill tube every few days.
Build 2: The Two-Bucket SIP
For a single tomato, pepper, or pot of herbs on a balcony, the nested-bucket version is faster and more portable. You need two food-grade 5-gallon buckets that stack with a gap between their bottoms.
Take the inner bucket and drill its bottom full of holes, then cut or drill one larger hole to seat a wicking cup that will hang below it. Drill a hole in the side of the inner bucket near the bottom for the fill tube to pass through. Nest the inner bucket inside the outer one — the rims hold it up so a reservoir gap of several inches forms underneath. Mark where the bottom of the inner bucket sits, and drill the overflow hole through the outer bucket just below that line. Slide the fill tube through, pack the wicking cup with damp mix, fill the inner bucket with potting mix, and plant. Prime through the fill tube until water weeps from the overflow. The whole assembly stays light enough to move and is ideal for renters and small patios. If you are deciding between a permanent bed and movable containers for a small space, our look at a raised bed versus an in-ground garden is a useful companion read.
Best Crops for a Self-Watering Container
SIPs shine with thirsty, fast-growing, fruit-and-leaf crops that hate to dry out. The constant, even moisture suits them perfectly and prevents the swings that cause problems like blossom-end rot in tomatoes or bitter, bolting greens.
- Tomatoes — the flagship SIP crop; even moisture keeps fruit from cracking and reduces blossom-end rot. One indeterminate plant per tote half.
- Peppers and eggplant — heavy feeders that reward steady water with bigger yields.
- Cucumbers, zucchini, and squash — thirsty vines that thrive on a constant supply.
- Basil and other leafy herbs — lush and productive with the reservoir keeping them from wilting.
- Lettuce, spinach, chard, and kale — even moisture keeps greens tender and slows bolting in heat.
What to avoid: cacti, succulents, lavender, rosemary, and Mediterranean herbs that demand sharp drainage and dry roots — the constantly moist wicking zone of a SIP will rot them. Skip deep taproot crops like carrots and parsnips too, since the shallow soil over the reservoir cramps them.
Feeding, Maintenance, and Winterizing
Because you water from below, fertilizer applied to the soil surface does not flush down to the roots the way it does in a normal pot — and you cannot reliably feed through the reservoir without risking algae and salt buildup. The standard SIP trick is to lay a band of slow-release granular fertilizer or a strip of compost on top of the mix, under the mulch cover, at planting time; the downward movement of water through the soil carries nutrients to the roots gradually over the season. Top-dress again midseason for long-running crops like tomatoes.
Check the reservoir by lifting the container or peering into the fill tube; in peak summer a tote SIP with a big tomato may need topping up every two to four days, far less than a conventional pot. At the end of the season, drain the reservoir and tip the container so it does not hold water — a full reservoir left through a hard freeze can crack the plastic. Empty, clean, and store totes and buckets out of UV if you can, and they will give you many seasons. Refresh the top several inches of potting mix each spring and the same containers keep producing year after year.
Frequently Asked Questions
How does a self-watering container actually work?
It has a sealed water reservoir in the bottom, separated from the soil by a platform. Soil-filled wicking cups dip into the reservoir and draw water upward by capillary action, so the plant takes up moisture as it needs it. An overflow hole caps the water level and a fill tube lets you refill from the top without wetting the surface.
Why is the overflow hole so important?
The overflow hole, drilled level with the top of the reservoir, sets a hard ceiling on the water so the soil above never sits in standing water and the roots never drown. It also signals when the reservoir is full: when water weeps from the hole as you fill, you stop. Place it too high and you will rot the roots.
What soil should I use in a SIP?
Use a light, peat- or coir-based potting mix that wicks well and holds air. Avoid heavy garden soil or topsoil — it compacts, wicks poorly, and starves roots of oxygen. Pre-moisten the mix as you fill, since dry peat resists wetting and can be slow to start drawing water up from the reservoir.
What can’t you grow in a self-watering container?
Anything that needs dry roots and sharp drainage: cacti, succulents, lavender, rosemary, and most Mediterranean herbs will rot in the constantly moist wicking zone. Deep taproot crops like carrots and parsnips also struggle because the soil layer above the reservoir is too shallow for them.
How do I fertilize a sub-irrigated planter?
Because water moves up from below, surface fertilizer does not flush to the roots normally. The standard method is a band of slow-release granular fertilizer or compost laid on top of the soil at planting; water moving through the mix carries nutrients down gradually. Avoid dumping fertilizer in the reservoir, which causes algae and salt buildup.