

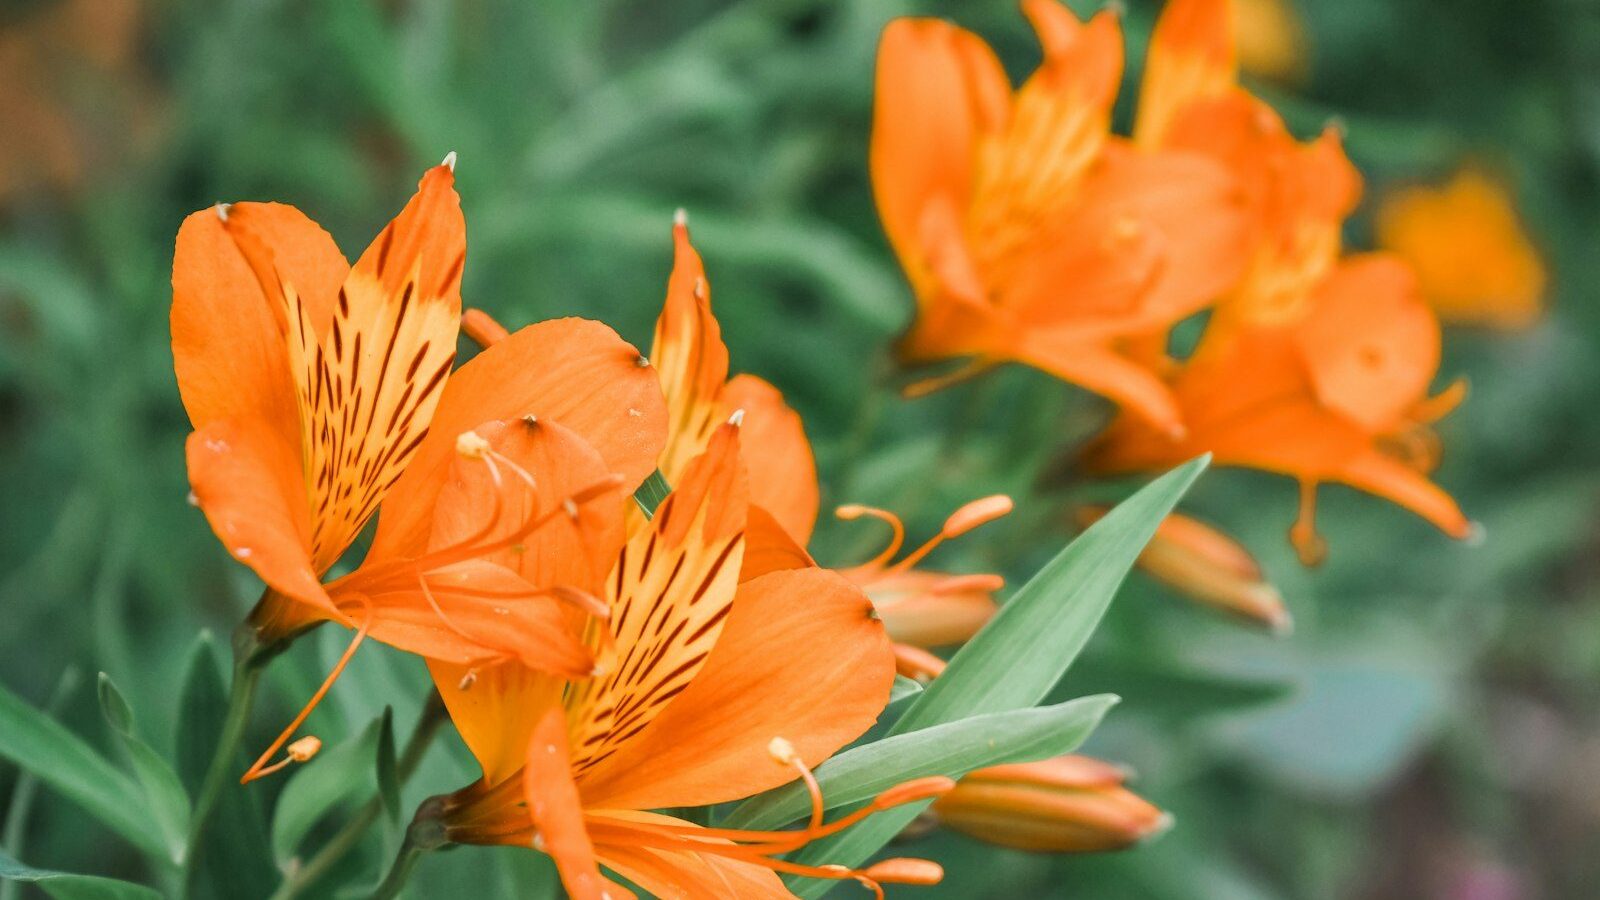
If you want one perennial that delivers months of color and asks almost nothing in return, grow daylilies. To grow daylilies well, plant the crown just one inch below the soil in full sun, space clumps 18 to 24 inches apart, water deeply during their first season, and divide them every three to five years. Hemerocallis is so forgiving that it thrives in clay, sand, and ground that other plants reject, which is exactly why it earned the nickname “the perfect perennial.” Each individual flower opens for a single day, but a mature plant pushes out dozens of buds per scape, so a well-grown clump can bloom for four to six weeks, and reblooming types stretch that show from early summer straight into fall. This guide covers everything from choosing dormant versus evergreen types for your climate to the one division technique that keeps old clumps flowering for decades.
Key Takeaways
- Daylilies are hardy in USDA zones 3-9 (some to 10); plant in full sun, 6+ hours, for the heaviest bloom.
- Set the crown exactly 1 inch below the soil surface, no deeper, and space plants 18-24 inches apart.
- Each flower lasts one day, but many buds per scape keep a clump in bloom for 4-6 weeks; rebloomers like ‘Stella de Oro’ bloom much longer.
- Water 1 inch per week, deeply, especially the first year and during bud set and bloom.
- Divide crowded clumps every 3-5 years in early spring or right after bloom to restore vigor.
- Daylilies are edible for people, but the entire plant is highly toxic to cats; keep cats away.
Why Daylilies Are Nearly Indestructible
Daylilies (Hemerocallis) are not true lilies at all, which is the first thing worth knowing. True lilies grow from scaly bulbs; daylilies grow from a dense crown with thick, fleshy, water-storing roots that let the plant survive drought, neglect, and transplanting at the wrong time of year. That root system is the reason a daylily can sit in a black nursery pot on a hot driveway for a month, get planted bare-root in summer, or be sliced apart with a shovel and still bloom the following season. Few perennials tolerate that kind of rough handling.
They are also remarkably free of serious pests and diseases in most gardens, they crowd out weeds once established, and they hold a slope or fill a difficult bed where little else will grow. Plant breeders have produced more than 80,000 registered cultivars in every color except true blue, ranging from six-inch dwarf edgers to four-foot giants with flowers wider than your hand. For a gardener who wants reliable performance without fuss, daylilies are as close to foolproof as perennials get.
Hardiness and Foliage Types: Dormant, Evergreen, Semi-Evergreen
Daylilies are hardy across USDA zones 3 through 9, with some cultivars reliable into zone 10. That range covers most of North America, but to choose well you need to understand the three foliage categories, because they predict how a plant behaves in your winters.
- Dormant types die back completely to the ground each fall, go fully dormant through winter, and resprout in spring. These are the toughest in cold climates and the safest choice for zones 3-5.
- Evergreen types keep their green foliage year-round in mild regions and are best suited to zones 7-10. In a hard freeze the foliage can be damaged, and in very cold zones the crowns can heave or rot.
- Semi-evergreen types fall in between; foliage partly dies back, and they perform across a wide middle band of zones 5-8.
The practical rule: if you garden in zone 5 or colder, lean heavily on dormant and semi-evergreen cultivars. If you garden in zone 8 or warmer, evergreen and semi-evergreen types will look fuller through the off-season. Always check the cultivar’s listed type before buying, especially mail-order, because a beautiful evergreen variety can sulk or die in a Minnesota winter.
One Flower a Day, Weeks of Bloom
The botanical name Hemerocallis comes from Greek for “beauty for a day,” and it is literal: each flower opens in the morning and is spent by nightfall. New gardeners sometimes panic at the pile of wilted blooms, but this is normal and not a sign of anything wrong. The magic is in the numbers. A single flower stalk, called a scape, carries anywhere from a dozen to thirty or more buds, and a mature clump produces many scapes. As one flower fades, the next opens behind it, so a healthy clump stays in continuous bloom for roughly four to six weeks.
Reblooming Varieties for the Longest Show
If you want bloom that lasts most of the growing season rather than a few weeks, choose reblooming (remontant) cultivars. The famous workhorse is ‘Stella de Oro’, a compact golden-yellow dwarf that flowers from early summer until frost in much of the country. ‘Happy Returns’, a softer lemon-yellow, behaves the same way and is slightly more refined. Both are dependable in zones 3-9 and are excellent for edging, mass plantings, and front-of-border color. Pair a few rebloomers with larger single-season cultivars and you can have daylily color from June through September.
Sun and Light Requirements
Daylilies flower best in full sun, which means at least six hours of direct light per day. More sun generally means more scapes and more buds. They will tolerate partial shade and still survive happily, but expect noticeably fewer flowers and floppier foliage that reaches for light. As a working guideline, give them a minimum of six hours; eight or more is better for heavy bloomers.
There is one nuance worth knowing. Dark-colored cultivars, the deep reds, purples, and near-blacks, can scorch or fade under intense afternoon sun. These varieties hold their color better with morning sun and a little afternoon shade, especially in hot southern climates. For yellows, oranges, and pastels, full all-day sun is ideal. If you are gardening in zone 8 or warmer, a touch of afternoon shade across the board helps flowers last longer into the day and keeps colors saturated.
Soil Preparation
Soil is where daylilies show off their toughness. They adapt to clay, loam, and sand, and tolerate a wide pH range. That said, they perform best in well-drained soil that is slightly acidic to neutral, around pH 6.0 to 6.5. The one condition they genuinely dislike is soil that stays waterlogged, which invites crown rot. If you have heavy clay that holds water, plant on a slight mound or amend the bed to improve drainage.
Before planting, work two to three inches of compost or well-rotted manure into the top eight to ten inches of the bed. This adds organic matter, improves both drainage in clay and moisture retention in sand, and gives new roots an easy medium to establish in. You rarely need to chase a precise pH for daylilies; a soil test is useful, but compost and reasonable drainage solve most problems on their own.
When to Plant Daylilies
You can plant daylilies almost any time the ground is workable, but the two best windows are early spring and early fall. Spring planting, once the soil has thawed and warmed, gives the plant the whole season to establish before winter. Early fall planting, roughly six weeks before your first hard frost, lets roots settle into still-warm soil while top growth slows, and these plants often bloom strongly the next summer. In hot climates, fall is frequently the better choice because young plants avoid the stress of midsummer heat.
Daylilies are sold two ways. Bare-root divisions, often shipped by specialty growers, arrive as a fan of leaves attached to bare roots; soak the roots in water for an hour before planting and get them in the ground promptly. Potted daylilies from garden centers can be planted anytime through the growing season, including summer, as long as you keep them well watered after transplanting. Either form establishes quickly thanks to those storage roots.
How to Plant Daylilies Step by Step
Getting the planting depth right is the single most important step. Set the crown, the point where the white roots meet the green leaves, exactly one inch below the soil surface. Planted deeper, daylilies often grow lush foliage but refuse to bloom. Here is the full sequence for a bare-root or divided plant.
- Dig a hole wider and slightly deeper than the root mass, roughly 12 inches across and 8 to 10 inches deep.
- Build a firm cone or mound of soil in the center of the hole, tall enough that when you drape the roots over it the crown sits about one inch below the surrounding soil line.
- Spread the roots evenly down and around the cone so they radiate outward rather than bunching up.
- Backfill with amended soil, working it in among the roots and firming gently to remove air pockets. Confirm the crown is no more than one inch deep.
- Space plants 18 to 24 inches apart; for large or vigorous cultivars allow up to 30 inches, since clumps widen considerably over a few years.
- Water in thoroughly to settle the soil and eliminate remaining air gaps, then add mulch.
Watering
Aim for about one inch of water per week, from rain or irrigation, applied deeply rather than as frequent light sprinkles. Deep watering encourages roots to grow down, which makes established daylilies impressively drought-tolerant. Two periods demand attention. The first is the establishment year, when new plants have not yet built their full root system; keep the soil consistently moist, never soggy, through the first growing season. The second is during bud set and bloom in summer, when adequate water directly translates to more open flowers and fuller scapes. A clump that goes bone-dry while budding may drop buds or open smaller flowers.
Mulching
A two- to three-inch layer of organic mulch, such as shredded bark, leaf mold, or compost, conserves moisture, suppresses weeds, and moderates soil temperature. Keep the mulch pulled back an inch or two from the crown itself so it does not trap moisture against the base and encourage rot. In cold zones, a winter mulch applied after the ground freezes helps prevent frost heaving in the first winter after planting; pull it back in spring as growth resumes.
Fertilizing
Daylilies are light feeders and bloom well in average soil, so resist the urge to overdo it. A single application of a balanced granular fertilizer, something in the range of 10-10-10, in early spring as growth begins is usually plenty. In sandy soils or for heavy rebloomers, you can add a second light feeding in early summer after the first flush of bloom. The key caution is nitrogen: too much nitrogen produces lush green leaves at the expense of flowers. If your daylilies grow tall and leafy but bloom poorly, excess nitrogen, or planting too deep, is the usual culprit. Top-dressing with compost each spring is often all the feeding a daylily needs.
Deadheading and Cutting Back
Deadheading is optional for plant health but makes a real difference in appearance. Each morning or every couple of days, snap off the spent blooms from the previous day with a quick pinch; they pull away cleanly at the base. This keeps the clump tidy and directs energy away from seed production. Once every bud on a scape has finished, cut that entire scape down to the base, since it will not bloom again and only looks ragged. Removing seed pods also prevents self-sown seedlings, which rarely match the parent.
In late fall, after frost has knocked the foliage back, cut dormant-type daylilies down to a few inches above the crown and clear away the debris. Removing old foliage reduces overwintering sites for pests and disease such as daylily rust. Evergreen types in mild climates can simply be tidied of dead leaves rather than cut hard.
How to Divide Daylilies
Dividing is the one maintenance task that matters most for long-term performance. Over time a clump becomes congested, the center grows woody and unproductive, and bloom declines. Divide every three to five years, or whenever you notice fewer flowers and a crowded, mounded crown. The best timing is early spring as new growth emerges, or right after bloom finishes in late summer to early fall, giving divisions time to root before winter.
- Dig the entire clump, working a spade or fork around and under the root mass to lift it whole.
- Shake or wash off the soil with a hose so you can see the individual fans, the natural shoots of leaves with their own roots.
- Pull the fans apart by hand where you can; for tough, woody clumps use two forks back-to-back or cut with a sharp knife.
- Make divisions of two to three fans each, ensuring every division has healthy roots and at least one growing point.
- Trim damaged roots and shorten the foliage to about six inches to reduce stress, then replant promptly at the correct one-inch crown depth and water in.
Replant divisions the same day if possible. Because of their storage roots, even rough divisions usually establish quickly, and you will have generated several new plants to spread elsewhere or share. For more on rejuvenating mature perennials, see our companion guides on growing bearded iris, which are divided in a similar way, and other reliable perennials in our plants and flowers section.
Common Problems and How to Solve Them
Daylilies are among the most trouble-free perennials, but a handful of issues do appear. Most are easy to manage with good airflow, clean foliage, and well-drained soil.
Daylily Rust
Daylily rust appears as yellow-orange powdery streaks on the undersides of leaves. Remove and destroy affected foliage, avoid overhead watering, space plants for airflow, and cut back and clean up foliage in fall. Some cultivars show more resistance than others.
Leaf Streak
Leaf streak is a fungal disease causing yellow streaks and browning along the leaf midrib. Trim off infected leaves, improve air circulation, and avoid wetting foliage in the evening. It is cosmetic more than fatal but worth keeping in check.
Crown Rot
Crown rot turns the base mushy and foul-smelling and is caused by soil that stays too wet, often combined with planting too deep. Improve drainage, plant on a mound in heavy soil, and keep mulch off the crown. Severely rotted clumps may need to be dug, cut back to firm white tissue, and replanted in fresh, well-drained soil.
Insect Pests
Aphids, thrips, and spider mites occasionally feed on buds and foliage, distorting blooms or stippling leaves. A strong spray of water, insecticidal soap, or simply tolerating minor damage usually handles them. The daylily gall midge, more common on the West Coast, lays eggs in buds that swell and distort; pick off and destroy affected buds before the larvae mature. And be warned: deer love daylilies and will browse buds and flowers to the ground, so fencing or repellents may be necessary where deer pressure is high.
Are Daylilies Edible? An Important Safety Note
For people, daylilies are edible. The unopened buds and the open flowers of Hemerocallis are used in cooking, particularly in East Asian cuisine, with a mild, slightly sweet, vegetable flavor. As with any edible plant, eat only flowers you know are unsprayed, and try a small amount first since some people are sensitive.
There is a critical exception for cat owners. Daylilies (Hemerocallis) are highly toxic to cats. Even small ingestions of leaves, flowers, or pollen can cause severe, sometimes fatal kidney failure in cats, and this is a veterinary emergency. The same is true of true lilies (Lilium). Daylilies are not considered dangerously toxic to dogs or to humans, but if you keep cats, do not grow daylilies where they have access, and never bring cut daylily flowers into a home with cats. If a cat is exposed, contact a veterinarian immediately.
Growing Daylilies in Containers
Compact and dwarf cultivars such as ‘Stella de Oro’ grow well in pots. Choose a container at least 12 inches wide and deep with good drainage holes, use a quality potting mix, and place it in full sun. Container daylilies dry out faster, so check moisture often in summer and water when the top inch is dry. Feed lightly through the season, and divide or pot up every couple of years as the crown fills the pot. In cold zones, move pots to a sheltered spot or sink them in the ground over winter, since roots in containers are more exposed to freezing.
Companion Planting
Daylilies combine beautifully with other sun-loving perennials that share their easygoing nature. Their strappy foliage and bold flowers pair well with the vertical spikes of liatris, the airy mounds of hardy geraniums, ornamental grasses, coneflowers, black-eyed Susans, and catmint. Use rebloomers at the front of a border for season-long color, and let larger cultivars anchor the middle. Because daylilies form dense clumps, they also make excellent low-maintenance groundcover on slopes and along driveways where you want color without fuss.
Frequently Asked Questions
Why won’t my daylilies bloom?
The two most common reasons are too little sun and planting too deep. Daylilies need at least six hours of direct sun for good bloom, and the crown must sit only one inch below the soil. Excess nitrogen fertilizer and overcrowded, undivided clumps also reduce flowering. Check sun first, then depth, then divide if the clump is old and congested.
How long do daylilies bloom?
Each flower lasts a single day, but a mature clump produces many buds per scape and many scapes, so it stays in bloom for about four to six weeks. Reblooming cultivars like ‘Stella de Oro’ and ‘Happy Returns’ flower from early summer until frost, giving you color for months.
How often should I divide daylilies?
Divide every three to five years, or whenever bloom declines and the clump becomes crowded with a woody center. The best times are early spring as growth emerges or right after bloom in late summer to early fall. Dig the whole clump, separate it into divisions of two to three fans each, and replant promptly.
Are daylilies poisonous?
Daylilies are edible for humans, and the buds and flowers are used in cooking. However, they are highly toxic to cats and can cause fatal kidney failure even in small amounts. They are not dangerously toxic to dogs. If you have cats, do not grow or display daylilies where the cats can reach them.
What is the easiest daylily for beginners?
‘Stella de Oro’ is the classic beginner daylily: a compact, golden, reblooming variety that is hardy in zones 3-9, tolerant of poor soil, and flowers from early summer to frost. ‘Happy Returns’ is an equally forgiving lemon-yellow alternative. Both are widely available and nearly impossible to kill.
Few plants give back as much for as little as the daylily. Plant the crown an inch deep in full sun, water it through its first summer, divide it when the clumps get crowded, and it will reward you with weeks of color year after year, in climates from zone 3 to zone 9. Start with a couple of dependable rebloomers, add a few showier single-season cultivars, and you will quickly see why generations of gardeners have called Hemerocallis the perfect perennial.