

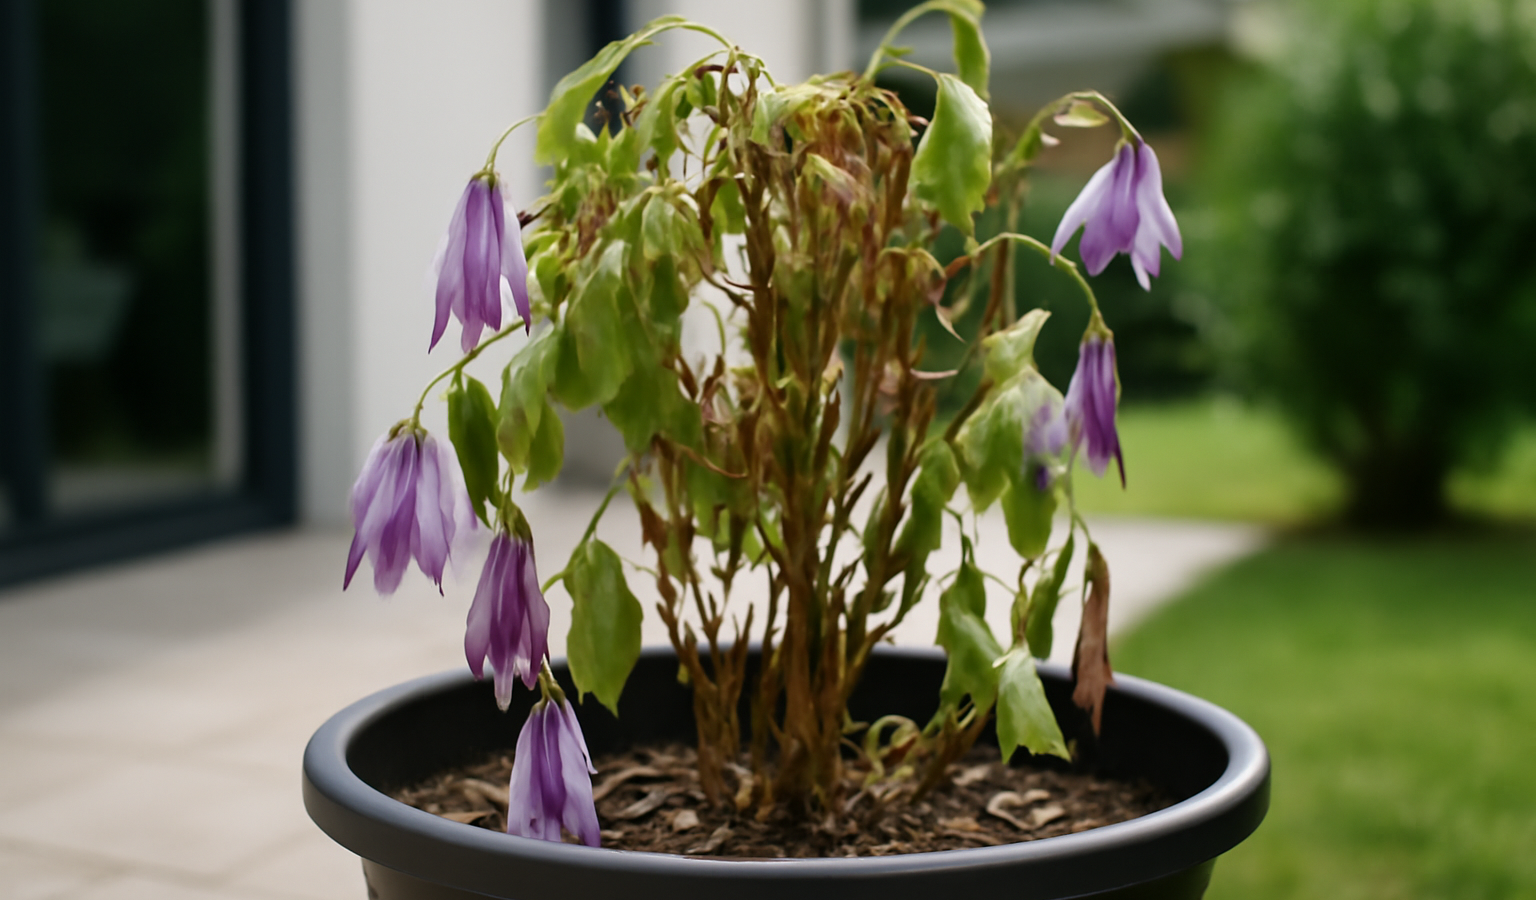
One day your clematis is covered in fat buds and glossy leaves, and the next morning a whole stem is hanging limp like someone pulled the plug on it. It is one of the most alarming things a clematis can do, partly because it happens so fast and partly because the plant often looks otherwise healthy right up until it folds. The good news is that clematis wilting almost always comes down to one of three causes, and two of them are completely fixable in an afternoon. The third looks like a death sentence but usually is not, especially if you planted the vine the way you were supposed to. Before you rip the thing out and write it off, work through the diagnosis below. Most wilted clematis recover and bloom again the same season, and many come back stronger the following spring once you understand what went wrong.
Key Takeaways
- Sudden collapse of a single stem on a large-flowered hybrid is usually clematis wilt fungus (Calophoma / Phoma stem rot), not a watering problem.
- Small-flowered species like Clematis montana, viticella, and alpina are largely resistant to wilt; if those are flagging, look at water or physical damage first.
- Cut wilt-affected stems back below the wilt point into clean, green tissue, and the plant often re-sprouts from below.
- Plant clematis deep, with the crown 2 to 3 inches below the original soil line, so it can regenerate from buried buds if the top dies.
- Give it “head in sun, feet in shade”: mulch and shade the root zone, and water deeply rather than often.
Cause 1: Clematis Wilt Fungus (Calophoma / Phoma Stem Rot)
This is the classic, notorious clematis wilt, and it is the reason the plant has a reputation for being temperamental. The culprit is a fungal pathogen, formerly grouped under Ascochyta and now usually identified as Calophoma clematidina (older references call it Phoma clematidina). It enters the stem, typically near the base or at a leaf node, and rots a section of the vascular tissue. Because that tissue carries water up the stem, everything above the infection collapses almost overnight. You can water all you want; the water simply cannot get past the blockage. The hallmark is speed and selectivity: one stem, or part of one stem, goes from turgid to flat in a day or two while the rest of the plant looks fine.
The single most useful fact about this disease is that it overwhelmingly attacks the large-flowered hybrids, the ones with dinner-plate blooms in May and June (think ‘Nelly Moser’, ‘The President’, ‘Jackmanii’ types). The small-flowered species and their cultivars are far more resistant. If you grow Clematis montana, Clematis viticella, Clematis alpina, Clematis macropetala, or Clematis tangutica, true wilt fungus is rare to the point that you should suspect a different cause entirely. This is also why so many experienced gardeners quietly shift toward viticella hybrids over time: you trade slightly smaller flowers for a plant that essentially never wilts.
How to diagnose it
Start with the plant’s identity. If it is a large-flowered hybrid, wilt fungus moves to the top of the suspect list immediately. Then look at the pattern of collapse. Fungal wilt typically takes down a single stem or a cluster of stems while neighboring stems stay firm and green; water stress, by contrast, tends to flag the whole plant at once. Run your hand down the wilted stem to the base. Look for a darkened, water-soaked, or blackened lesion near a node or near soil level, often a discolored band that pinches the stem. Above that point the leaves may show dark spots or blotches before they wilt. The tissue at the lesion is soft and the stem may snap or crush easily where it is rotted, while clean tissue below it is firm and green inside when you nick the bark with a thumbnail. If the collapse happened in a day and you find a rotted node, you have your answer.
How to fix it
Do not panic and do not dig up the plant. Wilt fungus rots stems, but it rarely kills the whole root system, and a properly planted clematis carries dormant buds below the soil line that can regrow. Get a pair of clean, sharp pruners and a cup of rubbing alcohol or a 1-part-bleach-to-9-parts-water solution. Trace the wilted stem down to below the rotted lesion and cut it back into clean, firm tissue. Cut at least an inch or two below where the stem turns green and solid inside, even if that means removing most of the stem; if you have to follow it all the way to ground level, do that. Wipe or dip the blades in your disinfectant between every cut so you do not smear spores onto healthy tissue.
Bag and trash every piece you remove. Do not compost it and do not leave clippings or fallen spotted leaves lying in the bed, because the fungus overwinters on debris and re-infects from below. Clear out old leaf litter around the crown. After cutting back, keep the plant watered and fed, and watch the base. Within a few weeks you will usually see fresh shoots pushing from the crown or from below the soil, and those new stems are typically clean. There is no practical home cure that eradicates the fungus from the soil, so management is about removing infected tissue fast and keeping the plant vigorous enough to outgrow it. If a particular hybrid wilts year after year despite clean pruning, accept that it is prone to it and replace it with a resistant viticella or alpina type in the same spot.
Cause 2: Water Stress and Dry Roots
Clematis are thirsty plants with a deep, demanding root system, and they wilt readily when those roots dry out. This is the cause people overlook because they assume any sudden wilt must be the dreaded fungus. But a clematis baking in full afternoon sun with a hot, dry root zone will flag dramatically, especially on the first genuinely hot days of summer or during a dry spell when nobody thought to water. The old gardening adage sums up the plant’s preference perfectly: clematis like their “head in the sun and their feet in the shade.” The vines want full sun on the foliage and flowers, but they resent hot, dry, exposed roots. Plant one against a south-facing wall in bare soil with no root shade and you are setting it up to wilt every July.
Container clematis are the most frequent victims because pots dry out so fast. A clematis in a pot on a sunny patio can use a startling amount of water on a 90-degree day, and a single missed watering can leave the whole plant collapsed by evening. New transplants are vulnerable too, since their roots have not yet spread into the surrounding soil and they depend entirely on the moisture in their original root ball.
How to diagnose it
Water stress usually wilts the whole plant fairly evenly rather than dropping one isolated stem, and it tends to coincide with heat or a stretch of no rain or watering. The clearest test is the soil itself: push a finger 2 to 3 inches into the root zone, or dig a small hole at the edge of the planting. If it is dry and dusty down there, you have your culprit. The other tell is timing of recovery. A water-stressed clematis that wilts in the afternoon heat will often perk back up overnight or after a deep soak, whereas a fungal-wilted stem stays limp no matter how much you water because its plumbing is severed. Check the stems at the base for rot lesions while you are at it; if the base is clean and firm and the soil is bone dry, this is a watering problem, not a disease.
How to fix it
Water deeply and immediately. Give an established clematis a slow, thorough soak that wets the soil down at least 12 to 18 inches, which for a garden plant usually means letting a hose trickle at the base for several minutes or applying a couple of gallons. Shallow sprinkles do not reach the deep roots and just encourage them to stay near the surface where they dry out faster. Going forward, aim to water deeply about once or twice a week in the absence of rain, and more often for plants in pots or in hot zones, rather than a little every day.
Then fix the “feet in shade” part for good. Spread 2 to 3 inches of organic mulch (bark, compost, or shredded leaves) over the root zone, keeping it pulled back an inch or two from the actual crown so the base of the stems does not stay wet. Mulch is the single most effective thing you can do, holding moisture and keeping the soil cool through summer. You can also shade the roots with a low planting of perennials or a strategically placed flat stone or paver over the root area. In hot, sunny climates (roughly USDA zones 7 and warmer), this root shading is not optional, it is the difference between a clematis that thrives and one that struggles. For potted clematis, move up to a larger container, since a bigger soil volume buffers against drying out, and consider a glazed or light-colored pot rather than thin black plastic that cooks the roots. For more on pairing clematis with companion plants that keep the root zone cool, browse our plants and flowers guides.
Cause 3: Stem Severance and Physical Damage at the Base
This is the cause that fools the most people, because the symptom looks exactly like fungal wilt: a healthy stem suddenly collapses. But here the problem is purely mechanical. Clematis stems are surprisingly brittle and fragile right at the base, especially on young plants and on the current season’s growth. A stem that gets kinked, crushed, snapped, or partially severed near the ground will wilt above the injury just as fast as a fungal infection would, because the water column is broken in the same way. The difference is there is no disease involved at all, and once you know that, the fix is simpler and the outlook is better.
The usual suspects are foot traffic and tools. A misplaced step, a string trimmer or lawn mower run too close to the base, a dog or a child blundering through the bed, a careless tug while tying in vines, or a sharp bend where a stem was forced onto a trellis can all crack the stem. Wind whipping an unsupported vine against a hard edge does it too. Slugs and other pests occasionally chew through the soft new stems of seedlings and young plants at ground level, with the same wilting result. Because the rest of the plant is perfectly healthy, the sudden flop seems mysterious until you look closely at the base.
How to diagnose it
Follow the wilted stem down to its base and inspect it closely. A physical injury looks like an injury: a clean snap, a crushed or flattened section, a kink, a torn flap of bark, or a stem that is nearly broken through and held on by a thread. The tissue around it is not rotted or blackened the way a fungal lesion is; it is mechanically damaged but otherwise green and healthy. Often you can gently move the stem and feel that it is hinged at a break point. Look also for evidence of the cause nearby: a trimmer line scuff, a footprint in the bed, chew marks from pests, or a too-tight tie biting into the stem. If you find a break and no rot, this is physical damage, plain and simple.
How to fix it
The wilted portion above a real break is not coming back, so cut the damaged stem off cleanly below the injury, just above a healthy pair of buds or nodes. Use sharp pruners and make a clean cut rather than leaving a crushed stub, which invites rot to move in. This is exactly where deep planting pays off: a clematis set with its crown 2 to 3 inches below the soil line has buds sitting safely underground, and once you remove the broken stem the plant will typically push new shoots from those buried buds within a few weeks. A shallowly planted clematis has no such reserve, which is one more reason to plant deep in the first place.
Then prevent a repeat. Keep mowers and string trimmers well away from the base; a ring of mulch or a few stones around the crown creates a no-go buffer. Tie in young stems loosely with soft ties, never wire, and never cinch them tight against a support. Make sure the vine is well supported so wind cannot flail it against hard edges. For young plants in slug country, protect the tender new growth at ground level until the stems toughen up. If you are building or rethinking the supports and beds around your vines, our outdoor living ideas cover trellises and structures that keep clematis off the ground and out of harm’s way.
How to Prevent Clematis Wilt in the First Place
Prevention for clematis is mostly about a handful of choices you make at planting time, plus a little ongoing housekeeping. Get these right and wilt of all three kinds becomes a rare event rather than an annual heartbreak.
Plant deep. This is the most important rule and the one most often broken. Set the plant so the crown sits 2 to 3 inches below the original soil line, deeper than the level it grew at in the nursery pot. Bury the bottom one or two leaf nodes. This puts dormant buds safely underground, so if the top of the plant is killed by fungus or snapped off by accident, the clematis can regenerate from below the soil. Deep planting is the single best insurance policy against losing a vine to wilt.
Choose resistant types where you can. If you have struggled with wilt fungus, lean toward the small-flowered species and their hybrids. Clematis viticella cultivars, Clematis montana, Clematis alpina, and Clematis macropetala are tough, vigorous, and almost never affected by stem rot. They thrive across a wide range, roughly USDA zones 4 through 9 depending on variety, and they give you reliable bloom without the drama of the temperamental large-flowered hybrids.
Keep the feet cool and the roots watered. Mulch the root zone with 2 to 3 inches of organic material, shade the base with companion plantings or a stone, and water deeply and regularly, especially in the first two seasons and during summer heat. A clematis that is never water-stressed is far less likely to flag, and a vigorous, well-fed plant shrugs off minor fungal infections and physical damage far better than a struggling one.
Practice good hygiene. Clear away old foliage and stem debris at the end of the season, since the wilt fungus overwinters on dead tissue. Disinfect your pruners between plants and after cutting out any infected stems. Avoid wounding the base of the plant with tools, and keep airflow reasonable so foliage dries quickly after rain. None of this is hard, and together it keeps the conditions that favor stem rot from building up around your vines.
Frequently Asked Questions
Will my clematis come back after it wilts?
Usually, yes. Wilt fungus and physical damage kill stems but rarely the whole plant, and a clematis planted deep with its crown 2 to 3 inches below the soil line can re-sprout from buried buds. Cut the affected stems back to clean, firm tissue or to ground level, keep it watered, and watch for new shoots within a few weeks.
How do I tell wilt fungus from a watering problem?
Fungal wilt typically drops one stem or a cluster while the rest of the plant stays firm, and the base shows a dark, rotted lesion near a node. Water stress wilts the whole plant evenly during heat, the base is clean, and the soil is dry 2 to 3 inches down. A dry plant often revives after a deep soak; a fungal-wilted stem does not.
Should I cut my clematis all the way to the ground after wilt?
Cut each affected stem down to clean, green, firm tissue below the rot or break. If the lesion runs all the way to the base, then yes, cut that stem to ground level. You do not have to remove healthy, unaffected stems. Bag and trash everything you cut, and disinfect your pruners between cuts.
Which clematis are resistant to wilt?
The small-flowered species and their hybrids are largely resistant: Clematis viticella, Clematis montana, Clematis alpina, Clematis macropetala, and Clematis tangutica. The large-flowered hybrids with the biggest blooms are the ones most prone to stem rot, so switching to a viticella type in a trouble spot is often the simplest long-term fix.
How deep should I plant a clematis?
Set the crown 2 to 3 inches below the original soil line, deeper than it sat in the nursery pot, burying the lowest one or two leaf nodes. This buries dormant buds so the plant can regenerate from below ground if the top is lost to wilt or damage. It is the single most effective step for preventing total loss to clematis wilt.