

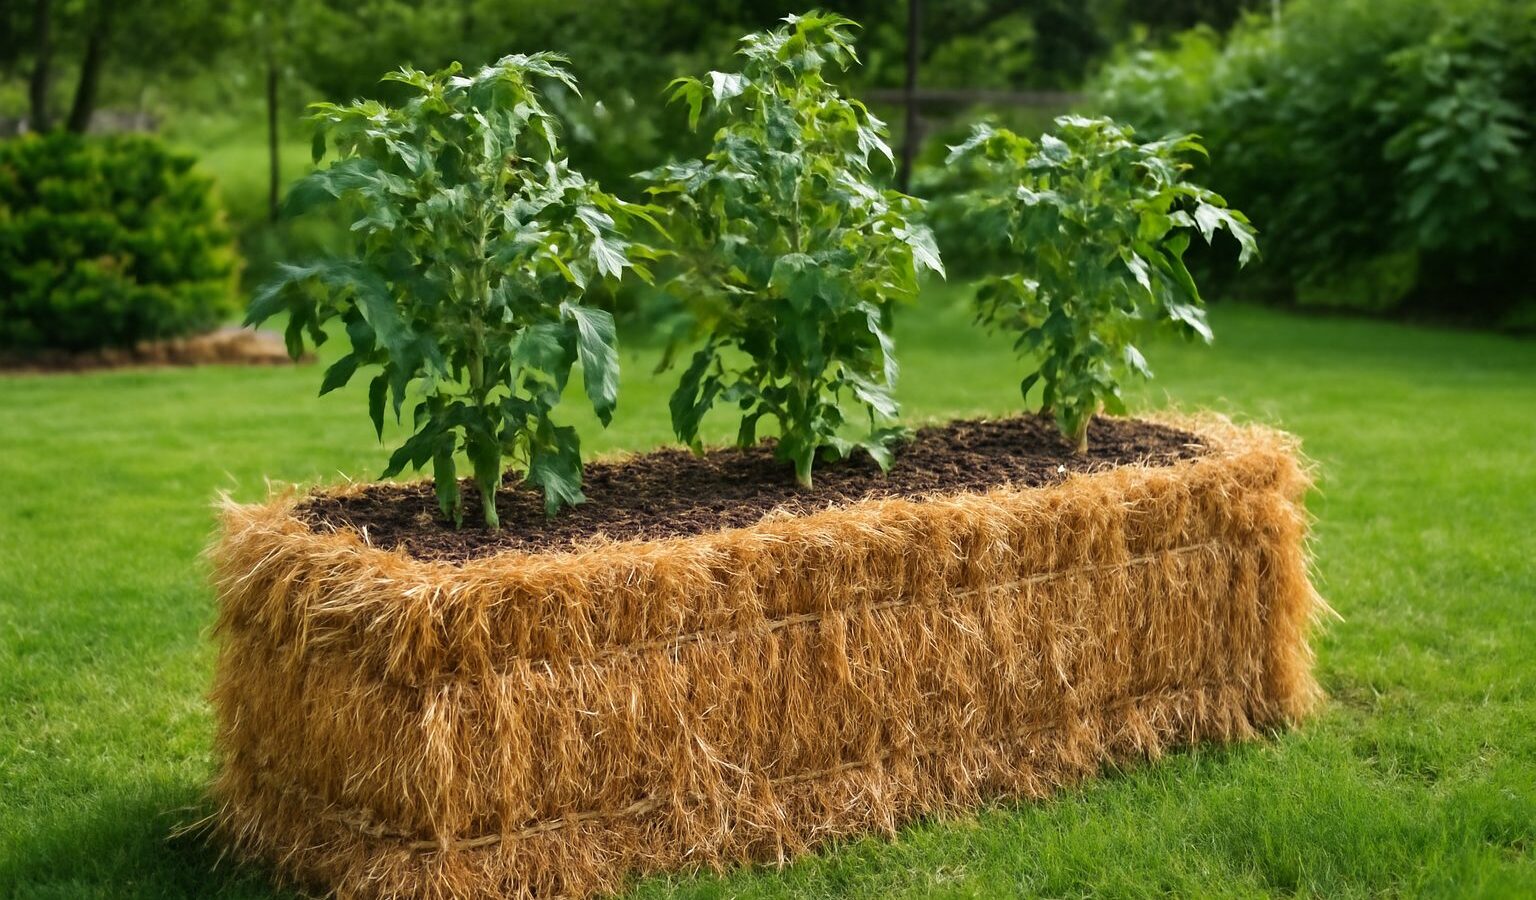
Straw bale gardening lets you grow vegetables almost anywhere — on a driveway, a patio, gravel, or compacted clay that no spade could break — by turning a bale of straw into a self-contained, raised, composting planter. As the inside of a conditioned bale decomposes, it heats up, feeds the roots, and creates a warm, well-drained rooting medium. There is no digging, no weeding from the soil seed bank, and the raised height is easy on your back. The one non-negotiable step is conditioning: a 10-to-14-day process that kick-starts decomposition before you plant. Get that right and the rest is straightforward. This guide covers choosing bales, the full conditioning schedule, what to plant, and how to water and feed through the season.
Key Takeaways
- Use straw bales (wheat, oat, barley), not hay — hay is full of seeds and will sprout into a weedy mess.
- Condition each bale for 10–14 days with water and high-nitrogen fertilizer before planting; this triggers the internal composting that feeds your crops.
- Position bales with the cut, twine-bound sides facing out and the stems pointing up so they absorb water.
- Bales drain fast and need daily watering in summer — a soaker hose on a timer makes this manageable.
- Plan on one season per bale; by fall the bale has broken down and becomes excellent compost or mulch.
Why Straw, Not Hay
The single most important rule is to buy straw, not hay. Straw is the hollow, dried stalk left after grain (wheat, oat, barley, or rye) is harvested — the seed heads are gone. Hay is dried whole grass and legume cut for animal feed, and it is packed with viable seeds that will germinate into a thick lawn of weeds across the top of your bale. Ask the farm or garden center specifically for straw. Choose dense, tightly bound bales held with two or three strings; loose, falling-apart bales won’t hold together through a season.
Where possible, source bales from a grower who can confirm the field was not sprayed with persistent broadleaf herbicides such as aminopyralid or clopyralid. These chemicals can pass through straw and stunt or kill tomatoes, beans, and other sensitive crops. If unsure, plant one tomato as a test before committing the whole bale.
Positioning the Bales
Set bales where they’ll get at least six hours of sun for vegetables, on a surface you don’t mind getting messy as the bale breaks down. Orient each bale with the cut ends (the prickly, stem-end side, not the smooth folded side) facing up — these absorb water best and give roots a path down into the bale. Keep the strings on the sides, never run them over the top, or they’ll cut into your planting bed.
Place bales directly on the ground, on cardboard to suppress weeds beneath, or on a patio. Once conditioned and watered they are heavy and will not move, so settle on the layout first. Leave walking room between rows. If you want a tidy edge, you can run a board or landscape fabric around a block of bales.
Conditioning: The Essential 10–14 Day Process
Conditioning jump-starts decomposition inside the bale so that, by planting day, the interior is a warm, nutrient-rich, partly composted medium rather than dry straw. You feed bacteria nitrogen and keep them wet; they heat the bale to 100–140°F as they work, then it cools, signaling it is ready. Use a high-nitrogen fertilizer — either conventional lawn fertilizer without weed killer (around 30-0-4) or an organic source like blood meal or feather meal (use about three times the volume for organic, which releases more slowly).
The Day-by-Day Schedule
- Days 1–3: Sprinkle ½ cup of conventional high-nitrogen fertilizer (or 3 cups organic) on top of each bale, then water it in deeply until it runs out the bottom. The goal is to keep the bale soaking wet.
- Days 4–6: Apply ¼ cup of fertilizer per bale each day and water it in thoroughly. The bale will begin to heat up — push your hand into the top and you’ll feel warmth.
- Days 7–9: Continue ¼ cup every other day, watering daily. The interior heat peaks during this window.
- Day 10: Add about 1 cup of a balanced fertilizer (such as 10-10-10) plus phosphorus and potassium, and water in. This rounds out the nutrients for fruiting crops.
- Days 11–14: Stop fertilizing and just keep the bale moist. Check the internal temperature with your hand or a compost thermometer. Once it has cooled to about body temperature (below 100°F), the bale is ready to plant. Planting while it’s still hot will cook the roots.
Planting Into the Bale
For transplants, pull apart a pocket in the top of the conditioned bale with a trowel, deep enough to bury the root ball, and tuck in a couple of handfuls of potting mix around the roots to settle the seedling. For seeds, spread a 2–3 inch layer of potting mix or compost across the top of the bale and sow directly into that, since small seeds need finer contact than coarse straw provides.
Spacing and What to Grow
- Tomatoes: 2 per bale, staked or caged — bales are excellent for tomatoes thanks to the warm, well-drained root zone.
- Peppers and eggplant: 3–4 per bale.
- Cucumbers, summer squash, zucchini: 2–3 per bale; trellis cucumbers up.
- Beans and peas: 8–10 plants per bale along the top.
- Lettuce, herbs, greens: 4–6 plants or a dense band of seed.
- Avoid: Tall, top-heavy corn (bales are unstable for it) and large sprawling crops like full-size pumpkins.
Watering and Feeding Through the Season
Bales drain extremely well, which means they also dry out fast — far faster than garden soil or even a raised bed. In summer heat, water daily, and twice on the hottest days. The most reliable approach is a soaker hose laid along the top of the bales on a timer, which keeps the interior evenly moist without you standing there with a hose. Check moisture by pushing a finger into the top; the bale should feel like a wrung-out sponge.
Because the decomposing straw provides only modest, declining nutrition, feed every two weeks with a balanced liquid fertilizer or compost tea once plants are growing, increasing to a bloom-boosting feed when tomatoes and peppers begin to flower. Watch for nitrogen drawdown — pale, yellowing lower leaves mean the bacteria breaking down the straw are competing with your plants for nitrogen, fixed with a nitrogen feed. Mushrooms sprouting on the bale are normal and harmless; they’re simply part of the decomposition. This same attention to feeding container-style plantings carries over to other small-space methods covered in the urban gardening hub.
End of Season and Reusing the Bale
A straw bale is essentially a single-season planter. By the time fall arrives, the bale has decomposed substantially, slumped, and lost much of its structure — it can’t be conditioned and replanted the same way the next year. Rather than waste it, break it apart and add the half-rotted straw to your compost pile, where it finishes breaking down into rich material, or spread it as mulch over beds and around perennials to insulate roots through winter. Many bale gardeners plant a fresh batch each spring and feed the spent bales into the compost cycle, which means the method also builds your soil over time. If you’re protecting other plants for the cold months, see our guide to overwintering plants and containers for mulching and storage methods.
Frequently Asked Questions
What’s the difference between straw and hay for bale gardening?
Straw is the hollow leftover stalk after grain is harvested, with the seeds removed, so it won’t sprout. Hay is dried whole grass and legumes for animal feed and is full of viable seeds that will germinate into a dense weed mat across your bale. Always buy straw — wheat, oat, or barley.
Why do I have to condition the bales first?
Conditioning feeds nitrogen-loving bacteria that start composting the inside of the bale, turning dry straw into a warm, nutrient-rich rooting medium. It takes 10–14 days of daily fertilizer and water. The bale heats to over 100°F during the process; you must wait until it cools below body temperature before planting, or the heat will kill your seedlings’ roots.
How often do straw bales need watering?
Daily in summer, and twice on the hottest days, because bales drain very fast and dry quickly. A soaker hose on a timer laid along the tops is the easiest way to keep them evenly moist. The bale should feel like a wrung-out sponge, never bone-dry.
What can I grow in a straw bale?
Tomatoes (2 per bale), peppers and eggplant (3–4), cucumbers and squash (2–3), beans, lettuce, herbs, and most greens all do well. Avoid tall corn, which makes the bale unstable, and large sprawling crops like full-size pumpkins. Tomatoes especially thrive in the warm, well-drained bale interior.
Can I reuse a straw bale next year?
No — by the end of one growing season the bale has decomposed and slumped too much to recondition. Instead, break it apart and compost the rotted straw or use it as winter mulch around perennials. Most bale gardeners start with fresh bales each spring and feed the spent ones into their compost.