

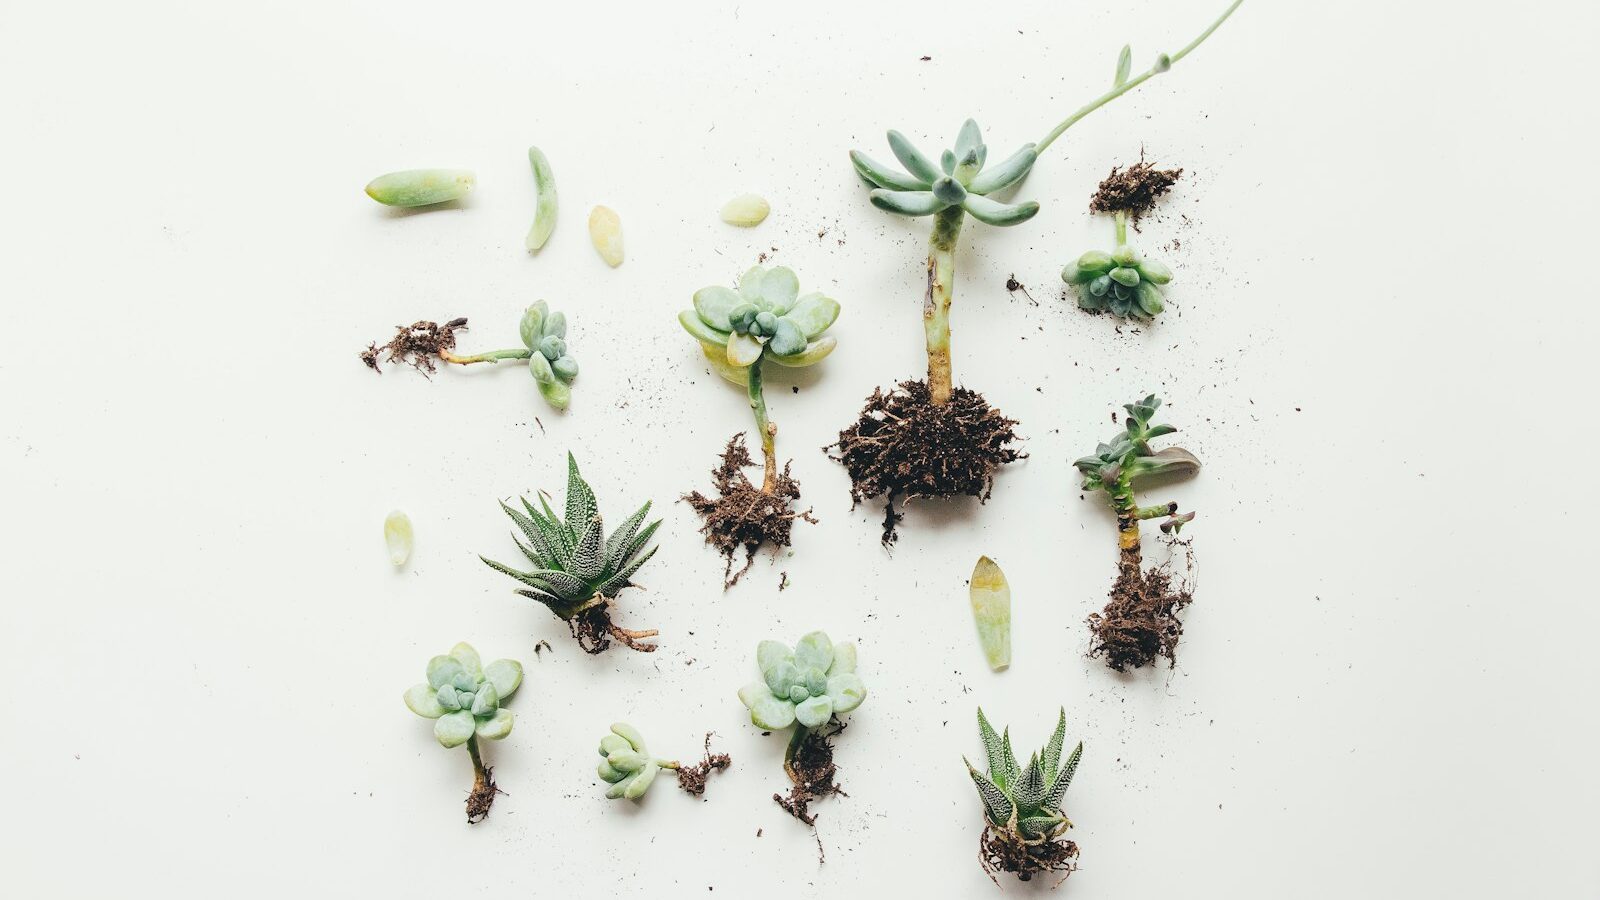
Succulents are some of the most forgiving plants to multiply, which is why a single fleshy rosette can quickly become a whole windowsill collection. Whether you want to rescue a leggy plant, fill out a sparse pot, or share babies with friends, there is a propagation method that fits. This guide walks through leaf propagation, stem cuttings, offsets (pups), and division step by step, plus the timing, light, and watering that make the difference between thriving babies and mushy failures.
Key takeaways
- Let cuttings/leaves callus before planting
- Leaf prop: twist off a whole clean leaf
- Stem cuttings revive leggy plants
- Offsets (pups) are the easiest method
- Bright indirect light + light misting for babies
As an Amazon Associate we earn from qualifying purchases.
Before you start, gather a few basics: a clean, sharp knife or scissors, a fast-draining medium, and shallow containers. A bag of gritty succulent and cactus soil and a propagation tray will cover nearly every method below. For a wider view of how propagation fits into overall plant maintenance, see our plant & flower care guide.
Why letting cuttings callus matters
Every method that involves removing a leaf or stem creates an open wound. If you plant that wound directly into damp soil, moisture wicks straight into the exposed tissue and the piece rots before it can grow roots. Callusing is the simple act of letting the cut end dry and seal over, forming a protective scab. This is the single most overlooked step, and skipping it is the most common reason succulent propagation fails.
- Set leaves or cuttings in a dry spot out of direct sun for 2 to 4 days (thicker stems may need up to a week).
- The end should look dry, slightly shrunken, and sealed before it touches soil.
- Do not place callusing pieces on wet paper towels or in water; they need air, not moisture.
- Warm, dry rooms callus faster than cool, humid ones.
Leaf propagation, step by step
Leaf propagation is satisfying and nearly free, but it works best with plump-leaved varieties such as Echeveria, Graptopetal, Sedum, and many Pachyphytum. Thin-leaved or stemmy types like aeoniums and most haworthias do not reliably grow from a single leaf, so save your effort for the right plants. You can browse suitable candidates in our roundup of types of succulents.
- Twist off a whole, clean leaf. Gently wiggle the leaf side to side until it pops off the stem with the base intact. A torn leaf that leaves part of itself behind will not grow, so a clean, complete removal is essential.
- Callus the leaf. Lay the leaves on a dry tray, out of direct sun, for 2 to 4 days until the cut end seals.
- Lay them on soil. Place the callused leaves flat on top of barely moist succulent soil, cut end facing the surface but not buried.
- Mist lightly. Spritz the soil every couple of days so it stays slightly damp, never soggy. Roots and a tiny rosette will emerge from the base over several weeks.
- Let the mother leaf fade. The original leaf feeds the new plant and will shrivel up. Only remove it once it has dried out completely on its own.
Expect patience here: it can take three to eight weeks to see roots, and not every leaf will take. A success rate of half is normal and good. Once a baby rosette is about an inch wide with its own roots, pot it into a small container such as a set of small terracotta pots.
Stem cuttings to revive a leggy plant
When a succulent stretches toward a window and grows a long, bare stem with leaves spaced far apart, it has become etiolated, or “leggy.” Stem cuttings let you behead that plant, restart the attractive rosette, and often coax the old stump to sprout new growth too. This method works for almost any succulent with a defined stem, including echeverias, sedums, crassulas, and trailing types like string of pearls.
- Behead the plant. Using a clean, sharp blade, cut the rosette off with about one to two inches of stem attached below it.
- Strip the lower leaves. Remove a few leaves from the bottom of the stem so there is bare stem to plant. Save those leaves for leaf propagation.
- Callus the cut. Let the cutting dry in a shaded spot for 3 to 7 days until the wound seals over.
- Plant it. Insert the bare stem into dry, fast-draining soil so the cutting stands upright. Wait a few days, then begin watering lightly.
- Keep the stump. Leave the original base in its pot; it will usually push out one or more new rosettes around the cut over the following weeks.
Trailing succulents are a special case. For step-by-step guidance on rooting strand cuttings of the most popular trailer, see our dedicated string of pearls care guide.
Offsets and pups, the easiest method
Many succulents produce baby plants, called offsets or pups, around the base of the mother. Because these pups often already have their own roots, separating them is the fastest and most reliable way to propagate. Hen-and-chicks (Sempervivum), aloes, haworthias, gasterias, and many agaves are generous pup producers.
- Find a well-developed pup. Choose an offset that is a reasonable size and ideally showing its own roots.
- Separate it gently. Wiggle the pup free by hand, or cut the connecting tissue close to the mother with a clean blade.
- Callus if needed. If you cut through tissue and the wound is wet, let it dry for a day or two. Pups with intact roots can be potted right away.
- Pot it up. Settle the pup into dry succulent soil at the same depth it sat before, then wait a few days before the first light watering.
Because pups arrive partly grown and often pre-rooted, they establish in a fraction of the time a leaf takes, making this the ideal method for beginners.
Division for clumping succulents
Division is closely related to pup separation but applies to succulents that grow as dense, multi-crowned clumps rather than a single rosette with babies attached. Aloes, haworthias, gasterias, and many sedums eventually crowd their pots, and dividing them refreshes the plant while giving you several new ones. It is best done when repotting.
- Unpot and shake off soil. Remove the whole plant and loosen the root ball so you can see the separate crowns.
- Tease the clump apart. Pull or cut the plant into sections, making sure each division keeps a fair share of roots.
- Trim and callus. Trim any damaged roots and let cut surfaces dry for a day or two if they are large or wet.
- Replant each division. Pot each section into fresh, dry succulent soil and resume normal watering after a few days.
Light, water, and timing for baby succulents
New propagations have no established root system, so their needs differ from mature plants. Two mistakes ruin most babies: too much direct sun, which scorches tender tissue, and too much water, which rots it. Get these right and the rest takes care of itself.
- Light: Give propagations bright, indirect light. Harsh midday sun can cook a leaf or fresh cutting; a bright windowsill out of direct beams, or a grow light, is ideal.
- Water: Mist or lightly water leaves and unrooted cuttings to keep the medium just barely moist. Once a piece has real roots, switch to soaking the soil and letting it dry fully between waterings.
- Timing: Spring and early summer are the best seasons; warmth and longer days drive the fastest rooting. Propagation slows dramatically in winter dormancy.
- Patience: Roots can take weeks. Resist the urge to tug on pieces to check progress, which only disturbs new growth.
Why some propagations fail
Even experienced growers lose some attempts, so do not be discouraged. Most failures trace back to a handful of avoidable causes.
- Skipped callusing: Planting a fresh, wet cut into damp soil is the number one cause of rot.
- Torn leaves: A leaf removed without its base cannot generate a new plant.
- Overwatering: Soggy medium drowns and rots delicate new roots faster than anything else.
- Too little light: Dim conditions cause weak, stretched, or stalled babies.
- Wrong method for the plant: Trying leaf propagation on a variety that only roots from cuttings wastes time.
The principles here carry over to leafy plants too. If you want to expand beyond succulents, our guide to how to propagate houseplants covers water rooting, division, and more for tropical foliage.
Frequently asked questions
How long does it take to propagate a succulent?
It varies by method. Offsets and pups establish in a couple of weeks because they often arrive pre-rooted. Stem cuttings usually root in two to four weeks. Leaf propagation is the slowest, taking three to eight weeks to show roots and a tiny rosette, and not every leaf will take.
Do I really need to let cuttings callus first?
Yes. Callusing lets the cut wound dry and seal so it does not absorb moisture and rot once planted. Skipping this step is the most common reason succulent propagation fails. Allow 2 to 4 days for leaves and 3 to 7 days for thicker stems.
Should I propagate succulents in water?
Most succulents propagate best in soil rather than water, because their fleshy tissue rots easily when submerged. Some growers suspend a cutting above water to encourage roots, but for reliable results, callus the piece and root it in dry, fast-draining succulent soil.
Why are my propagated leaves shriveling?
A little shriveling of the original mother leaf is normal; it feeds the new baby and should be left until it dries completely. If the new plant itself shrivels, it usually needs slightly more frequent misting or has not yet grown enough roots to take up water.
Which method is best for beginners?
Separating offsets or pups is the easiest and most reliable, since the babies are already partly grown and often have roots. Hen-and-chicks, aloes, and haworthias produce pups readily, making them perfect starter plants for learning propagation.