

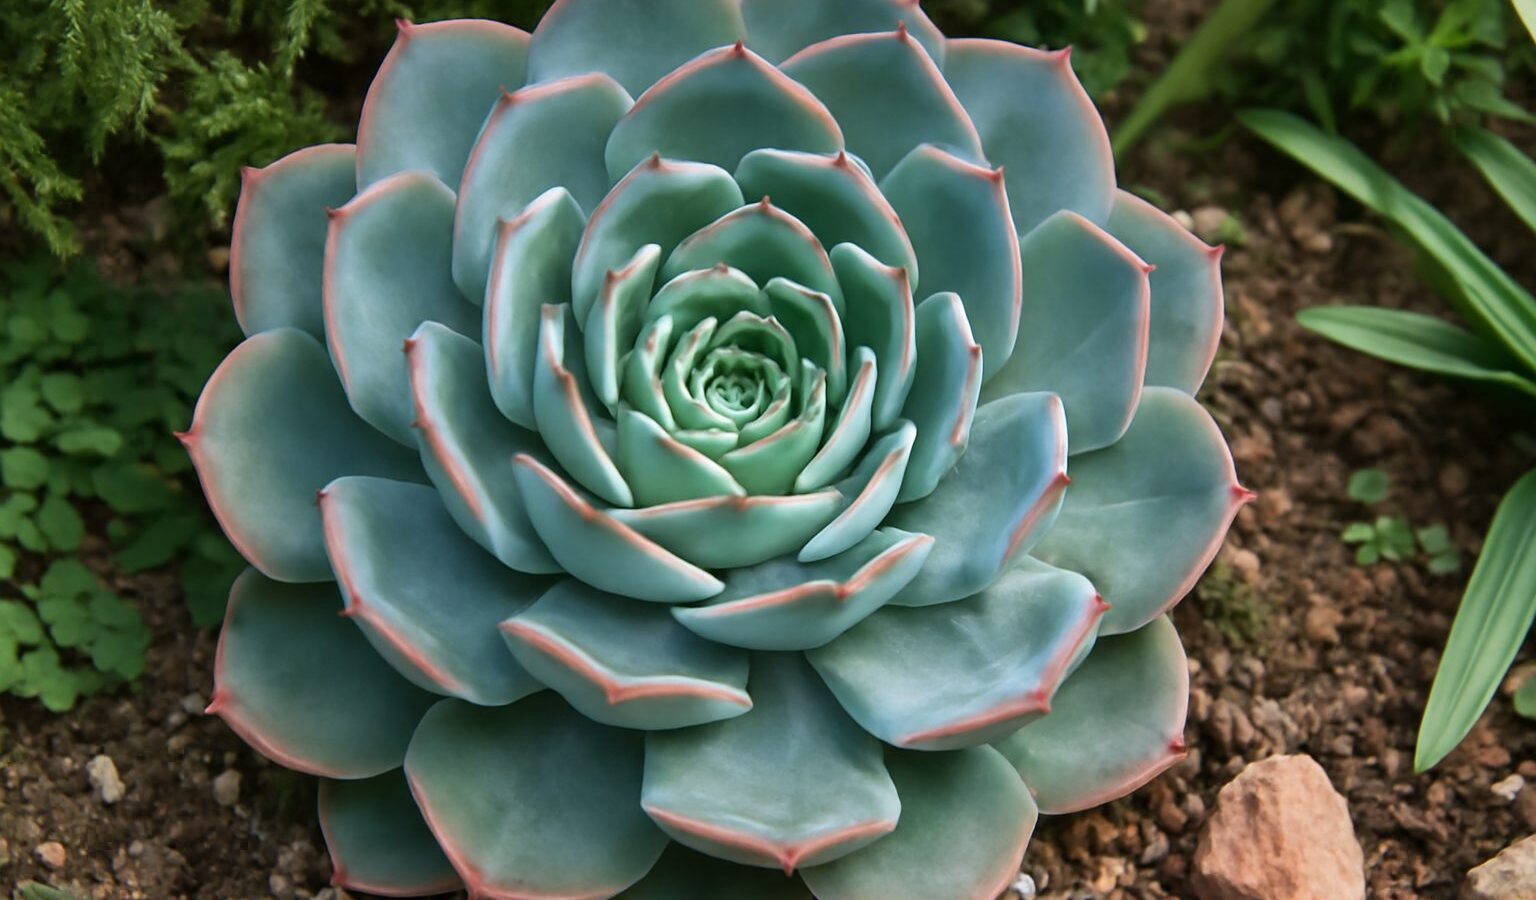
Echeverias are the rosette succulents you picture when someone says “succulent” — tidy, symmetrical whorls of fleshy leaves in chalky blues, dusty lavenders, soft pinks, and sunset oranges. They’re native to the semi-desert highlands of Mexico and Central America, and that origin tells you almost everything about keeping them happy: lots of light, fast-draining soil, and the discipline to let them dry out between drinks. They’re forgiving of neglect but quick to rot from kindness. Master the soak-and-dry watering rhythm, give them enough light to stay compact and colorful, and you’ll find echeverias are some of the most rewarding and easily multiplied plants you can grow. This guide covers light, soil, the right way to water, propagation by both offsets and leaves, and how to overwinter them outside their hardiness range.
Key Takeaways
- Echeverias need bright light — at least 4–6 hours of direct sun, or they stretch and lose color.
- Use a fast-draining, gritty mix (cactus soil cut with extra perlite or pumice) in a pot with a drainage hole.
- Water with the soak-and-dry method: drench, then let the soil dry completely before watering again.
- Propagate easily from offsets (“chicks”) and whole leaves — one plant becomes many.
- Hardy only to about zones 9–11; treat as houseplants or bring indoors before frost in colder climates.
- Water from the bottom or at soil level — water trapped in the rosette causes rot.
Light: The Make-or-Break Factor
Light is where most struggling echeverias go wrong. These are full-sun desert plants, and they need a lot of it — ideally 4 to 6 hours of direct sun per day. Outdoors in spring and fall they thrive in full sun; in the intense heat of midsummer, some afternoon shade prevents sunburn, especially in hot Southern climates. Indoors, the brightest south- or west-facing windowsill you have is the right spot.
The telltale sign of too little light is etiolation: the rosette stretches, the stem elongates, the leaves space out and point upward reaching for light, and the colors fade to plain green. A compact, tightly stacked rosette with rich color means the light is right. If your echeveria is stretching on a windowsill, it isn’t getting enough — add a grow light or move it outdoors for the warm months. Note that when moving any echeveria from indoors to full outdoor sun, acclimate it gradually over a couple of weeks to avoid scorching the leaves.
Soil and Pots
Drainage is the second pillar of echeveria care. Their roots must never sit in soggy soil. Use a gritty, fast-draining mix — a commercial cactus and succulent soil is a fine base, but most benefit from cutting it with extra inorganic grit: perlite, pumice, or coarse sand. A common recipe is roughly two parts cactus mix to one part perlite or pumice. The goal is soil that water rushes through and that dries out quickly afterward.
The pot matters just as much as the soil. Always use a container with a drainage hole — decorative pots with no drainage are the single fastest route to a rotted echeveria. Unglazed terracotta is ideal because it wicks moisture and breathes, letting the soil dry faster, which is exactly what these plants want. Match the pot size to the plant; an oversized pot holds too much wet soil around small roots.
Watering: The Soak-and-Dry Method
Overwatering kills more echeverias than anything else. The rule is simple: soak thoroughly, then let the soil dry out completely before watering again. When you water, drench until it runs out the drainage hole, then don’t touch it again until the soil is bone dry several inches down.
How often that works out to depends entirely on conditions — light, heat, pot material, season. In a hot, bright summer it might be once a week; in cool, dim winter it might be once every three or four weeks or less. Don’t water on a fixed schedule; water based on the soil. Stick a finger or a wooden skewer deep into the pot — if it comes out with damp soil clinging to it, wait.
Two techniques protect against rot. First, water at the soil level or from the bottom — set the pot in a tray of water for a few minutes to wick up moisture — rather than pouring over the plant. Water that pools in the center of the rosette sits against the tender new growth and causes crown rot. Second, watch the leaves: plump, firm leaves mean the plant is well-hydrated; slightly wrinkled, soft lower leaves signal it’s thirsty. Use the plant itself as your gauge. Mushy, translucent, yellowing leaves mean the opposite — overwatering — and you should stop immediately and let it dry out.
Feed sparingly. Echeverias are light feeders; a diluted, balanced or low-nitrogen fertilizer once a month during the spring and summer growing season is plenty. Don’t feed in winter dormancy.
Propagation: Turning One Plant Into Many
Half the fun of echeverias is how readily they multiply. There are two main methods, and both are easy.
By offsets (pups)
Mature echeverias produce small offsets — baby rosettes, sometimes called pups or chicks — around the base of the parent. This is the simplest method. Gently remove a pup, twisting or cutting it free with as much root as you can keep. Let the cut end callus over for a day or two in a dry, shaded spot — this dry-healing step prevents rot. Then plant the offset in gritty mix, wait a few days, and begin light watering once it shows signs of rooting. Offsets establish quickly because they often already have roots.
By leaves
Echeverias also propagate readily from individual leaves — a near-magical process. Choose a plump, healthy leaf from low on the plant. Gently twist it off so the entire base comes away cleanly; a torn leaf that leaves part of itself on the stem usually won’t root, so a clean break is essential. Lay the leaves on top of dry, gritty soil in a bright spot out of harsh direct sun, and let the ends callus for a day or two.
Then mist the soil lightly every few days. Within a couple of weeks, tiny pink roots and a miniature rosette emerge from the cut end. As the baby grows, the original leaf shrivels and feeds it — leave it attached until it falls away on its own. Once the new rosette has roots, nestle it into the soil and treat it as a young plant. Not every leaf takes, so start more than you need; this is normal.
Both methods work best in the warm, bright months of spring and summer. If you enjoy multiplying succulents, our guide on growing plants and flowers has more propagation ideas, and you can put your new plants to work in a small-space container arrangement.
Overwintering Echeverias
Echeverias are tender — hardy only to roughly USDA zones 9 through 11. They cannot survive frost; freezing temperatures rupture their water-filled cells and turn the leaves to mush. If you live where it freezes, you have two paths.
- Grow them in pots and move them indoors before the first fall frost. Place them in your brightest window or under a grow light, and reduce watering dramatically — they go semi-dormant in winter’s low light and cool temperatures, and wet soil in those conditions is a death sentence.
- Treat them as houseplants year-round in cold climates, simply summering them outdoors when nights stay reliably above about 50°F.
In winter, expect slower growth, less color, and possibly some leggy stretching from short days — that’s normal. Cut watering back to roughly once a month or less, keep them as bright and as cool-but-frost-free as you can, and hold off on fertilizer. Come spring, increase light and water and they’ll perk right back up. In frost-free zones 9–11, echeverias can live outdoors year-round, but even there they appreciate protection from cold winter rain that can pool and rot the rosettes.
Common Problems
Mushy, translucent leaves or a collapsing center means rot from overwatering or water sitting in the rosette — the most common killer. Stop watering, move to bright airflow, and if the crown is gone, salvage healthy leaves for propagation. Stretched, pale, leaning growth is etiolation from too little light; move to a sunnier spot. Wrinkled, soft leaves mean underwatering — give it a good soak. Brown, scorched patches after a move to full sun are sunburn; acclimate gradually next time. As for pests, mealybugs (white cottony tufts in the leaf joints) are the usual culprit — dab them with a cotton swab dipped in rubbing alcohol, and check new plants before adding them to a collection.
Frequently Asked Questions
How often should I water an echeveria?
Only when the soil has dried out completely — there’s no fixed schedule. In hot, bright summer that might be weekly; in cool winter it could be every few weeks. Always check the soil first, and water deeply when you do, letting it drain fully.
Why is my echeveria stretching and turning green?
That’s etiolation, caused by insufficient light. The plant elongates and loses color reaching for the sun. Move it to a spot with at least 4–6 hours of direct sun or add a grow light. You can also behead a stretched plant and re-root the rosette for a fresh, compact start.
Can I grow echeveria from a single leaf?
Yes. Gently twist off a healthy leaf so the entire base comes away clean, let it callus a day or two, then lay it on gritty soil in bright indirect light and mist occasionally. A tiny rosette and roots form in a few weeks. Not every leaf succeeds, so start several.
Can echeverias survive winter outdoors?
Only in frost-free zones 9–11. They’re tender and a freeze will kill them. In colder climates, grow them in pots and bring them indoors to a bright window before the first frost, watering sparingly through winter.
Why are the bottom leaves dying?
If the lowest leaves slowly dry, shrivel, and drop while the rest of the plant looks healthy, that’s normal aging. If lower leaves turn mushy, yellow, and translucent, that’s overwatering rot — let the soil dry out and ease off the watering.
Give an echeveria bright light, gritty soil with a drainage hole, and the patience to let it dry between soakings, and it will reward you with plump, colorful rosettes — plus an endless supply of pups and leaves to turn one plant into a whole windowsill collection.