

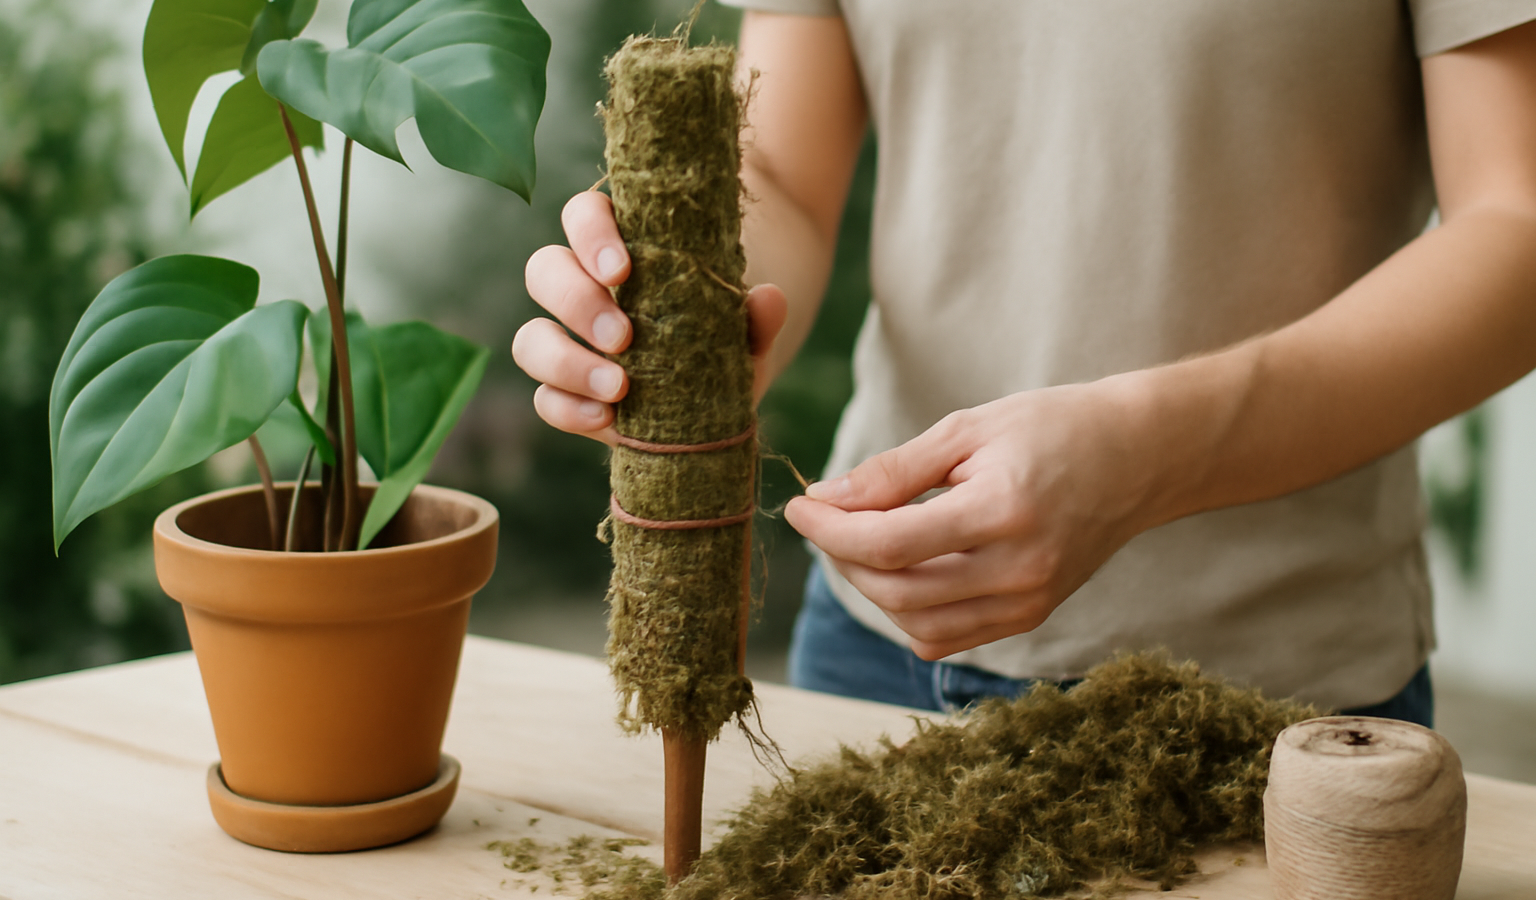
A moss pole gives climbing houseplants what they crave in the wild: a damp, textured surface to grip and root into as they ascend. Aroids like monstera, philodendron, pothos, and syngonium are natural climbers, and when their aerial roots latch onto a moist support, the plant “matures”—leaves get larger, fenestrations (those signature splits and holes) develop, and growth speeds up dramatically. Store-bought poles work, but they are often short, made of loosely packed coir that dries instantly, and impossible to extend. Building your own is cheap, takes about half an hour, and lets you make a pole the right height and moisture-retention for your plant. This guide walks through materials, a step-by-step build for both sphagnum and coir poles, how to attach your plant, and the part most people get wrong—keeping the pole moist.
Key Takeaways
- A moist moss pole triggers bigger leaves and fenestrations because aerial roots root into it—a dry pole does almost nothing.
- Sphagnum moss holds far more water than coir; coir is tidier and cheaper but dries fast and needs more frequent misting.
- Core materials: a central support (PVC, bamboo, or wood), sphagnum or coir, and fishing line or floral wire to bind it.
- Attach the plant loosely with soft ties so aerial roots face the pole; redirect, don’t force, the growing tip.
- Keep the pole damp by misting daily, top-watering, or building in a watering channel—dry poles are the #1 reason moss poles fail.
Why Climbing Plants Need a Moss Pole
In their native rainforests, aroids start life on the forest floor and climb tree trunks toward the light. Their aerial roots dig into damp bark and moss, anchoring the plant and absorbing moisture and nutrients. This vertical climb is the signal that tells the plant to shift from its juvenile form—small, entire leaves—to its mature form with the dramatic splits people grow monsteras for in the first place. A moss pole recreates that climbing surface indoors. The key word is moss: a plain stake gives support, but only a moist, rootable surface persuades aerial roots to attach and trigger that mature growth. Get the moisture right and a moss pole can transform a floppy, small-leaved plant into an upright specimen within a season or two.
Materials You’ll Need
The Central Support
You need a rigid spine to wrap the moss around. Good options include a length of PVC pipe (1/2 to 3/4 inch, lightweight and rot-proof), a wooden dowel or garden stake, or a thick bamboo cane. PVC has a hidden advantage: you can drill holes along it and turn it into a self-watering channel later. Cut it 8–12 inches longer than the height you want above the soil, so several inches can be buried securely in the pot. For tall plants, plan to extend the pole upward in stages as the plant grows rather than building one giant pole at the start.
The Moss or Coir
Sphagnum moss is the gold standard. It holds many times its weight in water, stays damp for days, and aerial roots root into it eagerly. Buy a bag of long-fiber sphagnum, soak it in water for 10–15 minutes, and wring out the excess before use. Coir (coconut fiber) is cheaper, less messy, and more sustainable, sold as sheets, mats, or loose fiber. The trade-off is that coir dries much faster and holds less water, so a coir pole needs more frequent misting. Many growers split the difference—a coir-wrapped pole stuffed with a sphagnum core—to get the tidiness of coir with the water retention of moss.
Binding and Extras
- Fishing line (clear, strong, invisible once mossed) or thin floral/coated wire to bind the moss to the pole.
- A plastic mesh tube or hardware cloth (optional) to create a “cage” you pack moss into—great for thick, even poles.
- Soft plant ties, garden velcro, or strips of pantyhose for attaching the plant—never bare wire against the stem.
- Scissors, and a drill if you’re making a self-watering PVC pole.
- A spray bottle for misting, plus gloves (sphagnum can carry irritants and you should wash up after handling it).
How to Build a Sphagnum Moss Pole: Step by Step
Step 1: Soak the Moss
Submerge a generous handful of long-fiber sphagnum in a bowl or bucket of water for 10–15 minutes until it’s fully saturated and springy. Squeeze out the dripping excess so it’s damp, not sopping—you want it pliable enough to mold around the pole but not so wet it won’t pack.
Step 2: Anchor Your Binding
Tie one end of your fishing line or wire securely near the bottom of the support, a few inches up from the end that will be buried. This is your starting anchor; you’ll wrap upward from here.
Step 3: Pack and Wrap
Press a layer of damp moss firmly against the pole—aim for a consistent thickness of about 1 to 1.5 inches all the way around. Hold it in place with one hand while you spiral the fishing line up and around with the other, pulling snug every half-inch or so to compress the moss. Work upward in sections, adding moss as you go, keeping the diameter even. Firm packing matters: a loose pole dries out fast and aerial roots struggle to grip it. Continue until you’ve covered the full intended height.
Step 4: Tie Off and Tidy
At the top, wrap the line several times and tie it off securely, tucking the end into the moss. Run your hands up the pole to even out any thin or bulging spots, adding moss and a few extra wraps of line where needed. The finished pole should feel firm and uniform, like a fuzzy green broom handle.
Step 5 (Mesh-Tube Alternative)
For a thicker, more uniform pole, roll plastic mesh or hardware cloth into a tube around the support, secure the seam with wire or zip ties, then pack damp sphagnum down into the tube. The mesh holds everything in place, makes refilling moss from the top easy as it compacts, and gives aerial roots gaps to push through. This method is more work upfront but produces a sturdier, longer-lasting pole.
Building a Coir Pole Instead
If you prefer coir, the process is similar but cleaner. Wrap a pre-cut coir sheet or mat tightly around your support and bind it with fishing line, overlapping the edges so there are no bare gaps. For loose coir fiber, use the mesh-tube method above. Because coir sheds water quickly, soak it before wrapping and plan on misting more often. To dramatically improve water retention, stuff the center of a mesh tube with a sphagnum core and wrap coir on the outside—you get a neat coir surface with a moisture reservoir inside.
How to Attach Your Plant to the Pole
Insert the finished pole into the pot, pushing it 3–4 inches into the soil and ideally against the inside wall for stability—do this carefully to avoid slicing through major roots. If you’re potting up a new plant, set the pole in first, then plant around it. Position the pole so the plant’s aerial roots and growth tips face toward it.
Now gently guide the main stem against the pole and secure it with soft ties at intervals—every node or every few inches. Use plant velcro, soft garden twine, or strips of fabric; never tie bare wire directly against the stem, which can cut into it as the plant thickens. Keep ties loose enough to slide a finger under. Where you can, point the aerial roots into the damp moss; some growers tuck them just under the surface or pin them with a bent paperclip to encourage them to root in. Don’t force a stiff stem—if it resists, tie it loosely and let new growth do the climbing. As the plant grows, add ties higher up and redirect the growing tip back toward the pole whenever it leans away. For more on training vining plants to grow upright instead of sprawling, our guide on why philodendrons get leggy covers the light and support fixes that work hand-in-hand with a moss pole.
Keeping the Pole Moist (The Part That Matters Most)
A dry moss pole is just an ugly stake. Aerial roots will only attach and root into a surface that stays damp, so consistent moisture is what makes the whole project work. There are three reliable ways to keep a pole wet:
- Mist daily. Spray the whole pole with a spray bottle once or twice a day. Simple, but easy to forget, and the moisture is shallow.
- Top-water the pole. Slowly pour water down the top of the pole so it soaks through the moss like a wick. More thorough than misting and reaches deeper.
- Build a self-watering channel. If you used PVC, cap the bottom, drill small holes along its length before wrapping, and fill the tube with water from the top. The water seeps out through the holes and keeps the moss damp from the inside for days—the lowest-maintenance option by far.
In dry indoor air or during winter heating, you’ll need to water the pole more often—check it daily until you learn its rhythm. The moss should feel like a wrung-out sponge, never bone dry and never dripping. Because these plants love humidity as well as a moist pole, pairing them with the moisture-friendly techniques in our small-space indoor growing guide helps the whole setup thrive, especially if you’re packing plants into a compact apartment.
Extending and Maintaining the Pole Over Time
Climbing aroids will eventually outgrow any pole. Rather than building a precarious six-foot tower from the start, plan to extend. With the mesh-tube method you can simply add a second section on top, lashing the supports together with sturdy wire and packing fresh moss into the join. Top up compacted moss every few months, since sphagnum settles and shrinks as it ages. If aerial roots have firmly grown into the pole, leave them—peeling an attached plant off its pole tears those roots and stresses the plant, so when you repot, move the pole and plant together as one unit. With occasional moss top-ups and steady moisture, a well-built pole supports a plant for years and just keeps getting more impressive as the leaves mature.
Frequently Asked Questions
Sphagnum moss or coir—which is better for a moss pole?
Sphagnum moss holds far more water and stays damp longer, so aerial roots attach more readily—it’s the better choice for triggering mature growth. Coir is cheaper, tidier, and more sustainable, but dries out fast and needs more frequent misting. The best of both is a coir-wrapped pole with a sphagnum core stuffed inside a mesh tube.
How do I keep my moss pole from drying out?
Mist it once or twice a day, top-water it by pouring water down from the top so the moss wicks it through, or build a self-watering PVC core with drilled holes that you fill from the top. The moss should always feel like a wrung-out sponge. In dry winter air, check it daily—a dry pole won’t trigger root attachment.
Will a moss pole really give my monstera bigger leaves?
Yes, when it stays moist. Climbing is the signal that tells aroids to shift from juvenile to mature growth, with larger leaves and fenestrations. As aerial roots root into a damp pole, the plant climbs and matures faster than it would sprawling. A dry pole or a plain stake gives support but won’t reliably trigger that change.
How do I attach my plant without damaging it?
Use soft ties—plant velcro, soft twine, or strips of fabric—looped loosely enough to slide a finger under, secured every node or few inches. Never tie bare wire against the stem, as it cuts in as the plant thickens. Point aerial roots toward the damp moss and tuck or pin them in, but never force a stiff stem; let new growth climb instead.
Can I add a moss pole to an established plant?
Yes. Insert the pole carefully into the pot a few inches deep, working it down beside the root ball to avoid slicing major roots, then gently tie the existing stems against it with soft ties. The plant won’t immediately latch on, but as new growth emerges it will climb. If the root ball is dense, it’s easiest to add the pole when you next repot.