

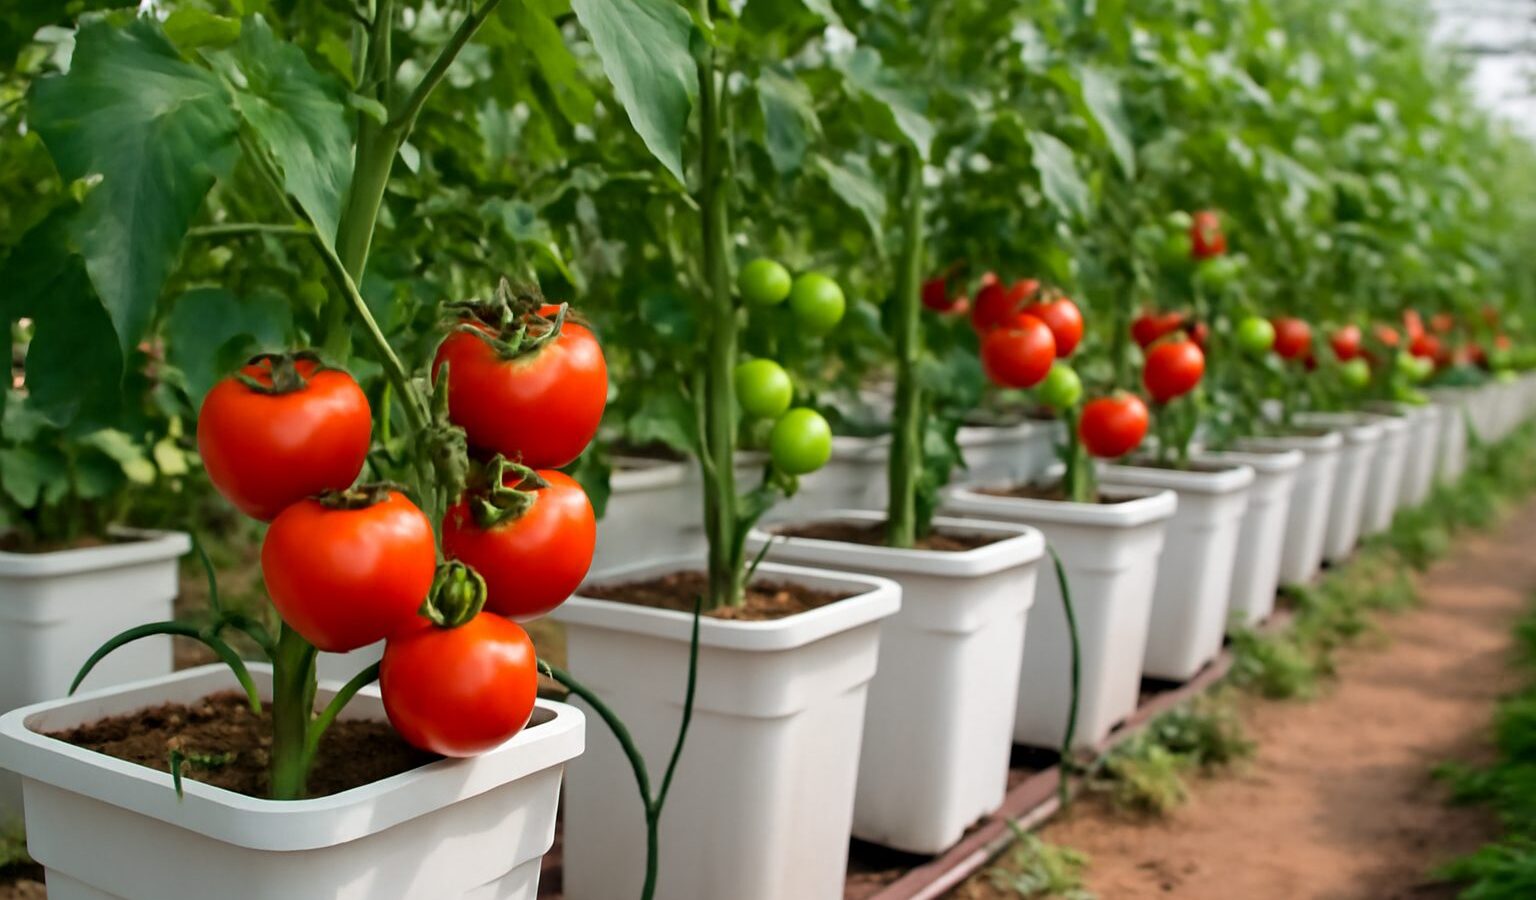
Dutch bucket hydroponics, also called the Bato bucket system, is the most practical way to grow large fruiting crops like tomatoes, peppers, and cucumbers without soil. The concept is simple: each plant lives in its own bucket filled with an inert media, and nutrient solution is pumped to the top, trickles down through the roots, drains out a special siphon elbow, and runs back to a shared reservoir to be used again. Because every bucket connects to one feed line and one drain line, you can run two plants or twenty off a single pump and reservoir, which is exactly why it scales so well in a greenhouse or a sunny balcony. This guide covers every component, how to plumb and start the system, the media and nutrients that work, and the crops that thrive, plus the troubleshooting that keeps a Dutch bucket setup running clean.
Key Takeaways
- A Dutch bucket system feeds many individual buckets from one shared reservoir and pump, making it ideal for tall, heavy-fruiting crops grown vertically up a trellis.
- The signature part is the elbow siphon (the Bato fitting), which keeps about 1-2 inches of solution in the bucket bottom while draining the rest, giving roots a constant reserve.
- Use an inert, free-draining media, perlite, expanded clay (hydroton), or a perlite/coco mix, not soil.
- Run feed cycles on a timer (several short waterings a day) and recirculate the runoff; check the reservoir’s nutrient strength (EC/PPM) and pH (5.5-6.5) regularly.
- Best crops are large fruiting and vining types: indeterminate tomatoes, peppers, cucumbers, eggplant, and pole beans, not quick leafy greens, which suit other systems better.
- Space buckets so trellised plants get airflow and light, and keep the reservoir cool, dark, and topped up to prevent algae and root rot.
How a Dutch Bucket System Works
A Dutch bucket setup is a recirculating drip system broken into modular units. Nutrient solution sits in a reservoir below or beside the buckets. A submersible pump pushes solution up through a main feed line, and small drip emitters tap off that line into the top of each bucket. The solution percolates down through the media and roots, and instead of pooling, it exits through an elbow siphon set into the bucket wall, which drains into a shared return line that carries everything back to the reservoir. The pump runs on a timer in short, frequent bursts, so the roots get cycles of fresh, oxygenated solution and then air.
The clever part is the elbow siphon. It’s an L-shaped fitting with an inner standpipe set an inch or two above the bucket floor. Because the drain intake sits above the floor, a small reservoir of solution always remains in the bottom of each bucket, a built-in buffer that keeps roots from drying out if the pump skips a cycle, while the standpipe carries off the excess so the media never waterlogs. That self-regulating reserve is what makes the system forgiving and is why it’s the go-to for big plants that drink heavily.
Components You’ll Need
The parts list is short and most of it is plumbing. Gather these before you start.
- Buckets: 3- to 5-gallon containers, one per plant. You can buy purpose-made Dutch buckets (often with a built-in raised drain channel) or adapt standard 5-gallon buckets. Black or opaque buckets keep light off the roots and prevent algae.
- Elbow siphons (Bato fittings): the L-shaped drain-and-standpipe assembly for each bucket. This is the one specialty part; the rest is generic.
- Reservoir: a tote or tank sized to your plant count, roughly 1-2 gallons of solution capacity per bucket as a starting point. Opaque to block light.
- Submersible pump: sized to lift solution to your highest bucket and feed all emitters; a small fountain or pond pump works for a few buckets.
- Plumbing: a feed manifold (often 1/2-inch poly tubing) with 1/4-inch drip lines and emitters or stakes to each bucket, plus a larger-diameter drain line (1- to 1.5-inch PVC) sloped back to the reservoir.
- Timer: a repeat-cycle or digital timer to run the pump in short intervals.
- Growing media: perlite, expanded clay pellets (hydroton), or a perlite/coco coir blend.
- Trellis support: for vining crops, string or stakes anchored overhead, since these plants get tall and heavy.
- Meters and nutrients: an EC/PPM meter, a pH meter, pH up/down solution, and a complete hydroponic nutrient (often a two- or three-part formula).
Setting It Up Step by Step
Build the system in this order so each part has something to connect to.
- 1. Position the buckets. Set them in a row on a slight slope, or on a bench, so the drains can fall toward the reservoir. Leave 18-24 inches between buckets for trellised plants to spread and breathe.
- 2. Install the elbow siphons. Fit one drain elbow into each bucket so the standpipe sits 1-2 inches above the bucket floor. This sets the depth of the retained reserve.
- 3. Run the drain line. Connect every bucket’s drain to a common return pipe, sloped continuously back toward the reservoir so gravity carries the runoff home. Use a pipe diameter generous enough that it never backs up.
- 4. Add media and plants. Fill each bucket with rinsed perlite or hydroton and transplant a seedling, settling its roots into the media. Starting from a rockwool or coco plug makes the transplant clean.
- 5. Build the feed line. Run the main poly tube from the pump along the bucket tops, then tee off a small dripper or stake into each bucket near the plant base.
- 6. Fill and mix the reservoir. Add water, then nutrients to your target strength, and adjust pH. Place the pump inside and plug it into the timer.
- 7. Test the cycle. Run the pump and watch each bucket fill, drip through, and drain. Confirm the siphons hold the right reserve and the return line flows freely with no leaks.
Choosing Growing Media
The media’s only jobs are to support the plant and hold the right balance of water and air around the roots, it provides no nutrition. Perlite is cheap, lightweight, and drains fast with great aeration, the most popular choice, though it can float and blow around when dry. Expanded clay pellets (hydroton) are reusable, rinse clean, and offer excellent aeration with a bit more weight to anchor plants, but cost more. A perlite-and-coco-coir blend (commonly 50/50) adds moisture retention, which can buffer the system between cycles, at the cost of slightly less aeration. Whatever you pick, rinse it well before use to wash out dust and fines, and avoid anything that compacts or holds too much water, which suffocates roots.
Nutrients, pH, and the Feed Schedule
Because the media is inert, the nutrient solution is the plant’s entire diet, so getting it right is the difference between a thriving system and a stalled one. Mix a complete hydroponic nutrient to the strength your crop wants, measured as EC (electrical conductivity) or PPM with a meter. Fruiting crops generally run a moderate-to-strong solution; seedlings and young transplants want it weaker, so build up strength as plants mature and start fruiting. Always follow your specific nutrient brand’s feed chart as the baseline, then adjust by watching the plants.
Keep the pH between 5.5 and 6.5, the window where most nutrients stay available to the roots. Outside that band, plants can’t absorb certain elements even when they’re present in solution, producing deficiency symptoms that fake you out. Test pH and EC every day or two with your meters and correct with pH up/down as needed. For the feed schedule, run the pump in several short cycles a day rather than one long soak, frequent brief waterings keep solution fresh and oxygenated while the elbow siphon’s reserve carries the roots between cycles. Top up the reservoir with plain pH-balanced water as plants drink it down (the solution concentrates as water evaporates), and fully drain and remix the reservoir every week or two to reset the nutrient balance. Keep the reservoir cool and fully shaded from light to discourage algae and protect the roots; warm, lit solution is the fast track to root rot. These nutrient principles carry across to other soilless growing methods like aeroponics.
Best Crops for Dutch Buckets
Dutch buckets shine with large, long-lived, fruiting and vining plants, the ones that would overwhelm a shallow system. The standouts:
- Indeterminate tomatoes are the flagship crop. They grow for months, climb 8 feet or more up a string trellis, and crop heavily, exactly the kind of heavy, thirsty plant the bucket’s reserve was made for.
- Peppers (sweet and hot) love the steady feed and produce abundantly over a long season.
- Cucumbers grow fast and yield prolifically when trellised vertically up the bucket strings.
- Eggplant is another large, fruit-heavy plant that thrives on the consistent moisture and nutrition.
- Pole beans and squash work well too, anything large and vining that benefits from a big root zone and trellis support.
What Dutch buckets are not ideal for is quick, shallow-rooted leafy greens like lettuce, spinach, and herbs, those are more efficiently grown in a thin-film or float system. The bucket’s deep media and built-in reserve are wasted on a crop that’s harvested in weeks. Reserve your buckets for the big producers and you’ll get the most out of the design. Because the plants grow tall, plan your overhead trellis and spacing from the start so each one gets full light and good airflow; crowded, poorly ventilated plants invite disease. A Dutch bucket setup fits beautifully into a greenhouse or onto a sunny patio as part of a broader small-space and container growing strategy, turning a few square feet into a productive, soil-free vegetable garden.
Common Problems and Fixes
A few issues come up again and again. Clogged drippers starve a bucket while its neighbors thrive, check each emitter when one plant lags, and flush the lines periodically. Root rot shows as brown, slimy roots and wilting despite moisture; it’s caused by warm, oxygen-starved solution, so cool and shade the reservoir, add an air stone, and don’t overwater. Algae (green slime on media or tubing) means light is reaching the solution, switch to opaque buckets, reservoirs, and lines. pH or EC drift causes mysterious deficiencies and stalled growth; the fix is simply testing more often and remixing the reservoir on schedule. Drain backups usually mean too small or insufficiently sloped a return line, so size the drain generously and keep it falling continuously. Catch these early and a Dutch bucket system runs reliably for an entire season.
Frequently Asked Questions
What is a Dutch bucket system best for growing?
Dutch buckets excel at large, long-season fruiting and vining crops: indeterminate tomatoes, peppers, cucumbers, eggplant, and pole beans. These heavy, thirsty plants benefit from the bucket’s generous media volume, built-in solution reserve, and easy vertical trellising. The system is overkill for quick leafy greens like lettuce and herbs, which grow more efficiently in shallow thin-film or float setups.
What media do you use in a Dutch bucket?
Use an inert, free-draining media, never soil. Perlite is the cheapest and most popular for its excellent aeration; expanded clay pellets (hydroton) are reusable and rinse clean; and a perlite/coco coir blend adds moisture retention to buffer the system between feed cycles. Whatever you choose, rinse it thoroughly before use to remove dust and fines that can clog drains.
How often should the pump run in a Dutch bucket system?
Run the pump on a repeat-cycle timer in several short intervals throughout the day rather than one long soak. Frequent brief waterings keep the nutrient solution fresh and oxygenated, while the elbow siphon’s retained reserve of 1-2 inches in each bucket carries the roots through the off periods. Exact timing depends on crop size, media, and temperature, so watch the plants and adjust.
What pH and nutrient strength should a Dutch bucket run at?
Keep pH between 5.5 and 6.5, the range where nutrients stay available to the roots, and correct drift with pH up/down. Set nutrient strength (EC/PPM) to your crop’s needs using a complete hydroponic formula, weaker for young transplants and stronger as plants mature and fruit, following your nutrient brand’s feed chart as a baseline. Test pH and EC every day or two and remix the reservoir every week or two.
Why is my Dutch bucket system getting root rot?
Root rot, brown slimy roots and wilting despite moisture, comes from warm, oxygen-poor nutrient solution, often made worse by light reaching the reservoir. Fix it by keeping the reservoir cool and fully shaded, adding an air stone to oxygenate the solution, using opaque buckets and lines to block light, and avoiding constant saturation. Frequent short feed cycles with air gaps in between give roots the oxygen they need.