

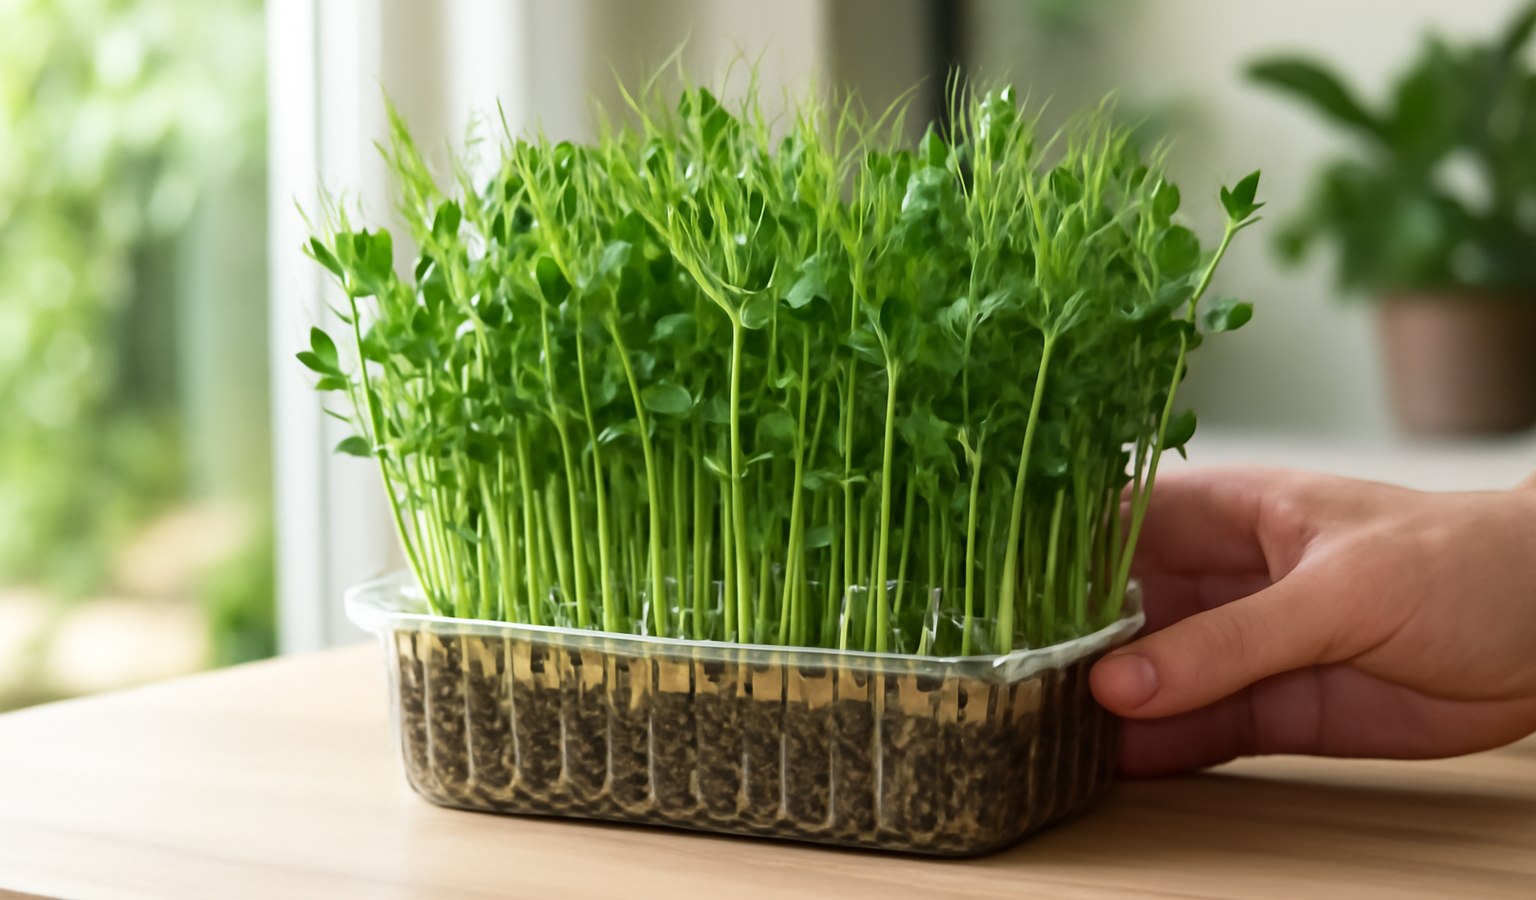
Pea shoots are one of the most forgiving and rewarding indoor crops you can grow, and once you understand the rhythm of soaking, sowing, and harvesting, you will find yourself starting a new tray almost every week. They go from dry seed to a dense thicket of sweet, crisp greens in under two weeks, they need nothing more exotic than a shallow tray and a bright windowsill, and the seed costs pennies because you can use ordinary whole dried peas. This guide walks through exactly how to grow pea shoots indoors, with the timing, varieties, and troubleshooting that separate a lush tray from a moldy disappointment.
Key Takeaways
- Soak whole dried peas for 8 to 12 hours before sowing them shoulder to shoulder in a shallow tray.
- Use untreated field, dun, speckled, or marrowfat peas; cheap dried peas from the grocery store often work fine.
- Blackout the tray for 2 to 3 days under an inverted second tray to encourage tall, even, well-rooted growth.
- Expect germination in 2 to 3 days and a harvest at 3 to 5 inches in roughly 10 to 14 days.
- Cut just above the lowest node for a possible second flush, then compost the spent mat.
- Water from the bottom and keep airflow moving to prevent mold and damping off.
What Pea Shoots Actually Are
Pea shoots are the tender young growth of pea plants: the top few inches of stem, the delicate leaves, and the curling tendrils that peas send out to climb. Grown densely indoors, they form a uniform carpet of greens that you snip wholesale rather than picking pod by pod. The flavor is unmistakable and lovely, a clean, sweet, fresh-pea taste with a juicy snap, far brighter than anything you can buy bagged at the supermarket.
People often confuse pea shoots with pea microgreens, and the two overlap, but there is a useful distinction. Pea microgreens are harvested very young and short, often at the first true leaf stage around 2 inches, prized for tenderness. Pea shoots are simply allowed to grow a bit taller, to roughly 3 to 5 inches, so you get more stem, more tendril, and a little more substance. The other practical difference is regrowth: because shoots are taller and you can cut above a lower node, a tray of shoots will frequently push out a second, smaller harvest, whereas the shortest microgreens are usually a single cut.
Choosing the Best Seed
Here is the part that delights frugal growers: you do not need specialty seed. Whole dried peas, the kind sold for soup and cooking, germinate beautifully and grow into excellent shoots. The only firm rule is that the seed must be untreated. Avoid garden seed packets that have been coated with fungicide or other chemicals, usually dyed bright pink or blue, because you are eating these plants whole and very young.
The peas that work best are the smooth, starchy field and forage types. Speckled peas and dun peas are classic shoot varieties, vigorous and reliable. Marrowfat peas, the large green peas used for mushy peas, are widely available in bulk and produce thick, robust shoots. Ordinary whole green or yellow split-free dried peas from the grocery store can also work, though germination is sometimes a touch less even because you cannot be sure how old or how well stored they are.
If you want guaranteed performance, buy seed explicitly sold for sprouting or shoots from a microgreen supplier. It is tested for germination rate, sold untreated, and often cleaner. For your first few trays, though, a bag of cheap dried peas is a perfectly honest way to learn the technique without spending much.
Quick Variety Comparison
- Speckled or dun peas: fast, vigorous, traditional choice for shoots, strong tendrils.
- Marrowfat peas: large seed, thick stems, generous yield, easy to source in bulk.
- Whole green or yellow dried peas: cheapest, widely available, germination can be slightly uneven.
- Sugar snap or snow pea seed: sweeter, more tender, but pricier and usually sold treated unless labeled untreated.
Supplies You Will Need
The gear list is short and most of it you may already own. A shallow tray is the foundation. Standard 10-by-20-inch nursery trays are ideal, and you want at least one with drainage holes plus a second solid tray to catch water and double as a blackout cover. Any shallow container works in a pinch, from a takeout clamshell to a baking dish, as long as it is only an inch or two deep.
For growing medium, a fine seed-starting mix or coconut coir both perform well. Coir is clean, holds moisture evenly, and is easy to compost afterward. If you want the fastest, tidiest crop and only one cut, you can even skip soil entirely and grow on a tray lined with damp paper towel; the shoots will not regrow well that way, but it is quick and mess-free. Round out the kit with a spray bottle for misting, and a light source, whether that is a bright window or a simple LED grow light.
- Shallow tray (10×20 with holes) plus a solid bottom tray.
- Seed-starting mix or coconut coir, or paper towel for a soilless quick crop.
- Whole dried untreated peas, roughly 1 to 1.5 cups per standard tray.
- Spray bottle and a second tray for blackout and optional weight.
- Bright window or grow light.
Step One: Soak the Seeds
Measure out about a cup to a cup and a half of dried peas for a standard tray, enough to cover the surface densely once they swell. Rinse them, then cover with several inches of cool water and let them soak for 8 to 12 hours, or simply overnight. The peas will roughly double in size and drink up a surprising amount of water, so use plenty. By morning they should be plump and smooth, and some will have a tiny pale root nub just beginning to emerge, which is exactly what you want.
Step Two: Drain and Optionally Pre-Sprout
Drain the soaked peas in a colander and give them a quick rinse. At this point you can sow immediately, which is what most growers do. If you want to nudge germination along and get a more uniform tray, you can pre-sprout for a single day: leave the drained peas in a colander or jar at room temperature, rinsing once or twice, until you see little white root tips on most of them. Do not let them sit longer than a day or the roots tangle and break during sowing.
Step Three: Sow Densely
Fill your tray with about 1 to 2 inches of moist growing medium and level it gently without packing it down hard. Then scatter the peas across the surface so they sit shoulder to shoulder, nearly touching, in a single even layer. Density is the secret to a good shoot tray. Crowded peas grow upward together, supporting each other into tall, straight stems rather than sprawling. Do not bury them; they sit on top, and you press them lightly into the surface so they make contact. A light dusting of mix over the top is optional and helps anchor them, but it is not required.
Step Four: Blackout for Two to Three Days
Cover the freshly sown tray to put it in darkness, ideally by inverting a second tray over the top. Some growers add a light weight, such as a brick or a jug of water on the upper tray, for the first day or two. The combination of darkness and gentle pressure does two things: it makes the shoots reach and stretch tall and even as they search for light, and the resistance encourages them to anchor strong roots into the medium. Keep the medium moist during blackout, misting if it looks dry, and lift the cover briefly each day to check moisture and let fresh air in.
Step Five: Uncover and Bring to Light
After 2 to 3 days the shoots will be 1 to 2 inches tall and pale yellow from growing in the dark, which is completely normal. Remove the cover and move the tray to a bright window or under a grow light. Within a day or two the pale stems and leaves green up dramatically as chlorophyll develops, and the tray transforms into the lush green carpet you are after. From here on, light is what drives sturdy, flavorful growth.
Light, Temperature, and Daily Care
Pea shoots are not demanding about light. Bright indirect light from a window is enough, and a basic LED grow light running 12 to 16 hours a day produces fast, even, deep-green trays regardless of the weather. Aim for ordinary room temperatures, roughly 65 to 75 degrees Fahrenheit. Cooler is fine but slower; much warmer increases the risk of mold.
Daily care is mostly about water and air. Keep the medium evenly moist but never soggy, because standing water invites rot and damping off. The best method is to water from the bottom: pour a little water into the solid catch tray and let the medium wick it up through the drainage holes for ten or fifteen minutes, then pour off any excess. Bottom-watering keeps the foliage dry, which is the single most effective defense against mold. Good airflow matters too, so do not crowd the tray into a stuffy corner; a gently circulating fan or simply an open, airy spot keeps the canopy dry between waterings.
Timeline From Seed to Harvest
The whole crop moves quickly, which is a big part of the appeal. Soaked peas germinate in 2 to 3 days during blackout, greening up within a day of seeing light. From sowing, you are typically harvesting in about 10 to 14 days, once the shoots reach 3 to 5 inches with the first sets of true leaves and tendrils unfurling. Warm rooms and strong light push toward the early end of that range; cooler conditions stretch it out. If you let them grow much past 5 or 6 inches the lower stems start to toughen, so harvest while they are tender.
How to Harvest and Regrow
Harvest with clean, sharp scissors. For a single big cut, gather a handful of shoots and snip just above the soil line. If you want a second flush, this is the key move: cut above the lowest node, leaving one or two sets of small leaves on the stem. Those remaining leaves drive regrowth, and within about a week the tray pushes out a second, somewhat smaller harvest. Peas usually give one or two useful cuts this way; after that the energy in the seed is spent, growth becomes thin and tough, and it is time to compost the whole root mat and start fresh.
Harvest just before you want to use the shoots, because they are at their sweetest and crispest within minutes of cutting. If you must store them, refrigerate in a container with a slightly damp paper towel and use within a few days. For continuous shoots in your kitchen, look into a broader indoor urban gardening routine that runs several fast crops at once.
Eating and Using Pea Shoots
Pea shoots are wonderfully versatile in the kitchen. Raw, they add a sweet crunch to salads and sandwiches and make a beautiful, fresh garnish. They are equally at home cooked: tossed into a hot stir-fry for the last thirty seconds, folded into fried rice or noodles, stirred through scrambled eggs, or wilted briefly with garlic as a quick side. Because the flavor is delicate, they shine with minimal handling, so add them late and let their fresh-pea sweetness come through. If you enjoy combining homegrown greens with other countertop crops, an automated unit like the systems covered in our guide to using an AeroGarden pairs nicely with tray-grown shoots.
Succession Sowing for a Constant Supply
Because a tray is finished in under two weeks and gives at most a couple of cuts, the way to keep pea shoots on hand year round is succession sowing. Start a fresh tray every 1 to 2 weeks so that as one tray winds down, the next is coming into harvest. Many growers keep two or three trays in rotation on a windowsill or shelf, staggered by a week each. It costs almost nothing in seed and turns pea shoots from an occasional treat into a steady kitchen staple.
Troubleshooting Common Problems
The most common worry for new growers is mold, and the good news is that what looks alarming is usually harmless. Healthy pea roots produce fine white root hairs, a fuzzy halo clinging tightly around each seed and along the roots. The telltale sign that they are root hairs and not mold is that they vanish when you mist them, reappearing as they dry. Actual mold is different: it is cobwebby and gray or grayish, it spreads across the surface rather than hugging the seeds, and it often carries a sour, musty smell. Mold is driven by too much moisture, stagnant air, and warmth, so the fixes are bottom-watering, better airflow, and slightly cooler temperatures.
Damping off, where seedlings collapse at the base and rot, comes from the same soggy, airless conditions; keep the medium moist rather than wet and let the surface breathe. Leggy, pale shoots that flop over mean too little light, so move the tray closer to a window or lower your grow light. Uneven germination usually traces back to old seed or too short a soak, so soak the full 12 hours and use fresher peas next time. If many peas float during soaking and never root, they may be too old or have been damaged; skim off persistent floaters before sowing.
Beyond Indoor Trays: Pea Shoots Outdoors
While dense indoor trays are the fastest route to shoots, you are by no means limited to them. You can sow peas more thinly in an outdoor bed or container and grow them on a little longer for repeated tip harvests. In fact, if you already grow regular garden peas for pods, you can simply pinch off the top few inches of tender growth and tendrils as the plants climb; this acts as a light pruning and gives you a handful of shoots as a bonus crop. The same sweet, fresh flavor applies whether the peas are destined for shoots or pods. For more ideas on what thrives on a balcony or windowsill, browse our plants and flowers growing guides.
Frequently Asked Questions
Can I use dried peas from the grocery store to grow pea shoots?
Yes. Whole dried peas sold for cooking, such as green, yellow, or marrowfat peas, germinate well and grow into excellent shoots. The only requirement is that they are untreated and not chemically coated, so avoid dyed garden seed.
How long do pea shoots take to grow indoors?
They germinate in 2 to 3 days and are usually ready to harvest in about 10 to 14 days from sowing, once they reach 3 to 5 inches tall with their first true leaves and tendrils.
Do pea shoots regrow after cutting?
Often, yes. If you cut above the lowest node and leave a set of small leaves on the stem, the tray will usually push out a second, smaller harvest within a week. After one or two cuts, compost the spent mat.
Is the white fuzz around my pea seeds mold?
Usually not. Fine white fuzz clinging to the seeds and roots is normal root hairs, and it disappears when misted with water. Mold is cobwebby, gray, spreads across the surface, and smells musty.
Why are my pea shoots pale and leggy?
Pale, floppy shoots mean too little light after the blackout period. Move the tray to a brighter window or lower your grow light closer, and run lights 12 to 16 hours a day for sturdy green growth.