

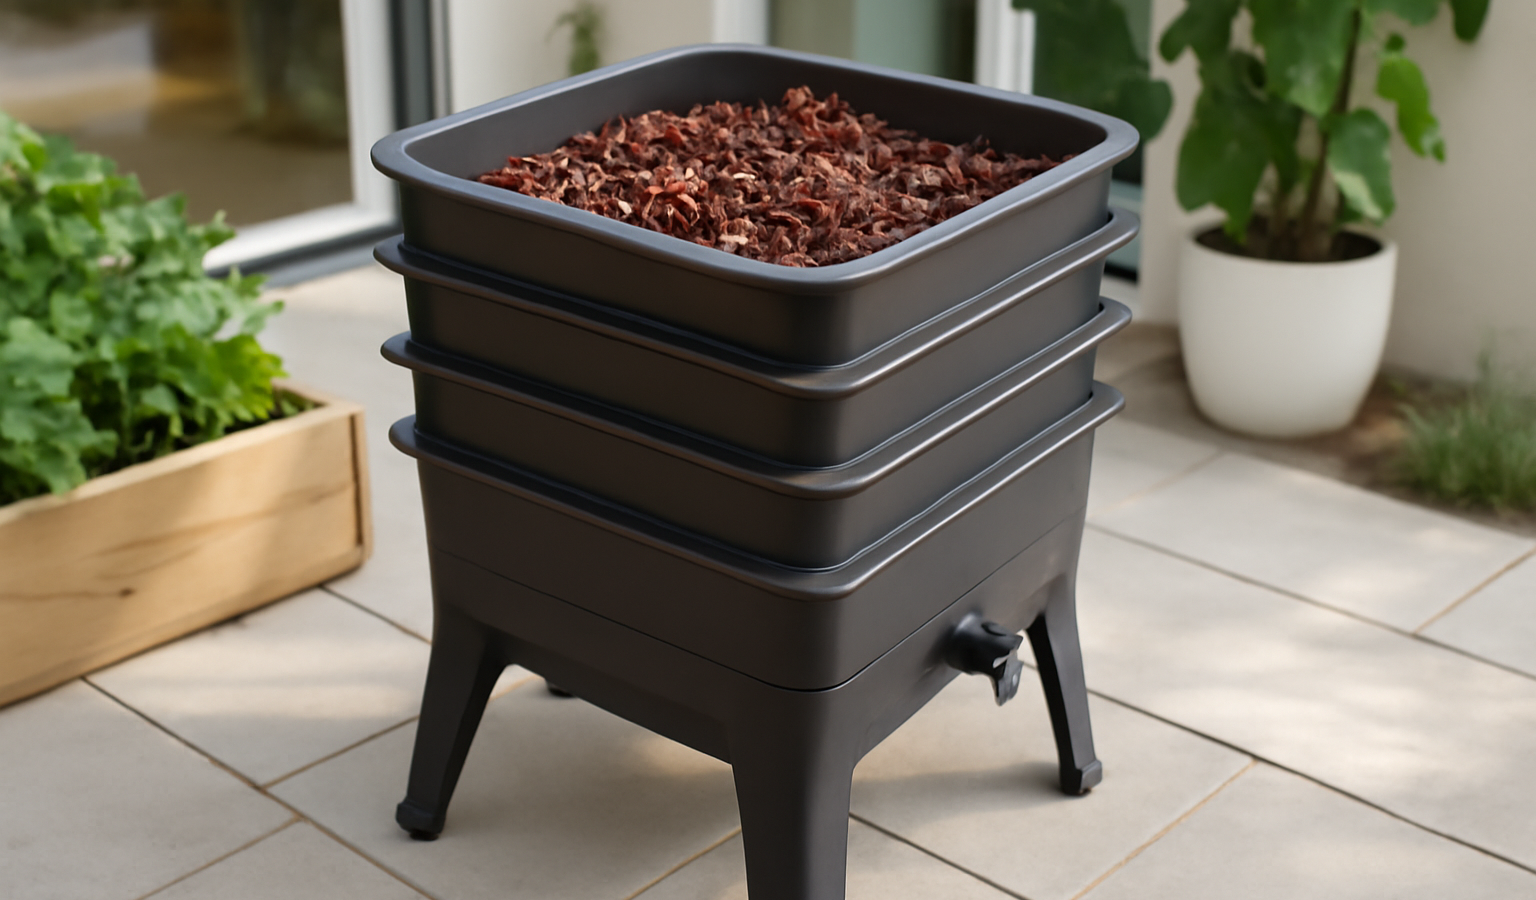
Worm composting (vermicomposting) turns your kitchen scraps into some of the richest, most plant-friendly fertilizer you can make at home, and the right bin makes the difference between a thriving worm herd and a smelly chore. We compared the most popular vermicomposting systems sold in the US for 2026, from classic stacking trays to continuous-flow bags and in-ground pods. Below are our seven favorite worm composters for apartments, backyards, and everything in between.
As an Amazon Associate we earn from qualifying purchases.
Our top picks
- Best overall (tray system): Worm Factory 360
- Best continuous-flow: Urban Worm Bag Version 2
- Best for indoors & apartments: VermiHut Plus 5-Tray
- Best DIY-style tote: DIY Two-Tote Worm Bin
- Best large/outdoor: Hungry Bin Flow-Through
- Best stackable purpose-built: Maze Worm Farm
- Best budget: FCMP Outdoor Essential Living Composter
| Bin | Type | Capacity | Best for |
|---|---|---|---|
| Worm Factory 360 | Stacking trays | 4 trays (expandable to 6-7), ~3 cu ft | Best overall |
| Urban Worm Bag V2 | Continuous-flow bag | ~30 gal / 4 sq ft surface | Continuous flow |
| VermiHut Plus 5-Tray | Stacking trays | 5 trays, ~5 lbs scraps/day | Indoors & apartments |
| DIY Two-Tote Bin | Homemade tote | ~10-15 gal | DIY tinkerers |
| Hungry Bin | Continuous-flow wedge | ~13 cu ft, up to 4 lbs/day | Large/outdoor |
| Maze Worm Farm | Stacking trays | 2-3 working trays | Compact stackable |
| FCMP Essential Living | Stacking trays | 2 or 4 trays, ~6 gal | Budget |
The 7 best worm composters of 2026
Worm Factory 360 — best overall
The Worm Factory 360 is the bin most experienced vermicomposters recommend to newcomers, and for good reason. It is a vertical stacking-tray system: worms eat their way up through stacked trays, leaving finished castings behind in the lower trays so you can harvest from the bottom without sifting through a wriggling mass. The standard kit ships with four trays and expands to six or seven, giving you roughly 3 cubic feet of composting space in a footprint just 16 inches square. That vertical design is what makes it so apartment-friendly while still handling a serious volume of scraps.
Made in the USA from recycled plastic and backed by a 5-year warranty, it assembles in about five minutes and asks for less than 15 minutes of attention per week. Each full tray weighs around 12.5 pounds, so rotating them is genuinely easy. Expect your first tray to take roughly three months to finish; after that, subsequent trays can complete in as little as a month. The built-in spigot drains off leachate (“worm tea”) into the base reservoir. It is the safest all-around pick if you want a proven, low-fuss system.
Pros
- Proven, beginner-friendly stacking design
- Compact 16″ square footprint, expandable to 6-7 trays
- USA-made with a 5-year warranty
- Harvest from the bottom without disturbing worms
Cons
- Trays can dry at the edges if you neglect moisture
- Plastic finish is more functional than attractive
Urban Worm Bag Version 2 — best continuous-flow
The Urban Worm Bag takes the continuous-flow concept used by the world’s largest commercial worm operations and shrinks it into a breathable fabric cube that sits on a steel frame. You feed from the top; worms migrate upward toward fresh food, and finished castings settle to the bottom where a zipper-free removable panel lets you harvest a few inches at a time. There are no trays to lift and no compaction problems, which is a big reason it keeps surprising reviewers who expected to pay far more for that kind of performance.
Capacity is generous: roughly 30 gallons of volume with about 4 square feet of working surface, enough to hold up to 8 pounds of worms processing 3 to 4 pounds of waste per day. The breathable fabric promotes airflow and helps regulate moisture, and a detachable cover lets you open or close the top to dial in humidity. It is one of the few systems that combines apartment-friendly size with true flow-through harvesting, and it often costs less than a multi-tray plastic tower.
Pros
- True continuous-flow harvesting, no tray lifting
- Breathable fabric improves airflow and moisture control
- Large ~30-gallon capacity in a compact footprint
- Often cheaper than plastic tray towers
Cons
- Fabric can drip if overwatered, so use a tray underneath
- Requires assembling the steel frame
- No spigot; leachate management is more manual
VermiHut Plus 5-Tray — best for indoors and apartments
The VermiHut Plus is the most feature-packed stacking system on our list, and its odor-control extras make it the one we’d trust inside a small apartment. It ships with five stackable trays built from durable HDPE plastic. A five-tray setup can house up to about 10 pounds of worms and process roughly 5 pounds of food scraps per day, which is a lot of capacity for something that takes up barely more floor space than the Worm Factory.
Where it stands out is the engineering aimed at airflow and smell. A “worm-saving tray” (M-Board) boosts ventilation and stops worms and bedding from dropping into the liquid reservoir, while a “V-Board” plus a coconut-fiber mat in the air-vented lid keep moisture balanced and knock down the already minimal odor. It even bundles useful accessories: a scraper, a claw, a coconut coir brick, a liquid-collection cup, and a worm-food magnet. If you’re nervous about composting near your kitchen, this is the system that gives you the most peace of mind.
Pros
- Five trays plus high capacity in a small footprint
- Strong odor and moisture control for indoor use
- Useful accessories included out of the box
- Worm-saving tray keeps worms out of the leachate
Cons
- More parts to learn than a basic bin
- Stacked five-high tower is tall on a counter
DIY Two-Tote Worm Bin — best DIY-style tote
If you’d rather spend your money on worms than on a fancy housing, the classic two-tote bin is the cheapest legitimate way to start vermicomposting. You take two opaque plastic storage totes (8 to 10 gallons each, dark colored so light stays out), drill ventilation holes in the lid and upper sides, drill drainage holes in the bottom of one tote, and nest it inside the second to catch leachate. The whole project costs under $20 and takes about 15 minutes with a drill. For an apartment, a 10- to 15-gallon bin size is the sweet spot.
The trade-off is that you do more of the work yourself: harvesting usually means dumping the bin and migrating worms by hand or with the light-and-wait method rather than letting a tray system separate them for you. But a tote bin is endlessly customizable, easy to replace if something goes wrong, and a great way to learn the fundamentals before committing to a pricier system. Many lifelong vermicomposters never graduate past it. Pair it with a good drill and a few hand tools from our essential garden tools guide and you’re set.
Pros
- Cheapest path into worm composting, under $20
- Fully customizable size and ventilation
- Easy and cheap to replace or expand
- Great learning project for beginners
Cons
- Manual, messier harvesting
- Requires a drill and a little DIY effort
- No built-in spigot or polished look
Hungry Bin Flow-Through — best large/outdoor
When you have a lot of food waste and outdoor space to put it, the Hungry Bin is the heavy hitter. It’s a tapered, wedge-shaped continuous-flow-through bin made from strong, UV-stabilized, food-grade plastic built to survive years outdoors. With roughly 13 cubic feet of capacity it can support a population of around 12,000 worms and process up to 4 pounds of waste per day. In recent testing, its worm population reached capacity about three weeks faster than competing bins.
The tapered shape is the secret: as castings build up, the narrowing base gently compresses them so finished compost drops out the bottom while worms stay in the active upper zone. Reviewers found it required the least maintenance of any bin they tested, rarely suffering the compaction or anaerobic pockets that plague stacking trays. It rolls on wheels for easy positioning and includes a tray for collecting liquid. It’s overkill for an apartment, but for a household producing serious volumes of scraps, nothing on this list is easier to run. If you also want a traditional bin for yard waste, see our best compost bins roundup.
Pros
- Huge ~13 cu ft capacity, up to 4 lbs of waste daily
- Lowest-maintenance bin in head-to-head testing
- Tapered flow-through design avoids compaction
- Tough UV-stabilized plastic, on wheels
Cons
- Large and best suited to outdoor use
- One of the most expensive options
- Too big for small apartments
Maze Worm Farm — best compact stackable
The Maze Worm Farm is the friendliest-looking bin here and the best purpose-built choice for a small patio, balcony, or household with kids. Designed and made in Australia from mostly recycled materials, it uses a rotating working-tray system: you can run two or three working trays, swapping them to maximize compost volume and keep airflow high. Each working tray measures about 14 inches deep by 14 inches wide and 4.5 inches tall, so the whole unit stays compact and lightweight enough to move around easily.
Thoughtful touches include an easy sliding worm-saver tray that keeps worms out of the liquid, a 2-liter flat tray underneath to catch worm tea as it drains, and a lid you can lift and hang while you work. Reviewers rate it as an excellent beginner bin and a strong pick for small homes, with robust construction and good pest resistance. Indoor-only users can find slightly better value elsewhere, but for an approachable outdoor stackable, the Maze is hard to beat. For the worm care basics, our worm composting guide walks through bedding, feeding, and moisture.
Pros
- Compact, lightweight, and easy to move
- Rotating 2-3 tray system with good airflow
- Made from mostly recycled materials
- Approachable design, good for families and beginners
Cons
- Smaller capacity than full-size towers
- Better value outdoors than strictly indoors
FCMP Outdoor Essential Living Composter — best budget
FCMP Outdoor’s Essential Living Composter is the third generation of the company’s worm bins, built to deliver the core features of pricier stacking towers at a budget-friendly price. It comes in 2-tray and 4-tray configurations (roughly 6 gallons), with a modern, low-profile look that won’t feel out of place indoors. Worms migrate upward through 52 angled tunnels in the base of each tray, so you get the same harvest-from-the-bottom workflow as more expensive systems for noticeably less money.
Smart details help it punch above its price: a moisture-control channel runs around the outside of each tray to keep bedding from drying out at the edges, and an integrated base reservoir collects worm tea you can dilute 1:1 with water for a free liquid fertilizer. Capacity is modest compared with a five-tray VermiHut or a Hungry Bin, so it suits a single person or a couple rather than a big household. But if you want a tidy, ready-made tray system without spending a lot, it’s the best value on this list.
Pros
- Lowest price among ready-made tray systems
- Clean, modern design suited to indoor use
- Moisture-control channels and a leachate reservoir
- Available in 2- or 4-tray sizes
Cons
- Smaller capacity, best for 1-2 people
- Fewer odor-control extras than premium bins
How to choose a worm composter
Worm bins fall into three broad designs, and the right one depends mostly on where you’ll keep it and how much waste you produce.
Tray/tiered vs continuous-flow vs bag
Stacking tray systems (Worm Factory 360, VermiHut Plus, Maze, FCMP) let worms migrate upward into fresh food, so finished castings collect in the bottom tray for easy harvesting. They’re compact, expandable, and great for beginners. Continuous-flow-through bins (Hungry Bin) feed from the top and let finished compost fall out the bottom continuously, which means the least maintenance and no tray lifting, but they’re larger. Breathable bags (Urban Worm Bag) combine flow-through harvesting with a soft, airflow-friendly fabric body, hitting a sweet spot between size and convenience. DIY totes are the cheapest and most flexible but require the most hands-on effort.
Indoor vs outdoor
For apartments and indoor use, prioritize odor control, a small footprint, and a sealed leachate reservoir: the VermiHut Plus, Worm Factory 360, FCMP, and Urban Worm Bag all qualify. Worms are happiest between roughly 55-77°F, so a temperature-stable spot indoors keeps them productive year-round. For outdoor setups, look for UV-stabilized, weather-resistant plastic and a bin big enough to justify the space: the Hungry Bin and Maze are built for that. If you garden, an in-ground system like the Subpod that feeds your soil directly is worth considering too.
Capacity
Match the bin to your output. A single person or couple is well served by a 2-4 tray system or a small bag; a family of four or more, or anyone composting yard and kitchen waste together, will want a five-tray bin, a large Urban Worm Bag, or a Hungry Bin. Remember that worm populations grow to fill their space, so a bin that feels oversized at first usually fills out within a few months.
Harvesting ease and drainage
Tray and flow-through systems separate worms from finished castings automatically, so harvesting is mostly lifting a tray or scraping the bottom panel. DIY totes require manual separation. Drainage matters just as much: most worm bins produce leachate, the liquid that drains through the bedding. A built-in spigot or collection tray (found on the Worm Factory, VermiHut, Maze, and FCMP) makes capturing that liquid tidy. Note that leachate is not the same as brewed worm-casting tea and should be diluted and used with care, ideally on non-edible plants until you’re confident the bin is well aerated.
Frequently asked questions
What worms do I need for a worm composter?
Use composting worms, not garden earthworms. Red wigglers (Eisenia fetida) are the standard choice because they thrive in shallow, scrap-rich bedding and reproduce quickly. European nightcrawlers are a good secondary option. A typical starter quantity is about one pound of worms per square foot of surface area, and the population will grow to match how much you feed them.
Will a worm bin smell or attract pests indoors?
A properly run bin smells earthy, not foul. Odor and fruit flies almost always mean overfeeding, too much moisture, or too little airflow. Bury food scraps under bedding, avoid meat, dairy, and oily foods, and don’t add more than the worms can eat in a few days. Bins with strong ventilation and moisture control, like the VermiHut Plus and Urban Worm Bag, make this easier to manage indoors.
How long until I can harvest worm castings?
The first batch usually takes around two to three months as the worm population establishes itself. After that, tray systems can finish a tray in as little as a month, and continuous-flow bins let you harvest small amounts steadily once they’re mature. Castings are ready when the material is dark, crumbly, and uniform with no recognizable scraps left.
What can I feed worms, and what should I avoid?
Feed fruit and vegetable scraps, coffee grounds, tea, crushed eggshells, and small amounts of grains or bread. Avoid meat, fish, dairy, oily or salty foods, and large amounts of citrus or onion, which can make the bin acidic and smelly. Chop scraps small to speed things up, and balance wet food scraps with dry bedding like shredded cardboard or coconut coir.
Is a tray system or a continuous-flow bin better?
Tray systems are compact, affordable, and beginner-friendly, making them the best all-around choice for most homes. Continuous-flow bins and bags require less ongoing maintenance and never need tray lifting, which is ideal if you produce a lot of waste or want the simplest routine. If space and budget allow, a continuous-flow design like the Urban Worm Bag or Hungry Bin is the lowest-effort option long term.